Post-Renovation Garage Door Safety Check: The Remodel Inspection Guide
Published: Nov 2, 2026
The Hidden Dangers of Post-Renovation Garage Door Operation
Completing a home renovation or drywall repair is a major achievement, but returning your garage door to service without a dedicated safety check introduces severe risks. Heavy framing, structural hammering, and airborne drywall dust systematically disrupt delicate mechanical and optical systems. According to the Consumer Product Safety Commission (CPSC), garage doors cause over 20,000 emergency room visits every year, with compromised auto-reverse mechanisms being a primary driver of impact injuries. Performing a systematic garage door safety inspection ensures your system operates safely before returning your garage to everyday use.
Still stuck? Get it fixed today.
24/7 emergency service from licensed local technicians.
Pre-Inspection Environmental Decommissioning
Before inspecting mechanical parts, disengage the opener power source or pull the manual emergency disconnect cord. Never use compressed air to blast drywall dust out of tracks or motor assemblies. High-pressure air drives fine particles past optical seals directly into motor logic boards and sealed bearings, causing permanent internal damage. Instead, clean the surrounding frame and floor using a HEPA-filtered shop vacuum to clear lingering dust.
The Optical Safety System Check: Photo-Eye Diagnostics
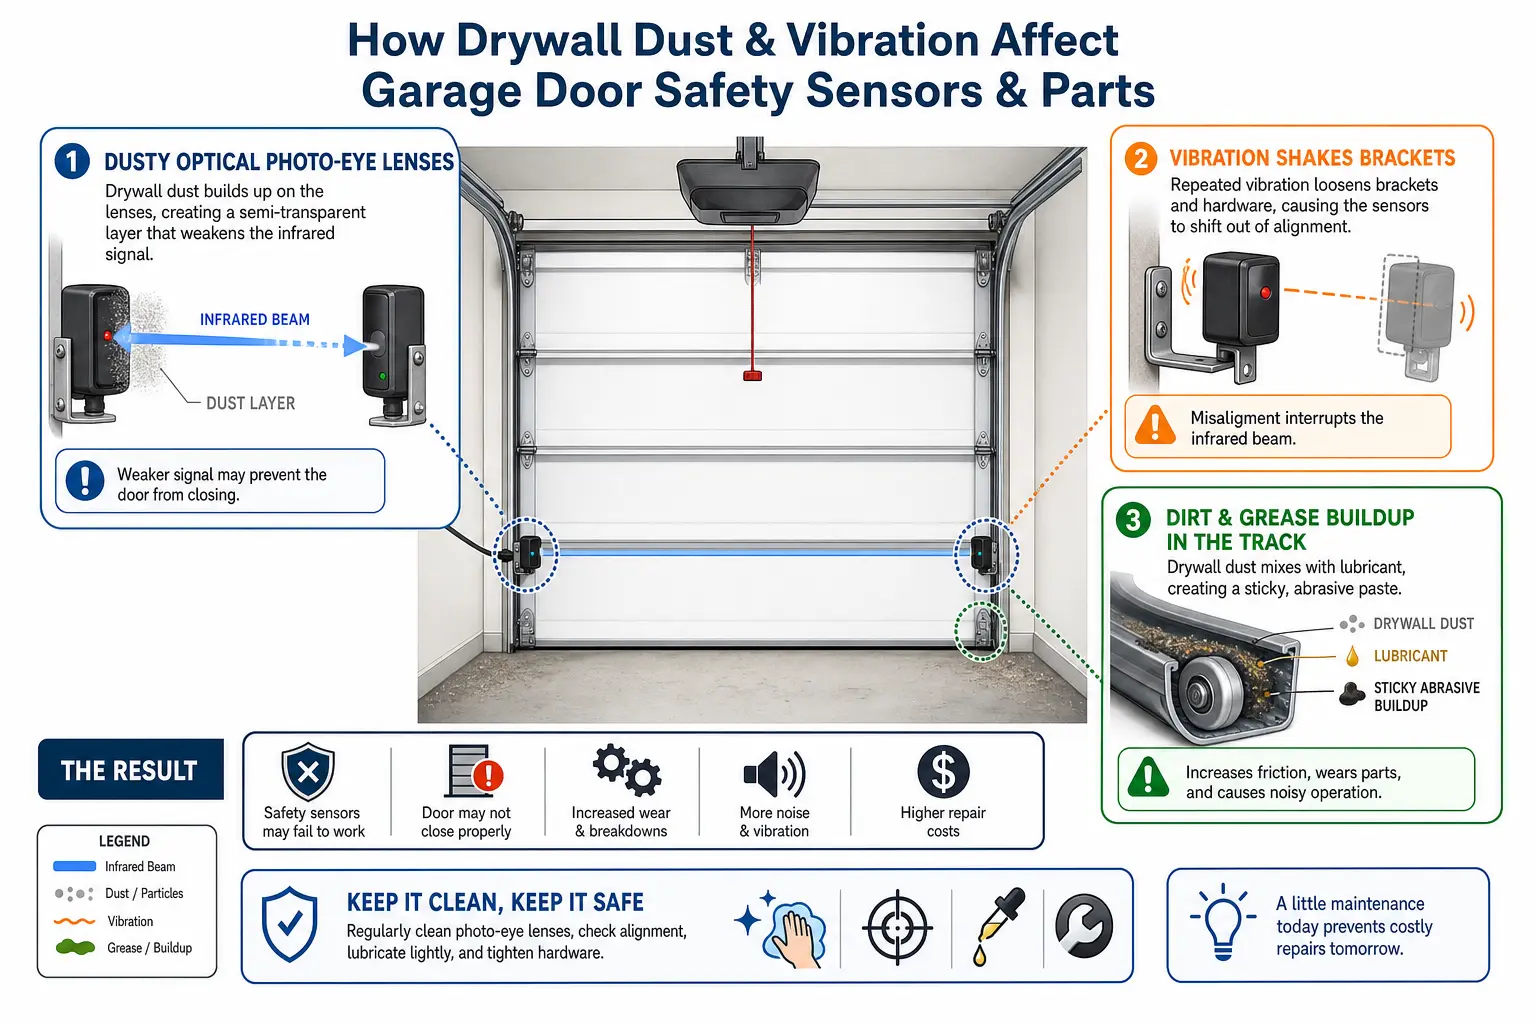
Fine drywall sanding dust consists of micro-particulates ranging from PM2.5 to PM10 (calcium sulfate dihydrate). When deposited onto optical lenses, a layer as thin as 0.05 mm can reduce infrared (IR) beam transmission by more than 60%, resulting in random door reversals or total opener lockout. Additionally, construction vibrations frequently cause mounting brackets to deflect by 3 to 5 degrees, breaking optical alignment across a 16-foot opening.
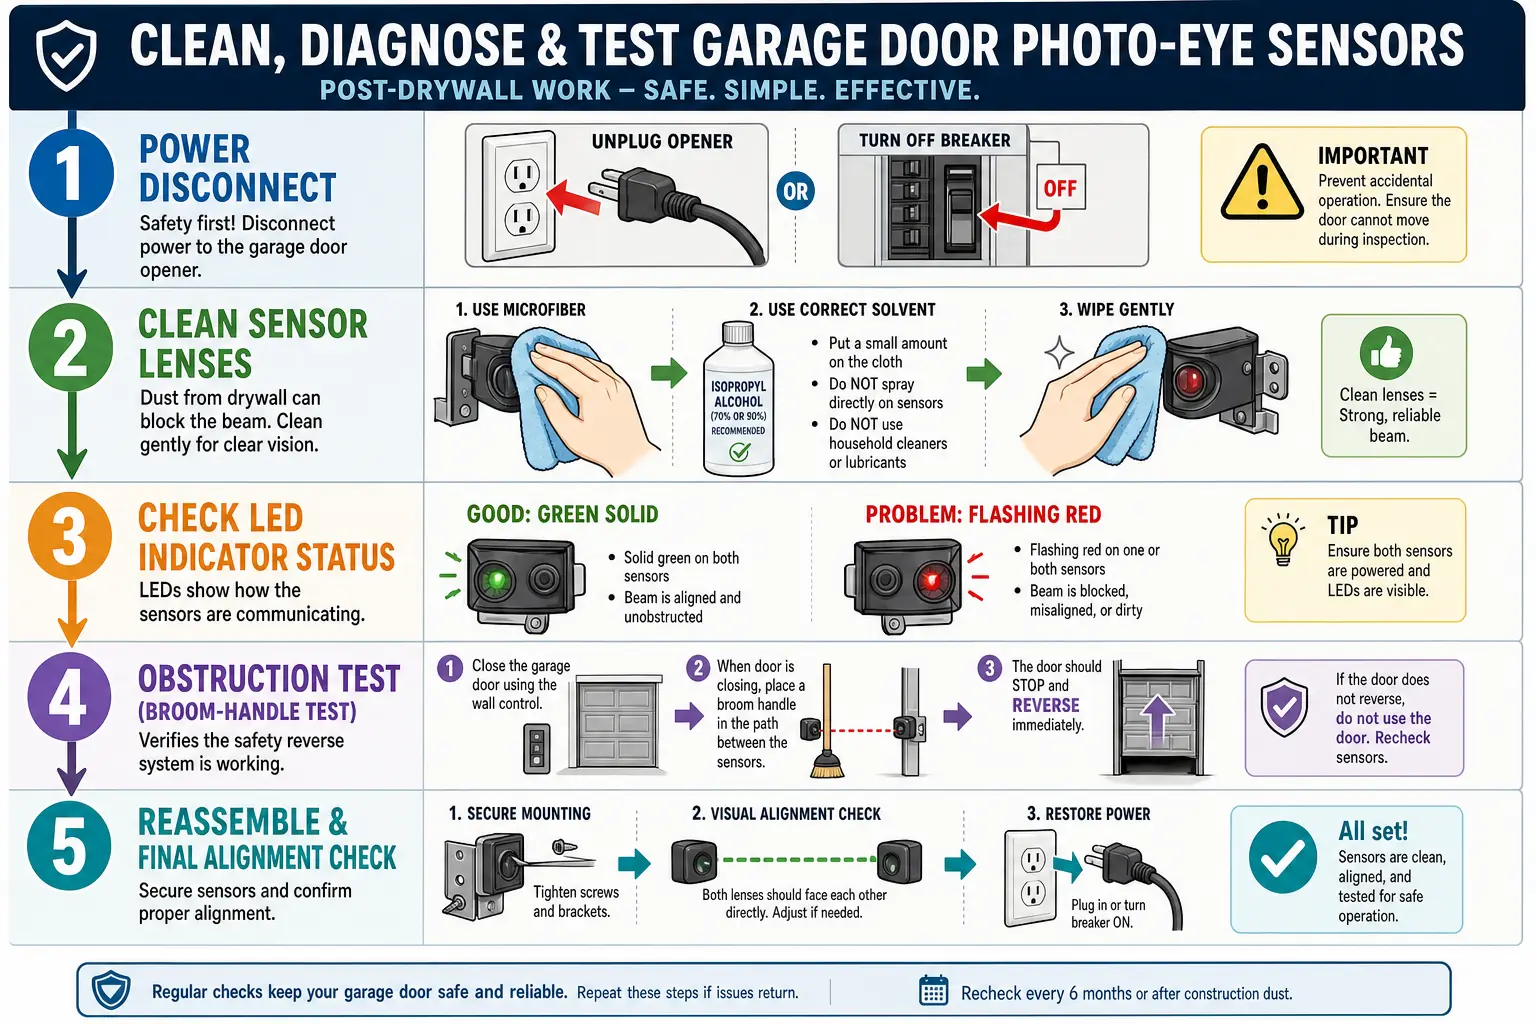
Gently wipe acrylic sensor lenses with a dry, clean microfiber cloth. Never use harsh solvent cleaners or paper towels that can scratch the delicate plastic lens. If indicator lights flash after wiping, gently re-align the sensor brackets until a solid LED light is restored. If the issue persists, diagnose whether your garage door safety sensor not working requires professional optical calibration.
Track and Mechanical System Decontamination
Applying standard wet lubricant over tracks coated with gypsum dust creates an abrasive grinding paste. This compound rapidly degrades roller bearings, scoring tracks, and placing severe strain on the opener motor. Clean metal tracks thoroughly with a solvent degreaser before applying a dry silicone lubricant. Inspect all wall and ceiling track brackets for loose bolts caused by remodeling vibrations. If physical impacts bent track sections out of alignment, professional garage door track repair is required to restore smooth operation.
System Balance and Torsion Spring Health Audit
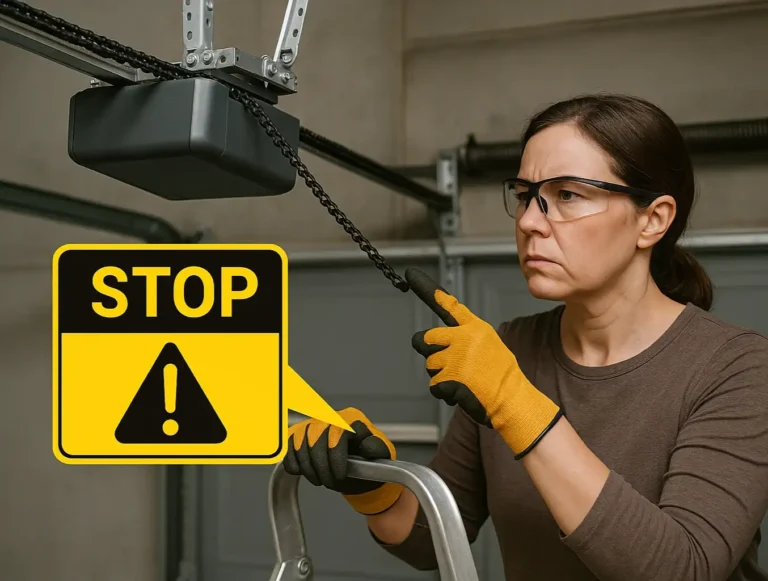
Renovations often alter door weight through added paint layers, insulation panels, or decorative overlay trims. With the door closed, pull the emergency disconnect cord and manually lift the door to waist level (roughly 3 feet high). A correctly balanced door should rest motionless in this position. If the door drifts downward or shoots upward rapidly, the counterweight system is unbalanced. While knowing how to balance a garage door is essential for diagnosing issues, severe garage door spring danger requires that high-tension adjustments always be performed by a qualified technician.
Mechanical Auto-Reverse Calibration: The 2x4 Board Test
CPSC federal safety guidelines mandate that automatic openers reverse within two seconds of contacting a 1.5-inch barrier. Lay a flat 2×4 wood block on the floor beneath the door’s center path and trigger the opener. Upon touching the block, the door must instantly reverse direction.
When drywall dust creates track drag, homeowners often attempt a quick fix by increasing the opener’s downward force setting. Raising this dial beyond factory specifications raises the auto-reverse threshold from a safe 15–20 lbs to over 50 lbs of crushing force, creating a major safety hazard. If force adjustments fail during testing, contact a certified technician for garage door opener repair or learn how experts properly adjust garage door pressure sensor levels.
Decision Framework: DIY Resolution vs. Certified Professional Intervention
Determining whether post-renovation maintenance can be handled safely at home depends on component tension and risk level.
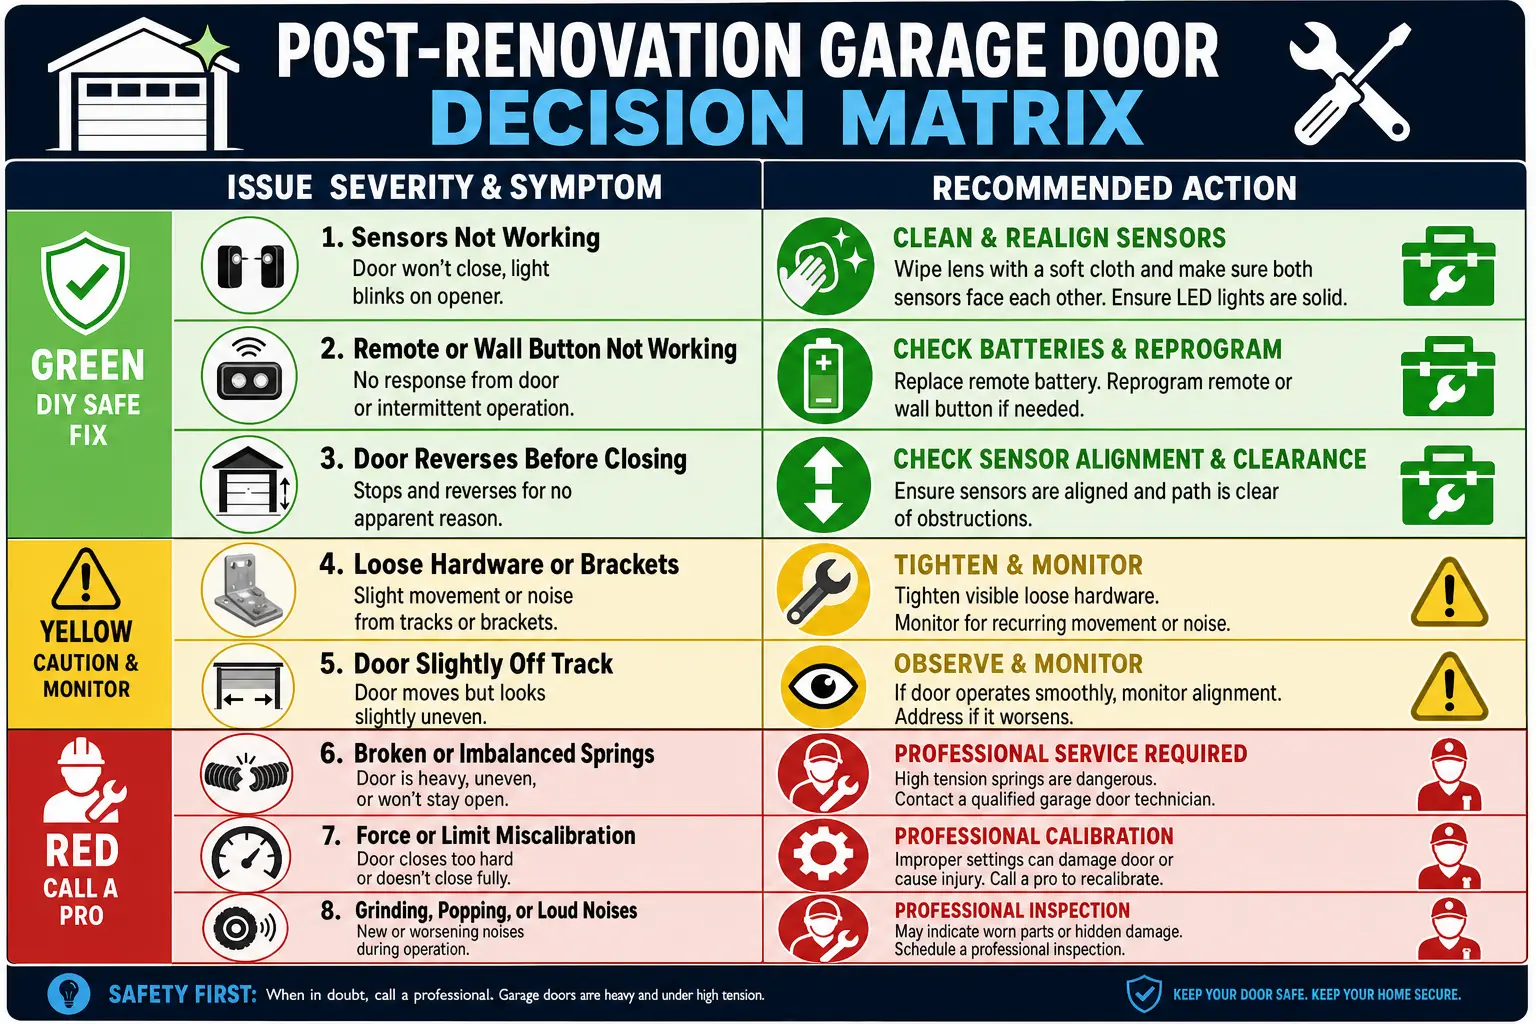
| Condition / Symptom | Hazard Level | Recommended Action |
|---|---|---|
| Gypsum dust film on optical lenses | Low | DIY Microfiber Lens Wipe |
| Misaligned sensor bracket | Low | DIY Manual Bracket Alignment |
| Dusty track residue buildup | Medium | Solvent Clean & Dry Silicone Lubricant |
| Failed 2×4 mechanical auto-reverse test | High | Professional Force Calibration |
| Unbalanced door / spring fatigue | Critical | Professional Tension Adjustment |
Reviewing diy vs professional garage door repair: which is better helps clarify these safety limits. Scheduling a professional post-remodel garage door tune up guarantees long-term performance and complete operational safety.
Frequently Asked Questions
Why does my garage door keep reversing after drywall sanding?
Fine gypsum sanding dust coats the acrylic infrared lenses, scattering the light beam and signaling a false obstruction to the opener unit. Wiping both sensor lenses with a dry microfiber cloth usually resolves this issue.
Can I use compressed air to clear drywall dust off garage door components?
No. High-pressure air forces micro-particulates past optical seals and directly into motor housing logic boards and bearing assemblies, leading to premature electrical failures and rapid internal wear.
What should I do if my garage door fails the 2x4 auto-reverse test post-renovation?
Stop using the automatic opener immediately. Do not simply increase the opener force dial, as this increases downward crushing pressure and creates a severe safety hazard. Contact a certified technician to inspect track drag and recalibrate limit settings safely.