Garage Door Closes Then Reopens: Step-by-Step DIY Triage And Brand Programming Guide


Published: Sep 8, 2026

It is a frustrating scenario: you press your remote button, the garage door travels all the way down, touches the floor, and immediately reverses back open. In an instant, your home’s security is compromised, leaving you to decide whether you can safely resolve this in a ten-minute triage window or if you need to hire an expert for a 24 hour garage door repair.

When a door behaves this way, the culprit is rarely a physical obstacle. Instead, the issue typically lies within the opener’s delicate balance of travel limits and safety force settings.

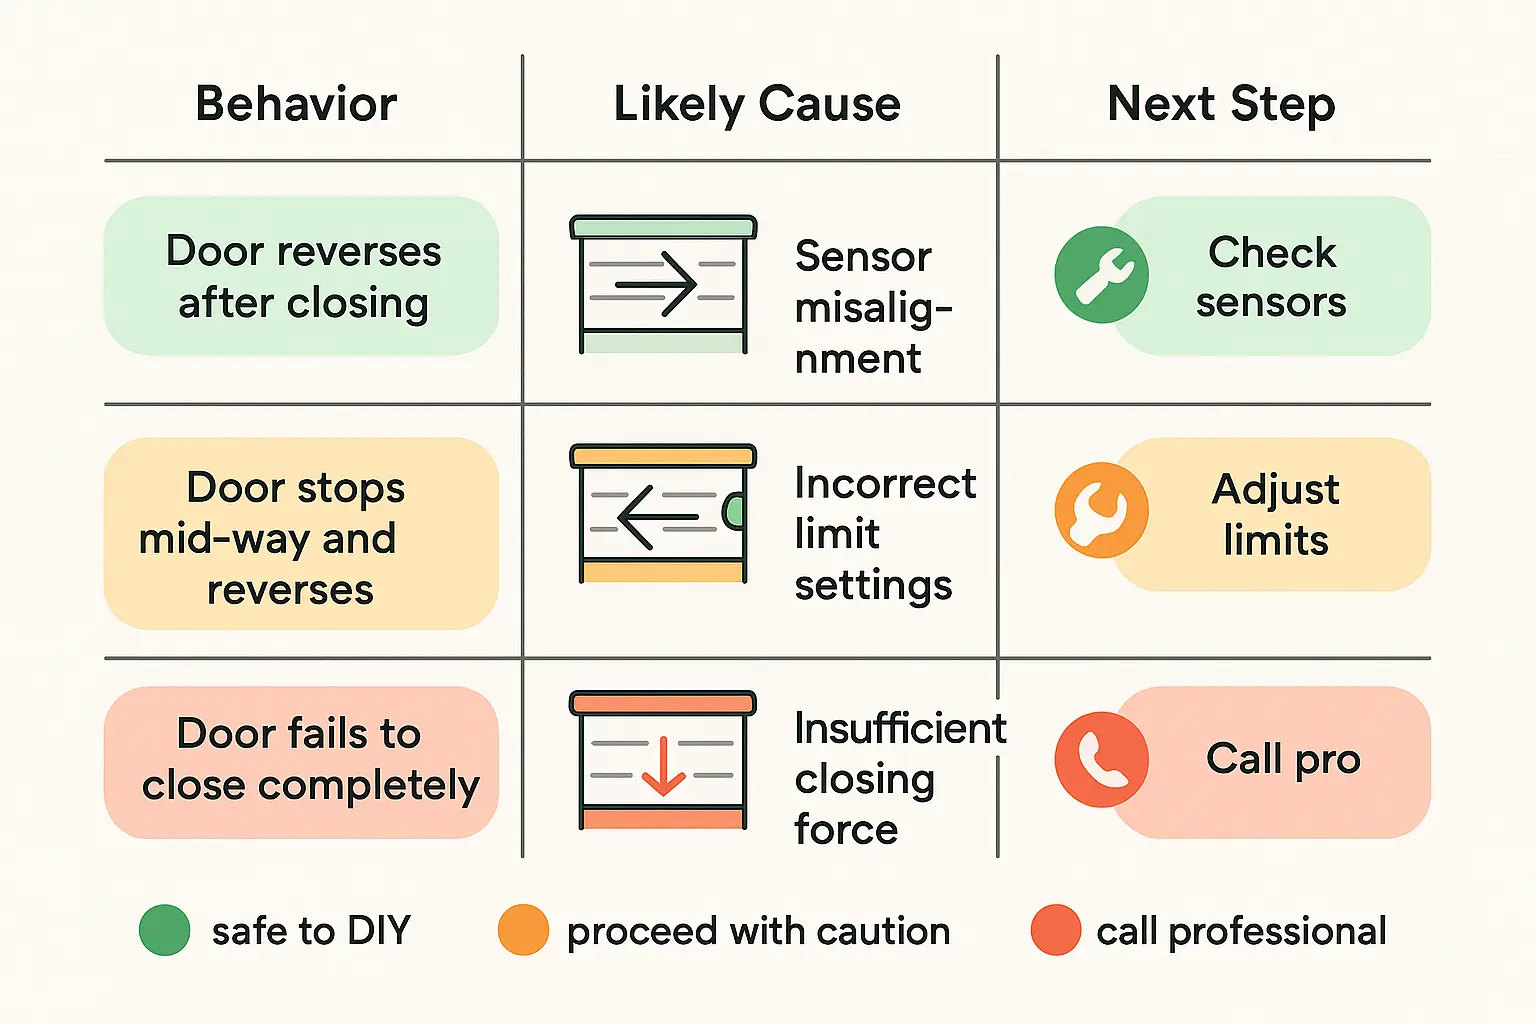
To help you diagnose the root cause immediately, use the interactive diagnostic matrix below to determine your next logical step.

Quick Triage Tool

Observed Behavior Immediate Suspect Safety Risk Corrective Action
Stops halfway down, reverses, lights flash 10 times Safety sensor misalignment Low Clean and align photo-eyes
Closes completely, hits floor, then immediately reopens Over-traveled down limit Low to Medium Reduce down travel limit setting
Stops mid-travel without flashing, heavy resistance Mechanical bind or broken spring High Perform balance test; call a pro
Reverses in cold weather but operates fine in summer Stiffened grease / low force margin Low Perform minor close force adjustment

This diagnostic matrix helps homeowners quickly identify why their garage door reverses or fails to close properly and guides them on safe initial checks or when to call a technician.


The 5-Minute DIY Safety Check


Before touching any programming buttons, check the safety sensors. Federal law (UL 325) mandates that all residential openers manufactured after 1993 feature an automatic reversing system.

First, inspect the LED indicator lights on both photo-eyes. A solid green and solid amber light indicate correct alignment. If either light is blinking or dark, wipe the lenses clean of dust, check for sunlight glare, and tighten the bracket screws to bring them back into a straight line.

The “Wall Button Bypass” Test

To isolate whether your issue is a safety sensor glitch or an internal limit/force setting problem, try the manual bypass test. Walk to your wall-mounted control panel and press and continuously hold the close button. If the door closes fully and stays closed only while you hold the button down, your safety sensors are either blocked, misaligned, or suffering from damaged wiring. If the door still reverses even with the button held down, your travel limits or close force require adjustment.


Understanding Travel Limits vs. Close Force Settings


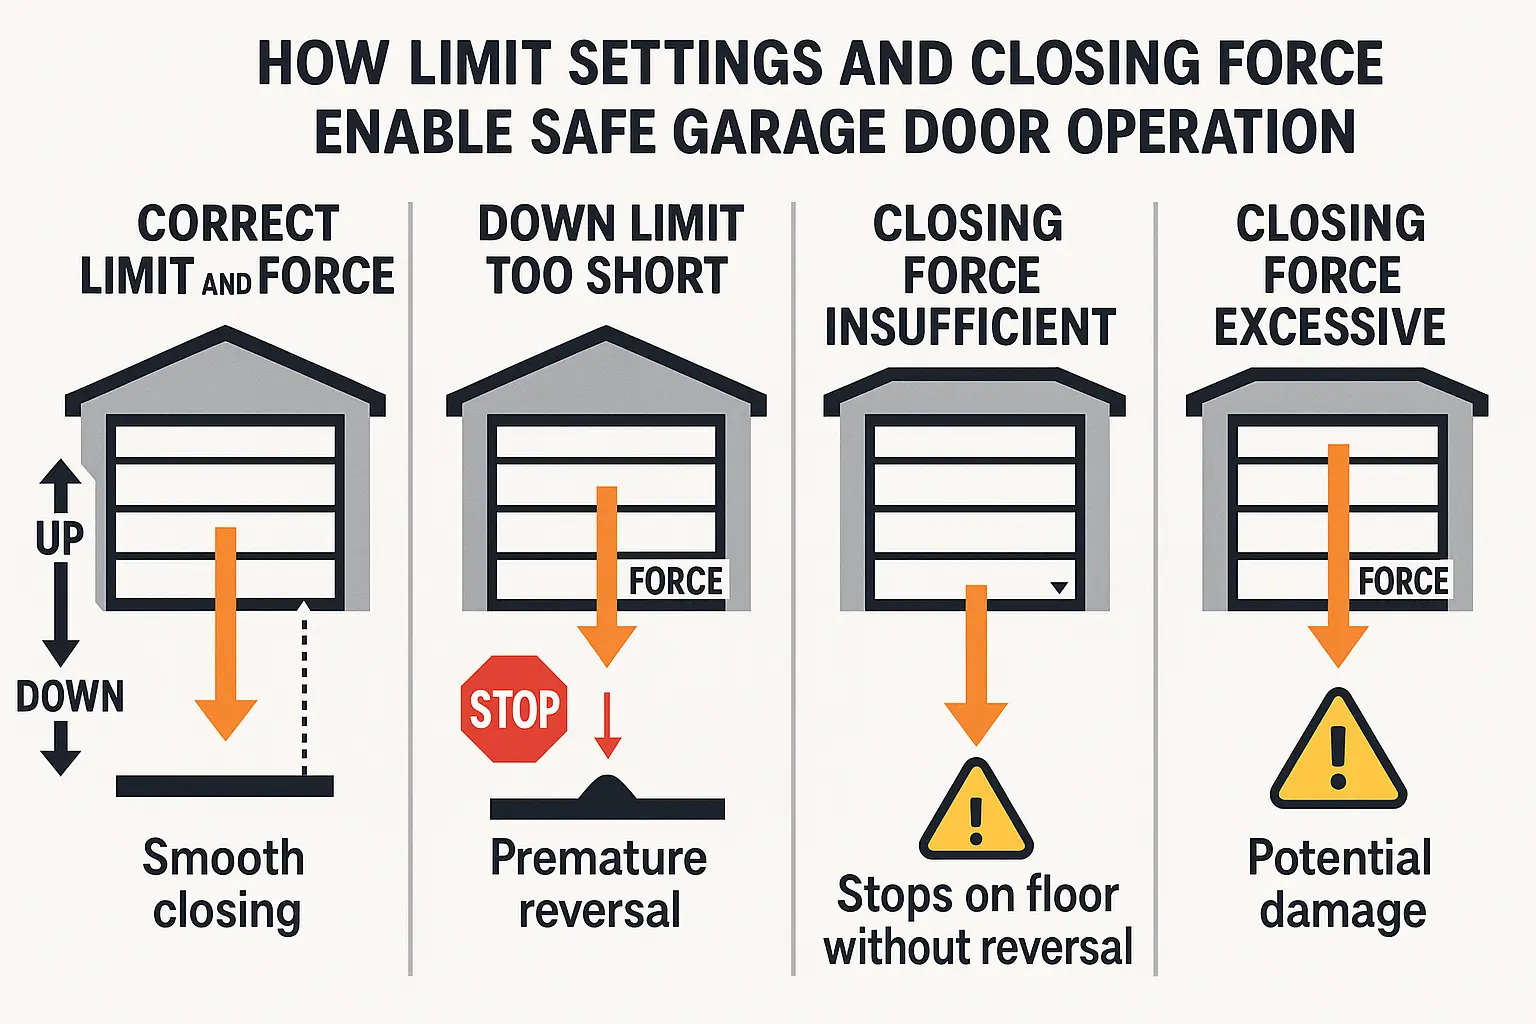
To adjust your system properly, you must understand how travel limits and close force settings interact.

  • Travel Limits: These digital or mechanical bounds tell the opener exactly where the door starts (open limit) and where it ends (close limit). If your down limit is set too far, the door strikes the ground before the opener thinks it should. The motor registers this sudden physical resistance as an obstruction and initiates a “safety bounce” to prevent crushing.
  • Force Settings: This is the amount of physical power the motor is permitted to exert to move the door. If the force margin is set too low, even minor friction from a track curve or cold weather grease will cause the motor to stop and reverse.

This flowchart educates users on how garage door travel limits and force settings interact and affect closing behavior, providing clear visuals of correct and problematic scenarios.


Brand-Specific Programming Guides


Every manufacturer uses a different interface to control travel and force. Before making adjustments, consult these quick procedures for major brands. If you are also working on your remote controls, you can reference how to program universal garage remote systems to ensure seamless operation.

LiftMaster & Chamberlain

Older models use physical plastic limit screws on the side of the chassis (turn the “Down” screw counter-clockwise to decrease downward travel).

Modern Security+ 2.0 models utilize a board with black, orange, and purple adjustment buttons:

  1. Press and hold the square adjustment button between the arrow keys until the UP arrow begins to flash.
  2. Hold the UP arrow until the door reaches your desired open height. Press the square button to lock it in.
  3. The DOWN arrow will now flash. Hold the DOWN arrow until the door reaches the floor. Press the square button again.
  4. The opener will beep and flash. Run the door through one complete cycle to let the system automatically calculate its force profile. Note that Security+ 2.0 systems alert you to force limits with a 5-beep/5-flash warning code.

Hörmann ProMatic & SupraMatic

Hörmann systems use a menu-driven interface:

  1. Access the programming menu by holding the “PRG” button until “11” appears on the LED display (Menu 11 is the learn mode).
  2. Press the UP arrow to open the door completely, then press the DOWN arrow to close it.
  3. The controller will automatically run consecutive learning cycles to measure weight distribution and program the travel profiles.

Merlin

On Merlin Commander and SilentDrive openers:

  1. Locate the purple and orange adjustment buttons. Press and hold the “Limit” button until the UP arrow starts flashing.
  2. Adjust the door to the open position using the arrow keys, then tap the “Limit” button to save.
  3. The DOWN arrow will flash. Adjust the door to the floor and tap “Limit” again. The opener will cycle to learn its force levels.

Ryobi

For GD200 modular systems, calibration is managed digitally:

  1. Press the “Program” button on the console.
  2. Use the directional arrow keys to navigate to travel settings, calibrate the physical limits, and save via the keypad interface.

Advanced Mechanical Culprits (What Competitors Miss)


Sometimes, adjusting the programming does not fix the problem because of hidden mechanical faults:

  • RPM Sensor Interrupter Cup Slippage: If you recently replaced your opener’s drive gears, the small plastic interrupter cup on the AC motor shaft may not be seated fully against the motor collar. If it slips even a fraction of an inch, the RPM sensor cannot track rotation, causing immediate safety reversals.
  • Motor Shaft “Endplay”: Over years of heavy use, the collar holding your motor shaft can loosen. This allows the shaft to slide horizontally. The system interprets this physical shifting as an obstruction, triggering a false reversal.
  • Cold-Weather Drag: Freezing winter temperatures contract metal tracks and stiffen structural lubricants. This increased friction mimics an obstruction. A slight adjustment of your opener’s close force can offset this seasonal change.

The "Red Zone": When to Call a Professional


If you have tried basic programming and your door still fails to operate, you may be facing a structural safety issue.

To determine if your door is physically safe to operate, perform the 50% Balance Test:

  1. Pull the red emergency release cord to disconnect your door from the opener.
  2. Manually lift the door halfway up and release it.
  3. A properly balanced door will remain suspended in place. If it crashes downward or flies upward, your torsion springs are severely fatigued, improperly tensioned, or broken.

Additionally, check your door panel’s rigidity; if the top section is bending under motor pressure, you may need to look into a diy garage door strut to prevent structural collapse.

For complex electrical issues, spring replacements, or persistent sensor failures, avoid the safety risks of DIY work. Contact a trusted professional at 24H Garage Doors for immediate, certified emergency garage door service to restore your home’s security safely.

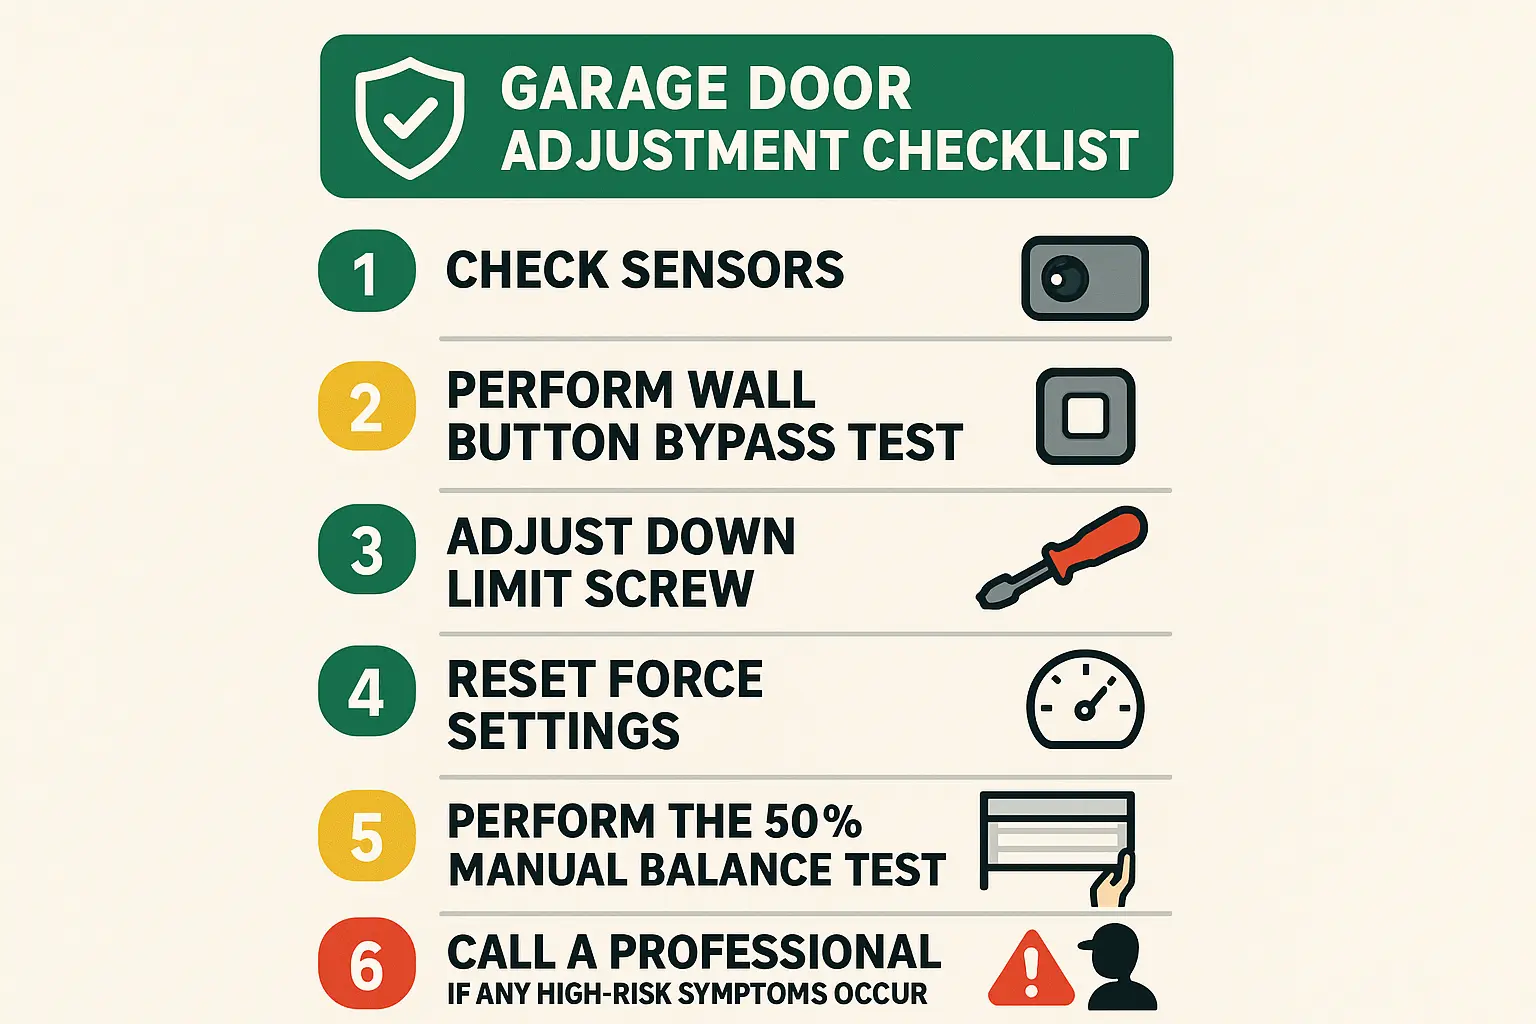
This infographic anchors key safety and adjustment steps in memory, guiding users to confidently perform basic troubleshooting while knowing when professional help is essential.


Frequently Asked Questions


Why does my garage door close all the way, touch the floor, and then immediately open back up?

This behavior occurs because your opener’s down travel limit is set too far. The door strikes the floor before the motor completes its programmed cycle. The opener registers this physical contact as an obstruction and initiates a safety reversal to prevent damage. Slightly reducing the down travel limit solves this issue.

How do I know if my safety reversal system is working correctly?

You can verify your safety reversal system’s operation using the DASMA-recommended “2×4 Test.” Place a 1.5-inch thick piece of wood flat on the garage floor directly under the path of the door. When you close the door, it must reverse immediately upon striking the wood. If it does not, your force and limit settings are dangerously miscalibrated.

Can cold weather really cause my garage door to reverse on its own?

Yes. Cold temperatures cause metal tracks to contract and lubricants to stiffen, which increases mechanical friction. If your opener’s close force is set precisely to the door’s summer weight, this extra winter resistance will mimic an obstruction, causing the door to stop and reverse halfway down.

Contact / Request a Call