Most homeowners stop at Level 1, get frustrated, and call for help. By learning all four, you’ll not only solve this problem but also gain the confidence to manage your home’s systems more effectively.
Level 1: The Symptom Check
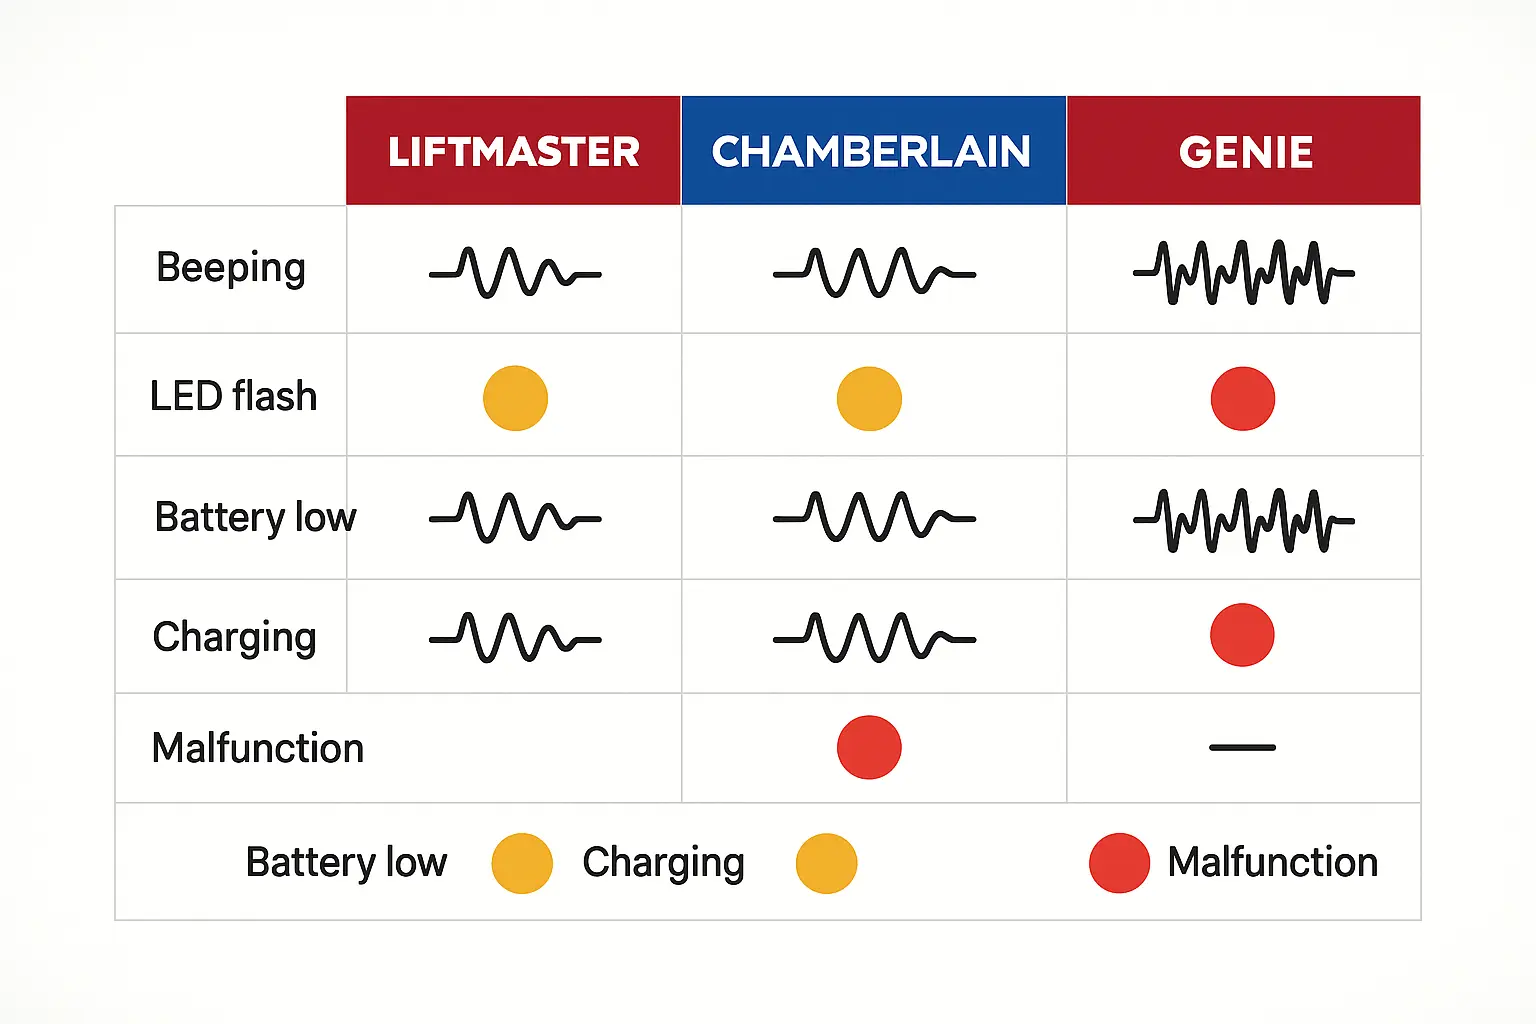
Before you even touch the opener, just listen and look. Your opener communicates through audible beeps and flashing LED lights. That incessant chirping isn’t random; it’s a specific error code. While these signals can vary slightly by brand, the patterns are often quite similar.
If you’ve been wondering about the cause of your garage door opener beeping, you’re in the right place. A dying backup battery is one of the most common reasons.
What you’ve learned: By matching your opener’s sounds and lights to the chart, you’ve made an initial diagnosis. If the signs point to the battery, you’re ready for the next level of confirmation.
Level 2: The Power-Cut Test (Power Outage Simulation)
This is the most straightforward hands-on test. You’re simply going to simulate a power outage to see if the battery can do its job. It’s a real-world performance check.
Safety First: Ensure the garage door is clear of any obstructions, including people, pets, and vehicles.
Disconnect the Main Power: Unplug your garage door opener unit from the electrical outlet in the ceiling. The unit should switch to battery power automatically, often indicated by a solid-colored LED (like orange or green) and a click.
Operate the Door: Using your wall control or remote, try to open and close the garage door.
Observe the Performance:
Reconnect Power: Plug the opener back into the outlet. The unit should switch back to AC power, and the battery indicator light may start flashing to show it’s recharging.
If you notice other issues during this test, you might be dealing with more general garage door opener power problems.
What you’ve learned: You’ve now seen how your battery performs under real-world conditions. A struggling battery has failed this test and is a prime candidate for replacement.
Level 3: The Visual Inspection
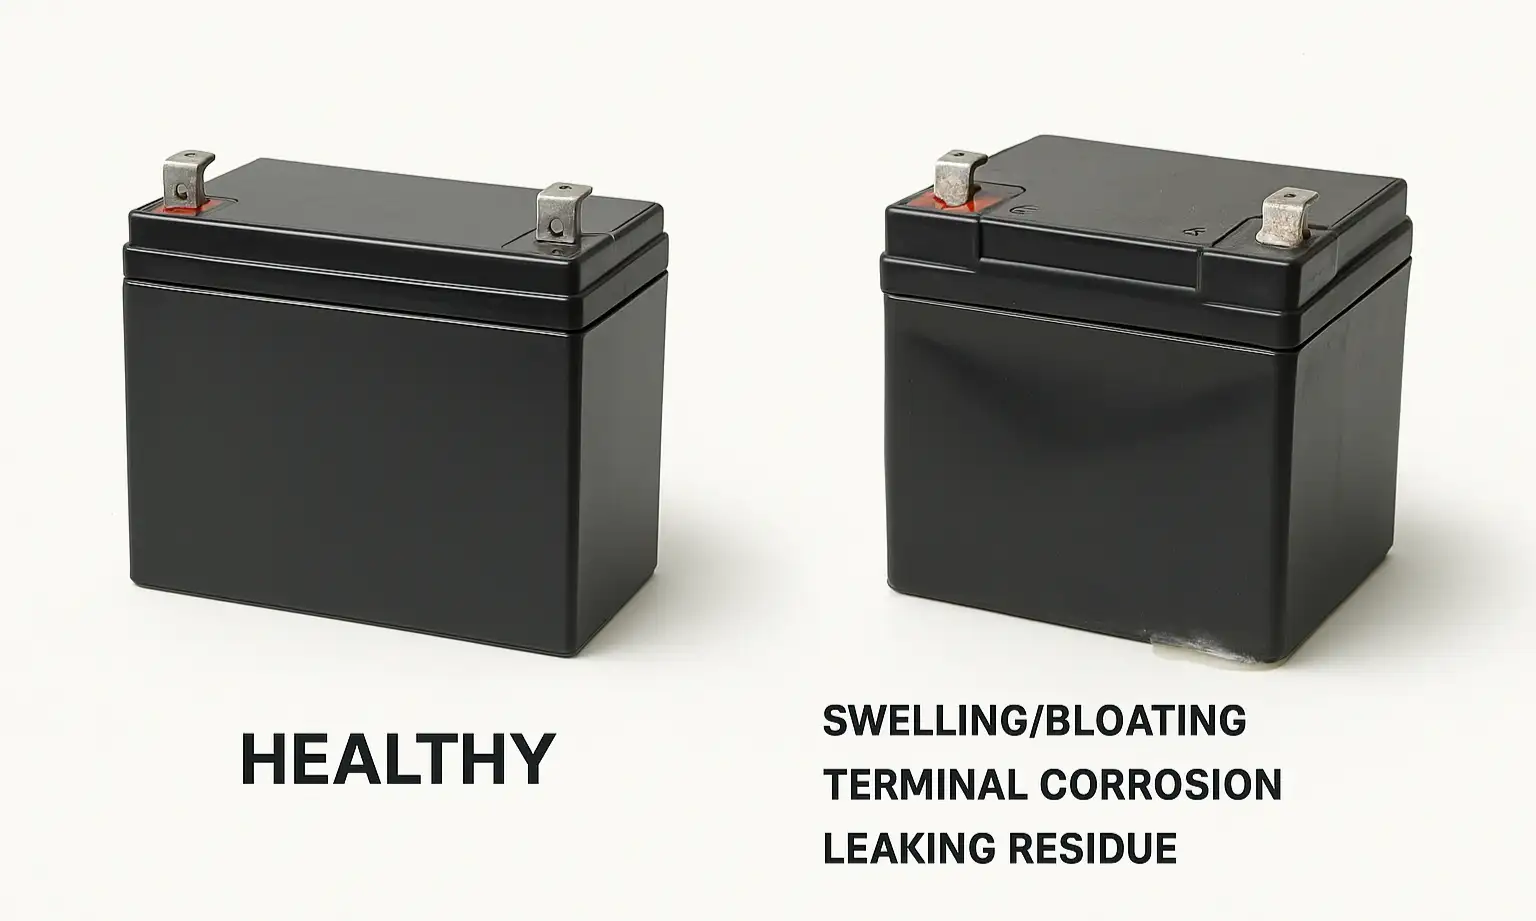
Sometimes, a battery will show you it’s failing before it tells you. A quick visual inspection can reveal definitive physical signs of decay. This step requires you to access the battery itself, usually located within a compartment on the opener motor unit.
Safety Note: Always unplug the garage door opener from its power source before opening any compartments. For more details on handling these batteries, review essential garage door battery backup safety guidelines.
Once you’ve accessed the battery, look for these tell-tale signs:
What you’ve learned: A visual inspection can provide undeniable proof of battery failure. If you see any of these signs, you don’t need to proceed to the final test—you have your answer.
Level 4: The Multimeter Test
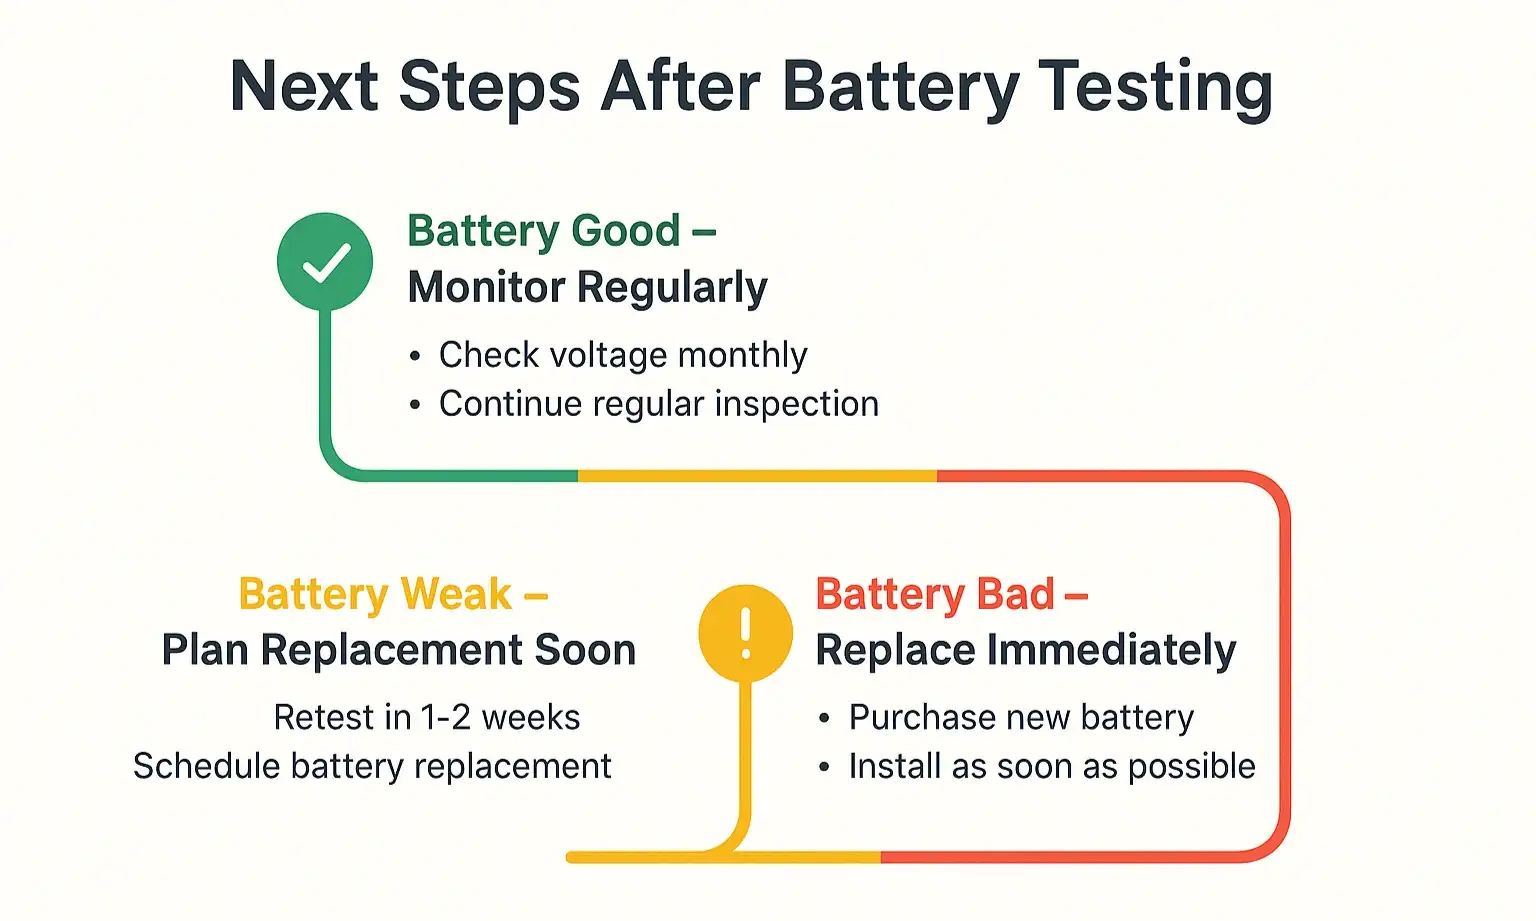
For the most accurate and definitive diagnosis, nothing beats a multimeter. This tool measures the battery’s voltage, giving you a precise reading of its health. It may sound technical, but it’s surprisingly simple. You can find an inexpensive digital multimeter at any hardware store.