Garage Door Remote Stopped Working: Fixes in Order of Likelihood


Published: Sep 22, 2026

There is nothing more frustrating than pulling up to your driveway, pressing your remote, and having nothing happen. Before you assume you need a costly replacement, take a deep breath. Industry repair database metrics show that approximately 75% of remote failures are solved with zero tools or professional intervention.

To help you resolve this issue immediately, this guide functions as a step-by-step triage system, starting with the easiest, most statistically likely culprits.
The 2-Second Diagnostic Test


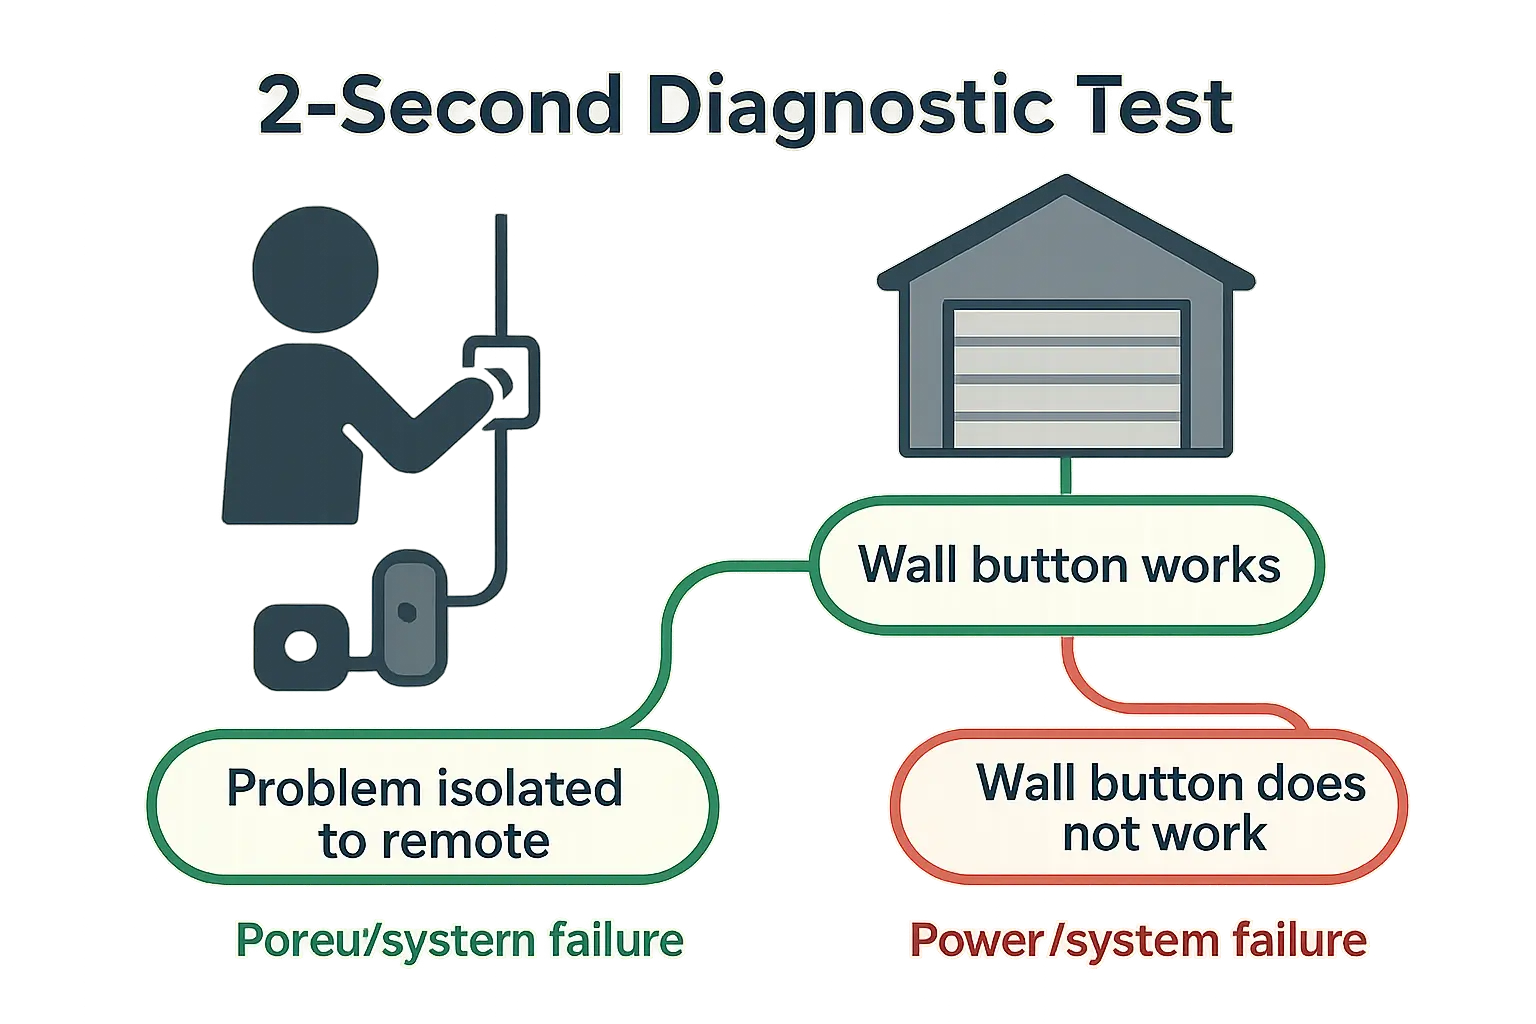
The 2 second diagnostic test

To isolate the root cause, walk inside your garage and press the wired wall button.

  • Scenario A: The wall button works, but the remote does not. Your motor has power, and the physical door mechanism is intact. The issue is isolated to the remote, programming, or signal path.
  • Scenario B: Neither the wall button nor the remote works. This points to a tripped circuit breaker, a disconnected power source, or a fried internal logic board. If this is your situation, you may have found that your my garage door remote stopped working alongside the entire opener system.
Physical Symptom Likely Culprit Likelihood Immediate Action
Wall panel LED is flashing rapidly Lock Mode is active Very High Press and hold the “Lock” button for 2–5 seconds.
Opener lights flash twice on activation Signal is blocked High Deactivate Lock Mode on the wall board.
Opener light flashes 10 times Misaligned safety sensors High Clean and realign the photo-eyes on your tracks.
Remote LED lights up, but door is static Desynced rolling code or RFI Moderate Re-sync to the Learn Button; remove LED bulbs.
No LED light showing on the remote Dead battery or contact corrosion Very High Replace the coin-cell battery; verify polarity.

Immediate No-Cost Fixes (0–2 Minutes)


Before buying parts, check these two incredibly common oversights that require zero tools:

  1. Deactivate Lock Mode: Many wall panels feature a “Lock” or “Vacation” button. When accidentally bumped, it disables all radio signal reception. If your wall board LED is flashing rapidly, hold the Lock button down for 2 to 5 seconds until the light turns solid.
  2. Clear Safety Sensor Obstructions: Garage door safety sensors must project an unbroken infrared beam to close the door. If you notice your garage door sensor green light not on or flashing, realign the sensors on either side of the track until both indicator lights shine steadily.

Power and Battery Faults (2–5 Minutes)


Lithium-ion coin-cell batteries (CR2032 or CR2016) typically last 2 to 5 years. Unlike household alkaline batteries that gradually dim, lithium coin cells have a flat discharge curve. They fail abruptly, making it seem like the remote itself died.

If you replace your garage door remote battery and it still fails, check for these hidden issues:

  • Reversed Polarity: It is remarkably easy to insert a coin cell upside down. Ensure the positive (+) side faces the correct metal terminals in the battery housing.
  • Contact Oxidation: Scrub the small metal terminal clips inside the remote with a cotton swab dipped in rubbing alcohol to clear invisible corrosion.
  • Volatile Memory Loss: When a battery completely drains over several weeks, the volatile rolling-code chip in the transmitter can lose its synchronized connection to your opener, requiring a manual re-sync.

Programming and Re-Syncing Protocols


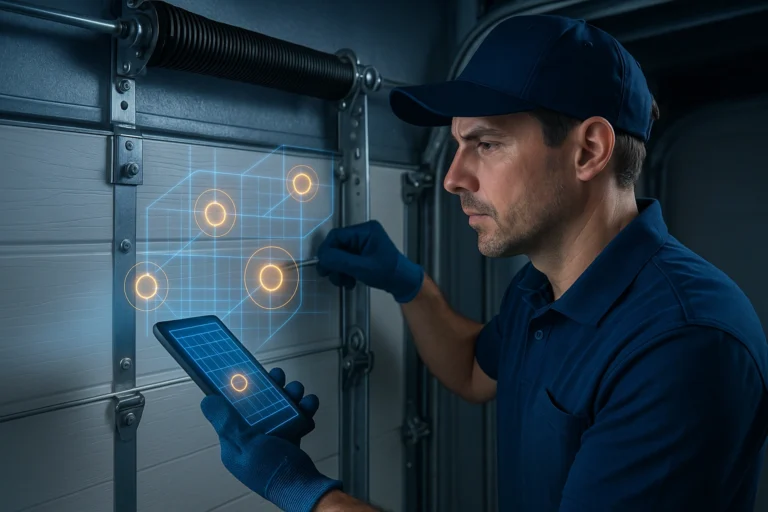
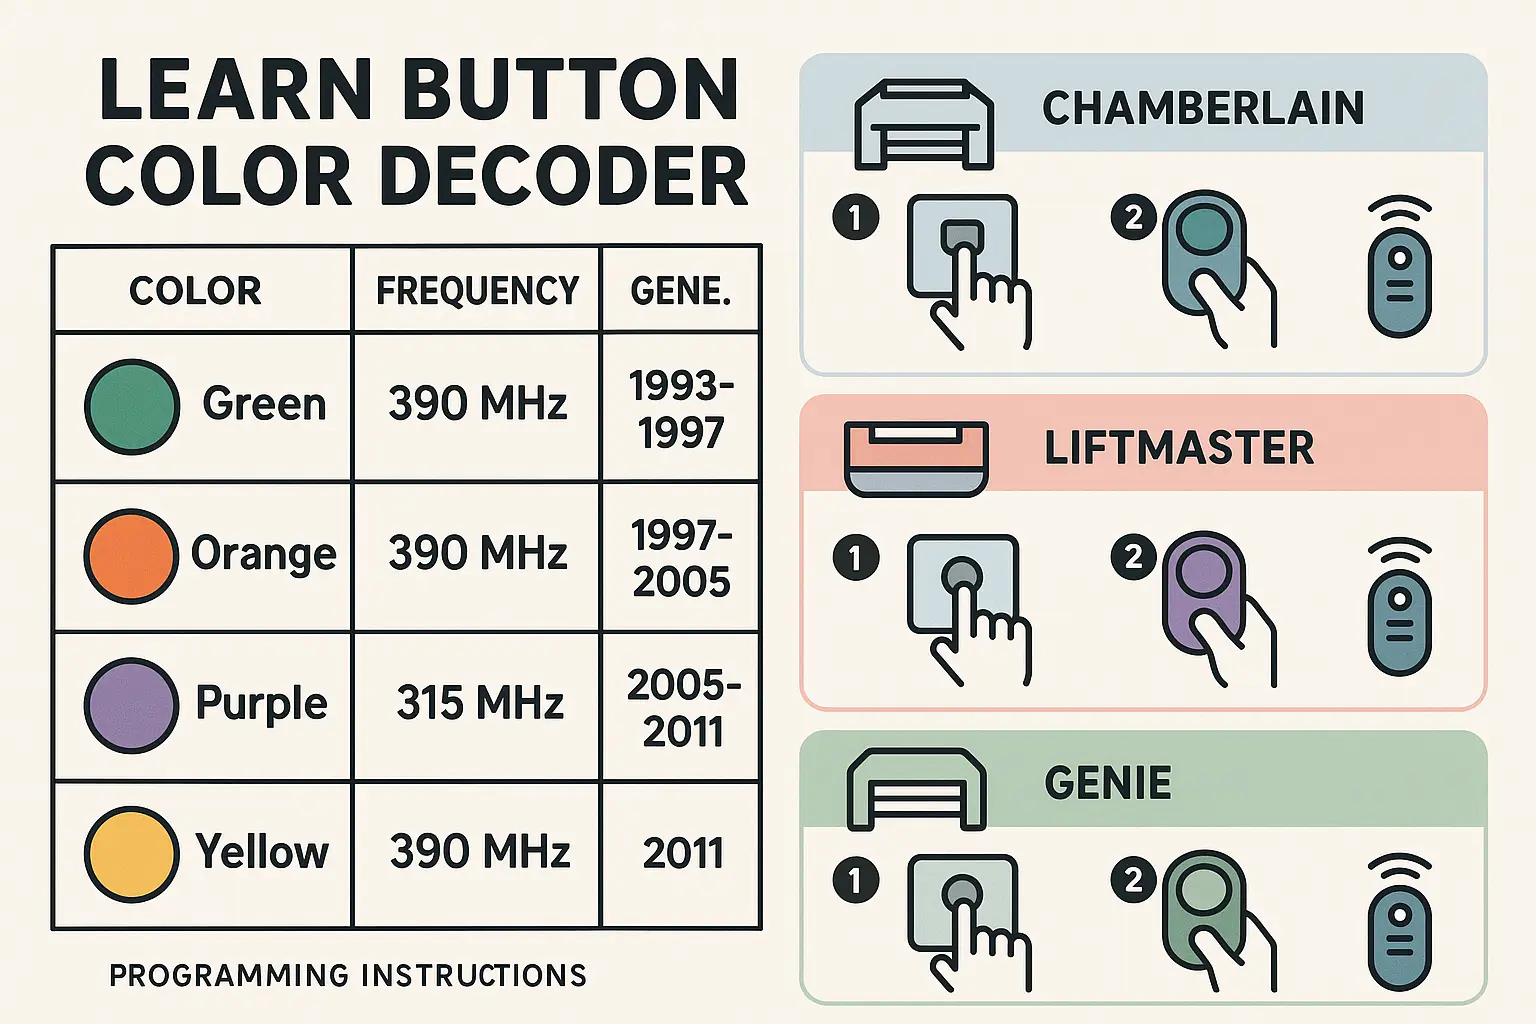
This visual decoder chart simplifies understanding of learn button colors and guides users through the step-by-step programmi

If your battery is fresh but the remote remains unresponsive, the wireless connection has likely desynced. To fix this, locate the colored “Learn” button on the motor head chassis.

Find where is the learn button on garage door opener to match your frequency and technology generation:

  • Green Button: Billion Code technology (1993–1995, 390 MHz)
  • Orange/Red Button: Security+ technology (1997–2005, 390 MHz)
  • Purple Button: Security+ 315MHz technology (2005–2015, 315 MHz)
  • Yellow Button: Security+ 2.0 technology (2011–Present, multi-frequency 310/315/390 MHz)

How to Re-Sync Your Remote

For a standard liftmaster garage door opener installation, press and release the Learn button on your motor once. Within 30 seconds, press and hold the button on your remote until the opener’s light bulbs flash or you hear two clicks. If you need a complete system clean slate, follow these steps to how to reset garage door opener and pair your remotes fresh.

Note: For pre-1993 systems, you will not find a Learn button. Instead, you must match the physical sliding pins inside the remote to the motor board. Learn more in our guide on what is a dip switch garage door opener.

Environmental Radio Frequency Interference (RFI)


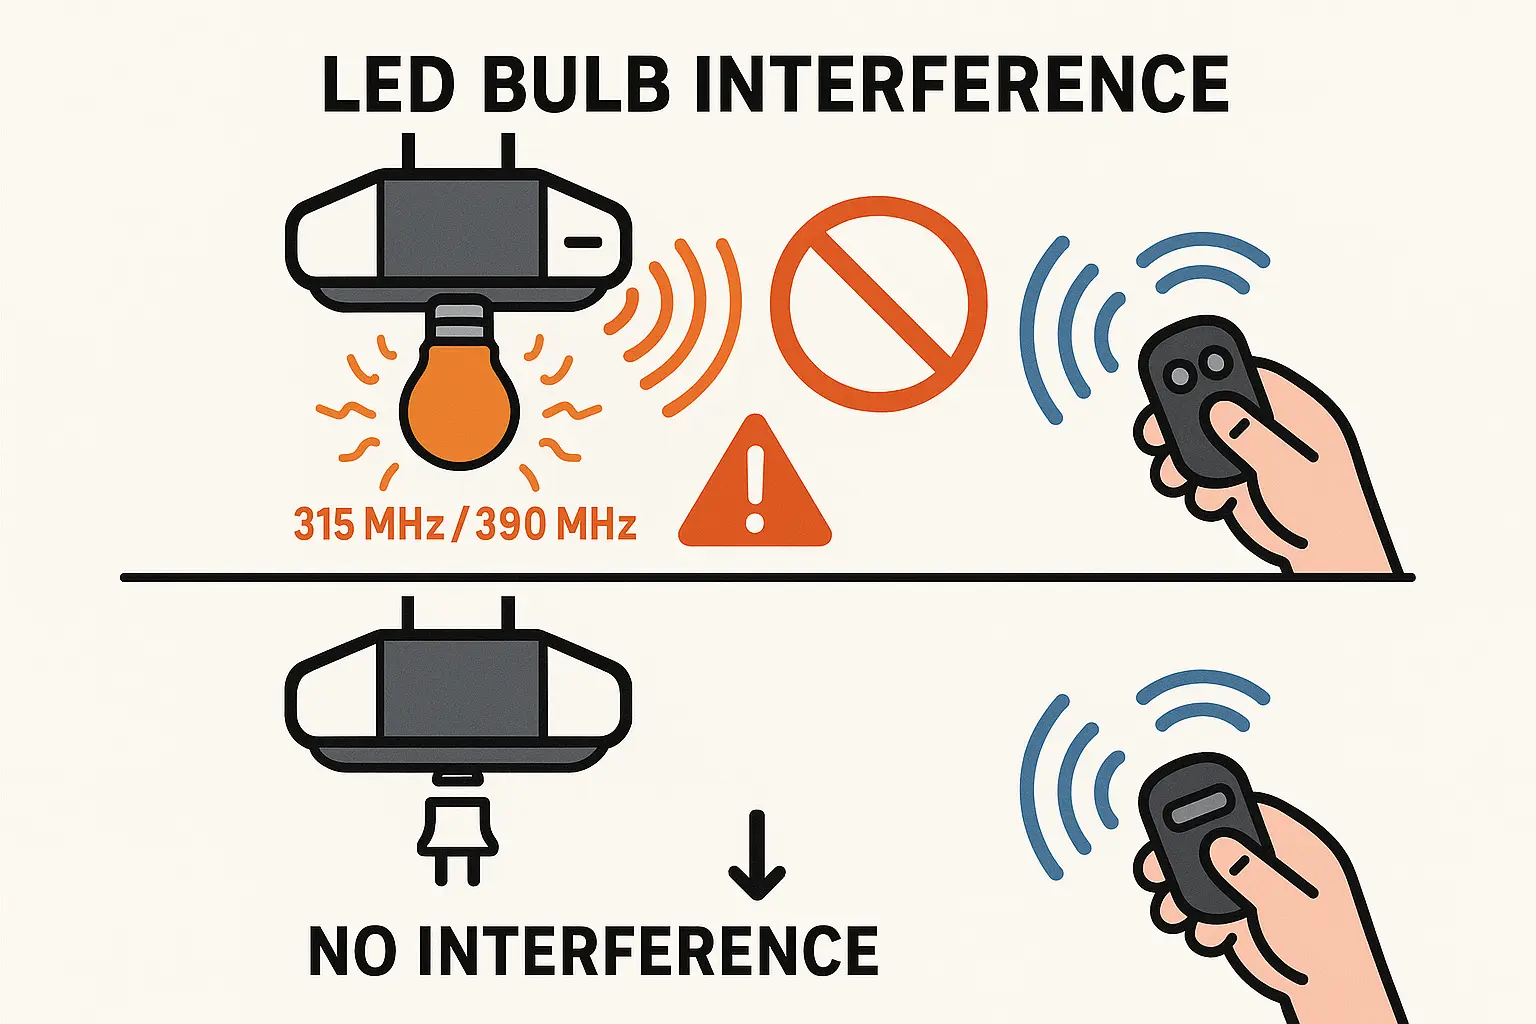
This image visually explains how certain LED bulbs emit electromagnetic noise that interferes with garage door remote signals

Does your remote only work when you are standing inches from the garage door? You are likely dealing with RFI.

In 2005, the FCC shifted military land-mobile radio frequencies near 390 MHz, forcing garage door manufacturers to shift to 315 MHz to avoid massive range loss. However, local interference still occurs daily—most notably from LED light bulbs.

Cheap, unshielded LED bulbs use driver circuits that pulse current, emitting electromagnetic noise at exactly the same frequencies used by your remote. When the opener light switches on, it completely blinds the receiver.

The Test: Unscrew the light bulbs from your opener and test your remote from the driveway. If it works perfectly, replace the bulbs with FCC-compliant, shielded garage-door-safe LED bulbs.

Hardware and System-Level Failure


If you have completed the steps above and your system is still unresponsive, the issue may be physical hardware degradation:

  • Damaged Antenna Wire: Locate the thin coaxial wire hanging down from your motor unit. It must hang straight down. If it is cut, frayed, or tucked inside the metal casing, your range will drop to almost zero.
  • Logic Board Failure: Power surges can damage the capacitors on your system’s receiver. If you suspect an electrical fault, a rollup door circuit board inspect can confirm whether the main board is fried.

If your remote or motor has reached the end of its lifespan, consider upgrading to a modern system. Exploring the garage door opener vs wifi extender conversation can help you choose a smartphone-compatible opener, allowing you to bypass physical remotes entirely. When DIY troubleshooting reaches its limits, securing professional garage door opener repair ensures your system is evaluated safely and efficiently.

Frequently Asked Questions


Why did my garage door remote stop working after I changed the battery?

If your remote remains unresponsive after a battery swap, the battery may be inserted upside down, or the metal terminal contacts may be dirty. Additionally, leaving a dead battery in a remote for a long time can cause the transmitter to lose its synchronized code connection to the opener’s motor, requiring a manual re-sync using the Learn button.

How do I know if my garage door remote is broken or if it is the opener?

Use the wired wall button inside your garage. If the wall button operates the door perfectly but the remote does not, the issue lies in your remote’s battery, signal path, or programming. If neither the wall button nor the remote works, the issue is likely a power failure, a tripped breaker, or a damaged receiver board in the opener.

Can LED light bulbs really stop my garage door remote from working?

Yes. Many standard or low-cost LED light bulbs produce electromagnetic interference that operates on the same 315 MHz to 390 MHz frequencies used by garage door remotes. When the light bulbs turn on, they can jam the remote’s signal. Replacing them with specialized, shielded LED bulbs rated for garage door openers resolves this problem.

Contact / Request a Call