Complete LiftMaster Garage Door Opener Setup and Installation Guide
Published: Jul 27, 2026
Standing on a ladder trying to decode a dry technical manual can turn a simple home upgrade into an afternoon of frustration. Whether you are setting up a newly installed unit, trying to sync a replacement remote control, or configuring a specialized system, getting your hardware to communicate reliably is the ultimate goal.
This guide bridges the gap between technical manuals and field execution. From standard programming to custom applications, here is how to get your system working perfectly on the first try.
The Quick-Start Diagnostic Tool (Ladder-Free Programming)
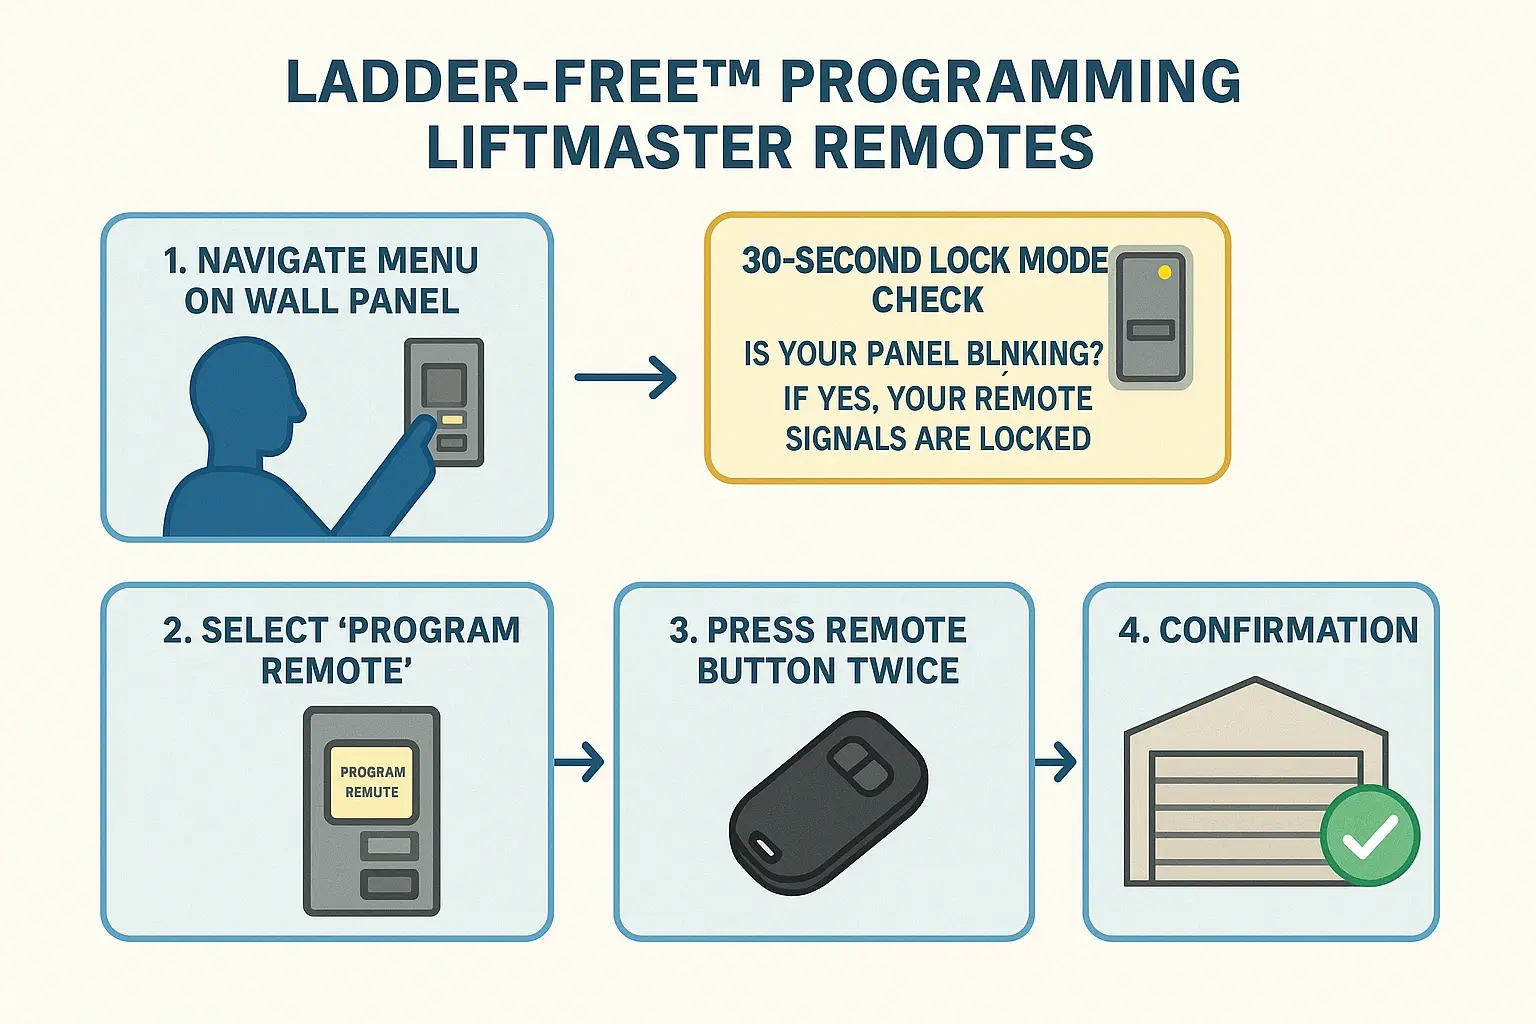
Many homeowners do not realize they can complete garage door remote programming without ever climbing a ladder. If you have a Smart Control Panel (wall control with an LCD screen or a physical "Menu" button), you can pair accessories directly from the wall.
The Ladder-Free Programming Sequence
1. Press the Menu button on your smart wall control panel.
2. Scroll down to Program and select Remote.
3. Press the button on your hand-held remote control that you wish to operate your garage door.
4. The opener lights will blink (or you will hear two clicks), indicating the code has been accepted.
2. Scroll down to Program and select Remote.
3. Press the button on your hand-held remote control that you wish to operate your garage door.
4. The opener lights will blink (or you will hear two clicks), indicating the code has been accepted.
The Blinking Light Trap: Is Your Remote Actually Broken?
Before assuming your garage door remote not working is due to a pairing failure, check your wall console. If the indicator light is blinking rapidly, your receiver is in Lock Mode (Vacation Mode). This security feature locks out all radio frequency signals. To disable it, hold the Lock button on your wall panel for two seconds until the blinking stops.
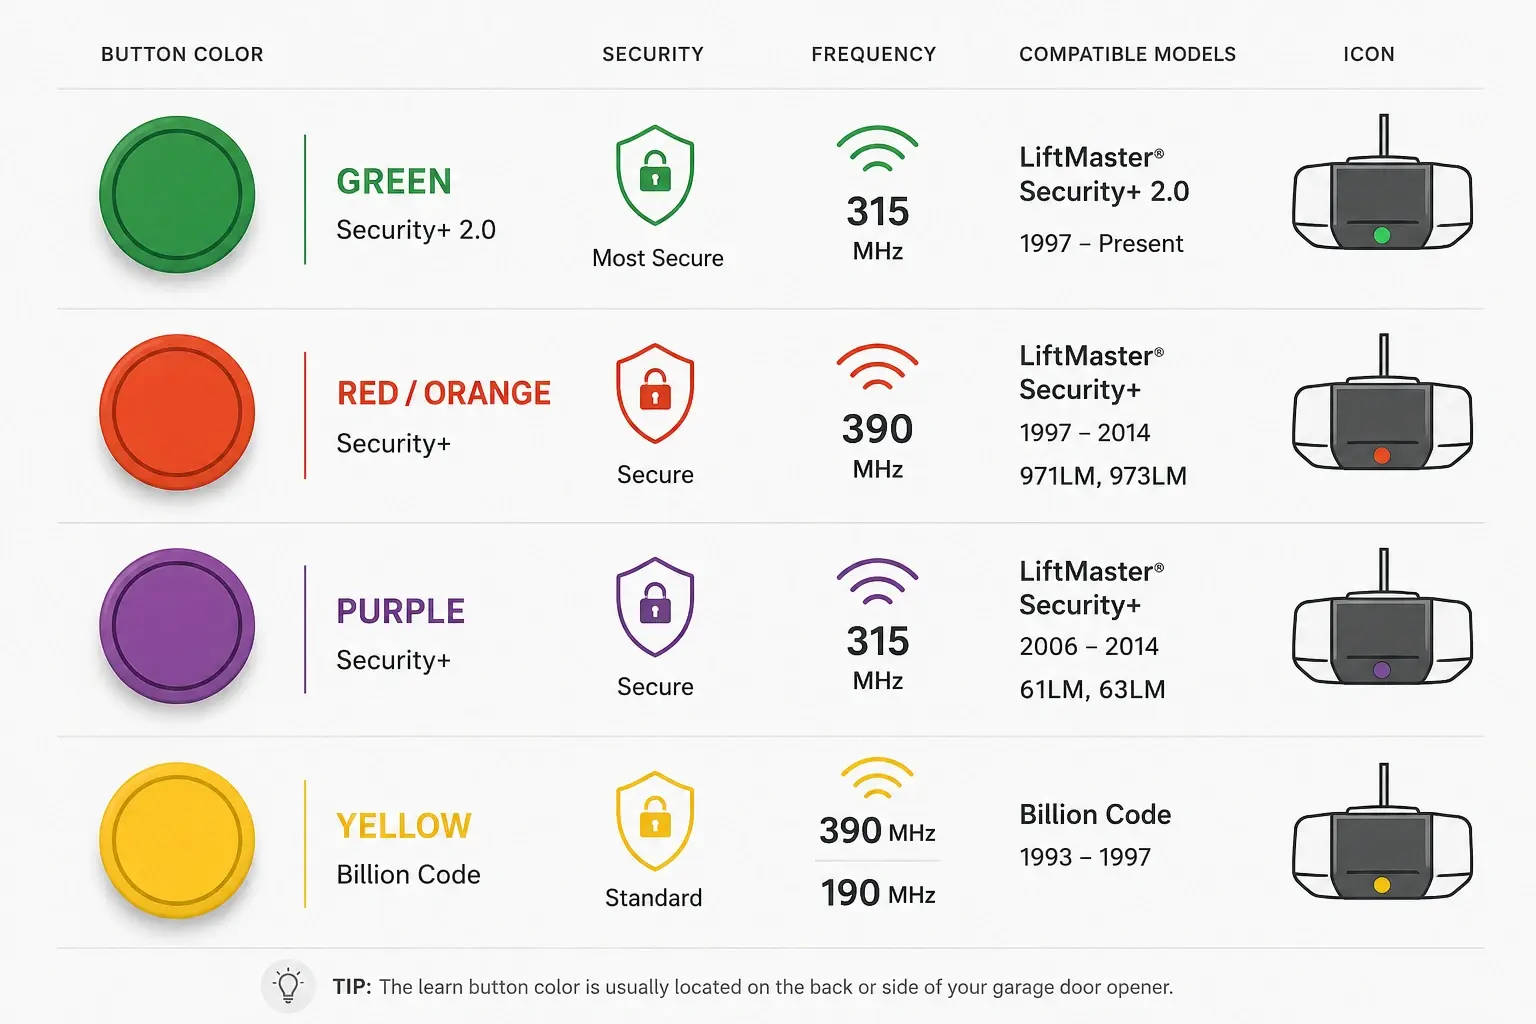
The Definitive Learn Button Color & Compatibility Decoder
If your wall console does not support menu programming, you must use the physical Learn Button on the motor head. Because receiver technologies evolved over the decades, matching the color of this button to the correct remote frequency is crucial to getting your system configured correctly.
Legacy Spotlighting: Chamberlain Formula 1 Whisper Drive
If you have a legacy Chamberlain Formula 1 Whisper Drive system, finding replacement transmitters can be challenging. Because these older models use either the 390 MHz Red/Orange or 315 MHz Purple rolling code protocols, the LiftMaster 893MAX serves as the ideal universal solution, backward-compatible with every technology in the chart.
Specialized LiftMaster Jackshaft Setup Guide (Models 8500 / 8500W / 98022)
Wall-mount Jackshaft openers offer a clean overhead profile, mounting directly to the side of the torsion shaft. However, this configuration means they lack a traditional overhead motor unit, changing the physical layout for programming.
Locating the Controls
• The Physical Yellow Learn Button: Housed under the front cover casing of the wall unit. Pull down the cover to expose the button.
• Alternative Smart Wall Control Programming: Rather than pulling the cover off, press the Learn button twice on your smart wall control panel to put the wall-mount opener into pairing mode.
Once activated, you can quickly connect garage door opener smart features or program your remotes. Remember that wall-mounted units require precise safety monitoring; make sure you understand how do garage door safety sensors work to keep these wall-mounted configurations operating safely.
• Alternative Smart Wall Control Programming: Rather than pulling the cover off, press the Learn button twice on your smart wall control panel to put the wall-mount opener into pairing mode.
Once activated, you can quickly connect garage door opener smart features or program your remotes. Remember that wall-mounted units require precise safety monitoring; make sure you understand how do garage door safety sensors work to keep these wall-mounted configurations operating safely.
Advanced DIY Relays: Adapting LiftMaster Receivers for Custom Projects
Outside of residential garages, DIY engineers and agricultural operations often adapt LiftMaster radio frequency hardware for custom applications, such as remote-controlled grain chutes, heavy-duty farm gates, or cellular-triggered wild hog traps.
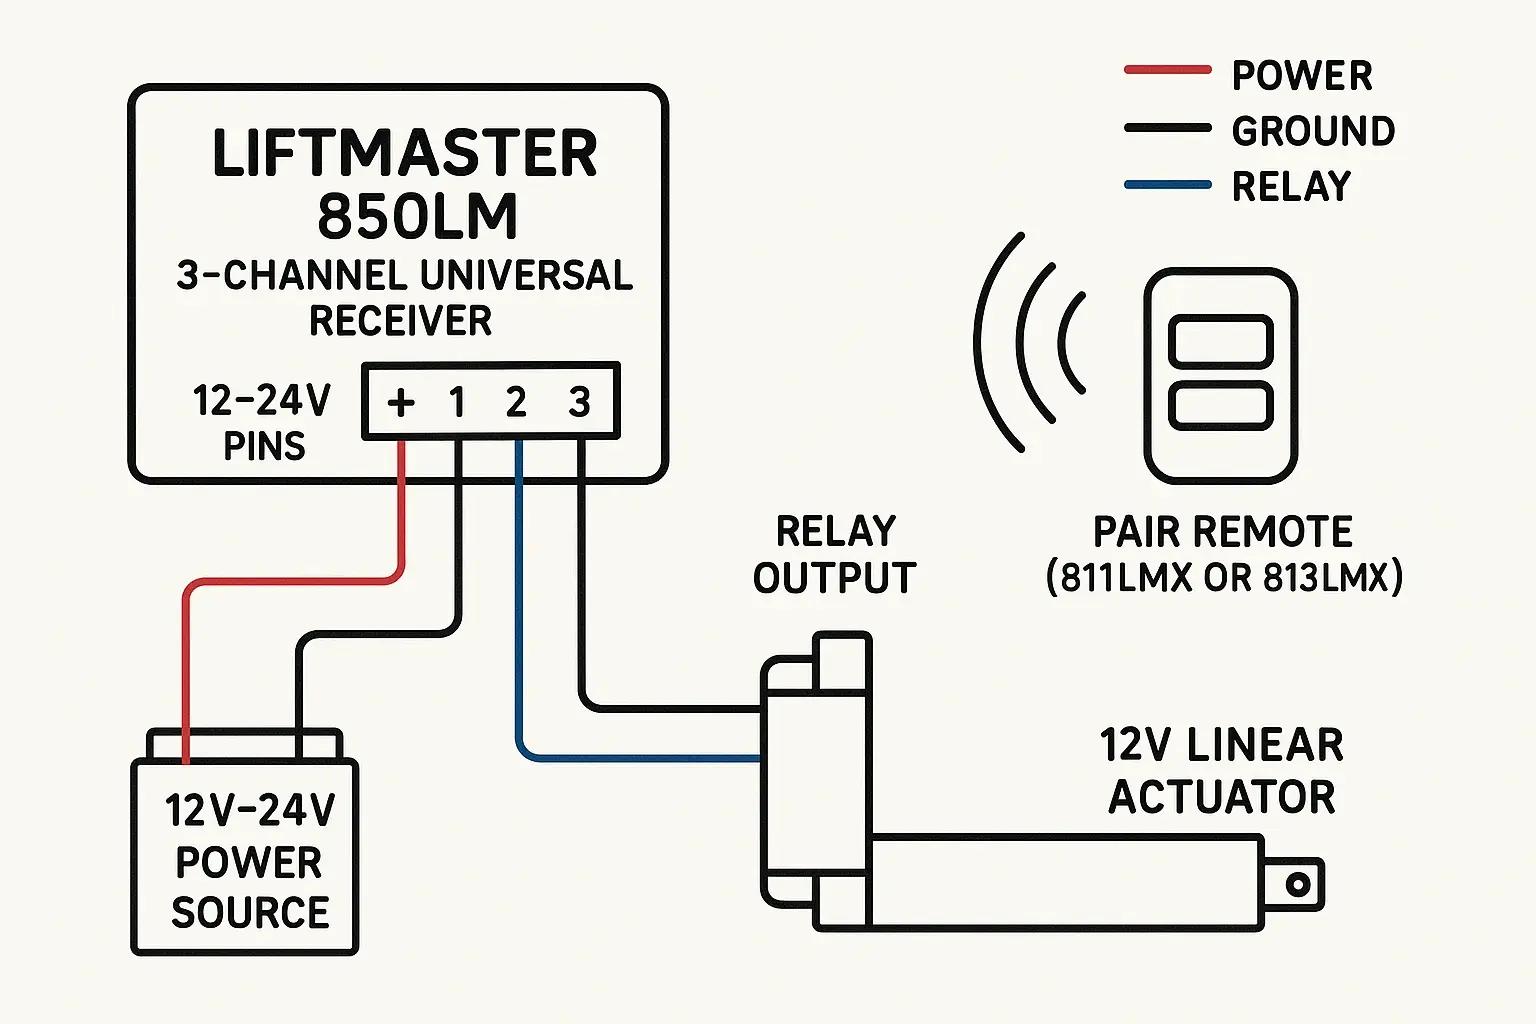
Integrating the LiftMaster 850LM 3-Channel Universal Receiver
By pairing the LiftMaster 850LM receiver with a 12V-24V DC power supply, you can wire a dry-contact relay output directly to a 12V linear actuator.
When triggered, the actuator moves a mechanical arm to drop a gate or open a chute. For reliable long-range use (up to 300 feet), operators pair this setup with a heavy-duty 811LMX or 813LMX DIP switch remote. To understand how these specialized transmitters function, explore our guide on what is a dip switch garage door opener.
The "Safe DIY" vs. "Professional Intervention" Decision Matrix
While programming accessories is an easy DIY task, physical installation of the opener motor or structural parts involves high-tension components that present significant safety hazards.
Safe DIY
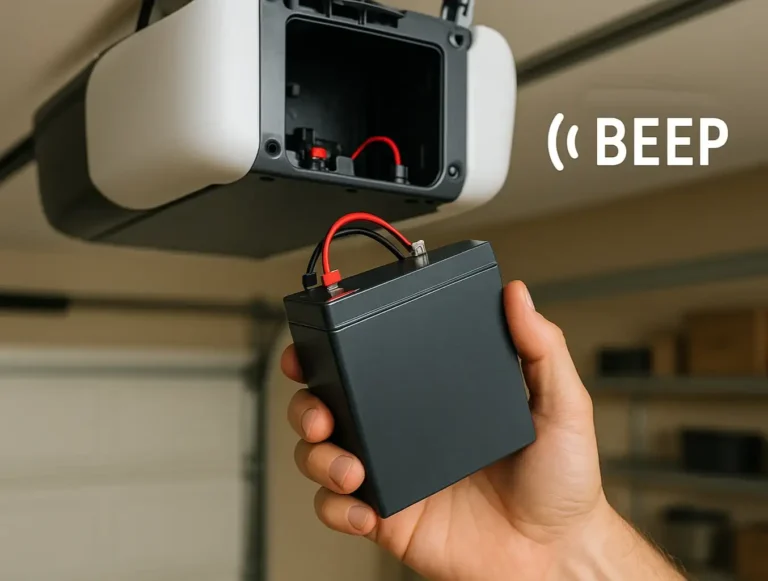
- Replacing 3V batteries
- Keypad & remote sync
- Smart app integration
Call a Certified Tech
- Frayed structural cables
- Squealing/broken springs
- Motor hums, no movement
If your installation requires hanging a new motor head, adjusting the torsion spring system, or modifying high-tension hardware, seeking a professional garage door opener installation service is the safest and most reliable path. Working with these systems without specialized training can lead to severe injury; ask yourself, can a garage door spring kill you, before attempting to service structural, high-tension parts yourself.
Frequently Asked Questions
My LiftMaster opener light blinks 10 times when I try to close the door. What is wrong?
This indicates a photo-eye safety sensor fault. Ensure the green and amber safety sensor lights are glowing steadily. If they are blinking, gently align them until both lights remain solid.
Can I program a newer Security+ 2.0 remote to an older Green Learn Button motor?
No. Standard Security+ 2.0 remotes (like the 893LM) cannot backward-transmit to legacy frequencies. However, you can use the universal LiftMaster 893MAX or 375UT remotes, which are designed to support older generations.
How do I clear the opener memory to erase lost remotes?
Hold down the physical Learn Button on the motor head for approximately 6 seconds, or until the indicator light goes out. This will erase all programmed remotes and keypads from the system's memory.
Get Professional Support Today
If you run into programming challenges, require a physical opener installation, or need 24/7 emergency repair support, our experienced technicians are ready to assist. Contact us today to ensure your garage door system operates safely, reliably, and efficiently.
You may also like