Wipe the Slate Clean: How to Clear HomeLink for a New LiftMaster Opener


Published: Sep 17, 2026

So, you’ve just installed a brand-new, powerful LiftMaster garage door opener. You’re excited to use your car’s built-in HomeLink buttons for that seamless, one-touch entry. You follow the instructions, but… nothing happens. You press the button again. Still nothing.

If this sounds familiar, you’re in the right place. This isn’t a sign of a faulty opener or a problem with your car. The most common reason for this frustrating snag is that your car’s HomeLink system is still holding onto old codes from a previous opener.

Before you can teach an old dog new tricks, you have to help it unlearn the old ones. This guide will walk you through why clearing your HomeLink memory is the crucial first step and exactly how to do it, ensuring a clean slate for a successful pairing with your new LiftMaster.

The "Why" Behind the Wipe: Understanding HomeLink Memory


Think of your car’s HomeLink system like a small computer that stores the unique signal from your garage door remote. When you sell a home, you give the new owners a new set of keys; you don’t let them rely on the old ones. Clearing your HomeLink is the digital equivalent of that—it’s a factory reset for your car’s built-in remote.

It’s All About Security: Rolling Codes Explained

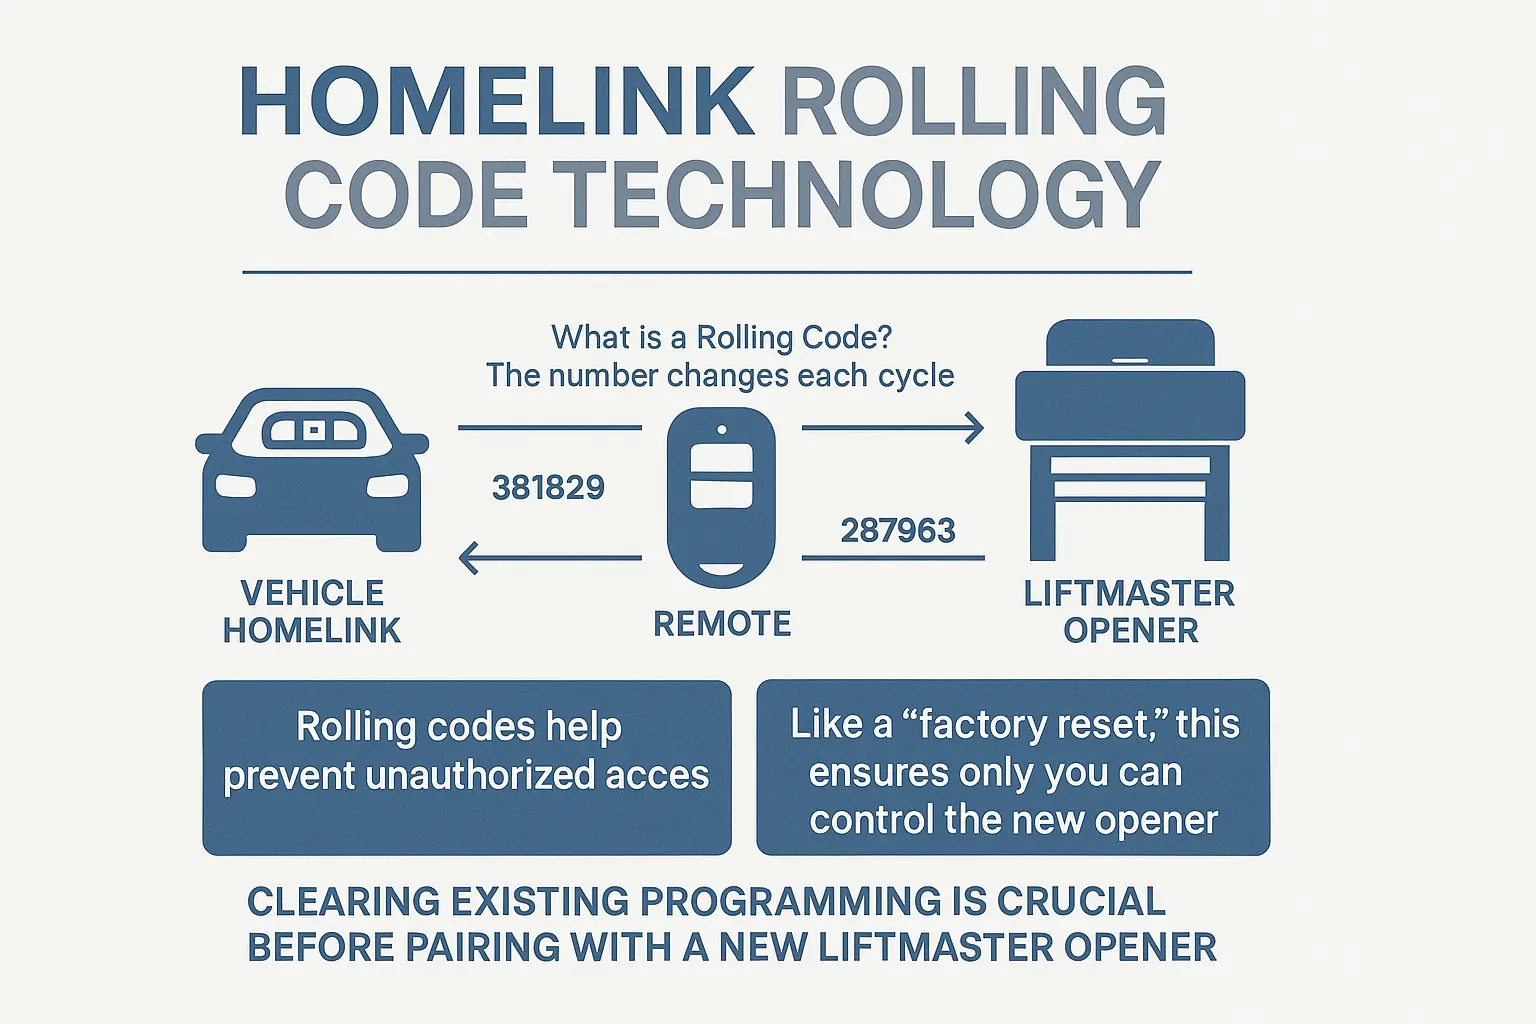
Modern LiftMaster openers use advanced security technology called Security+ 2.0®, a type of “rolling code” system. Instead of using the same code every time, the remote and the opener generate a new, encrypted code for each use. This makes it virtually impossible for would-be intruders to capture and replicate your signal.

By clearing the old, static codes from your HomeLink, you’re preparing it to learn this new, secure “language.” Failing to do so can cause signal confusion, which is why your new opener might be ignoring your car’s commands.

Understanding why you must clear HomeLink programming: a visual guide to rolling code security and the 'factory reset' process that ensures a clean slate for LiftMaster opener pairing.

It’s also important to understand the difference between this process and learning how to reset garage door opener motors themselves. Clearing your HomeLink only affects the memory in your car. Resetting the opener unit clears all paired remotes and keypads directly from the motor, which is a different procedure altogether.

Your Step-by-Step Guide to Clearing HomeLink Memory


Before you begin, park your vehicle outside of the garage to prevent any accidental door movements. It’s also a good idea to have your original LiftMaster remote handy, as you’ll need it for the programming step that follows.

You generally have two options: a total wipe of all buttons or clearing a single button. For pairing a new opener, a total wipe is highly recommended to prevent any signal conflicts.
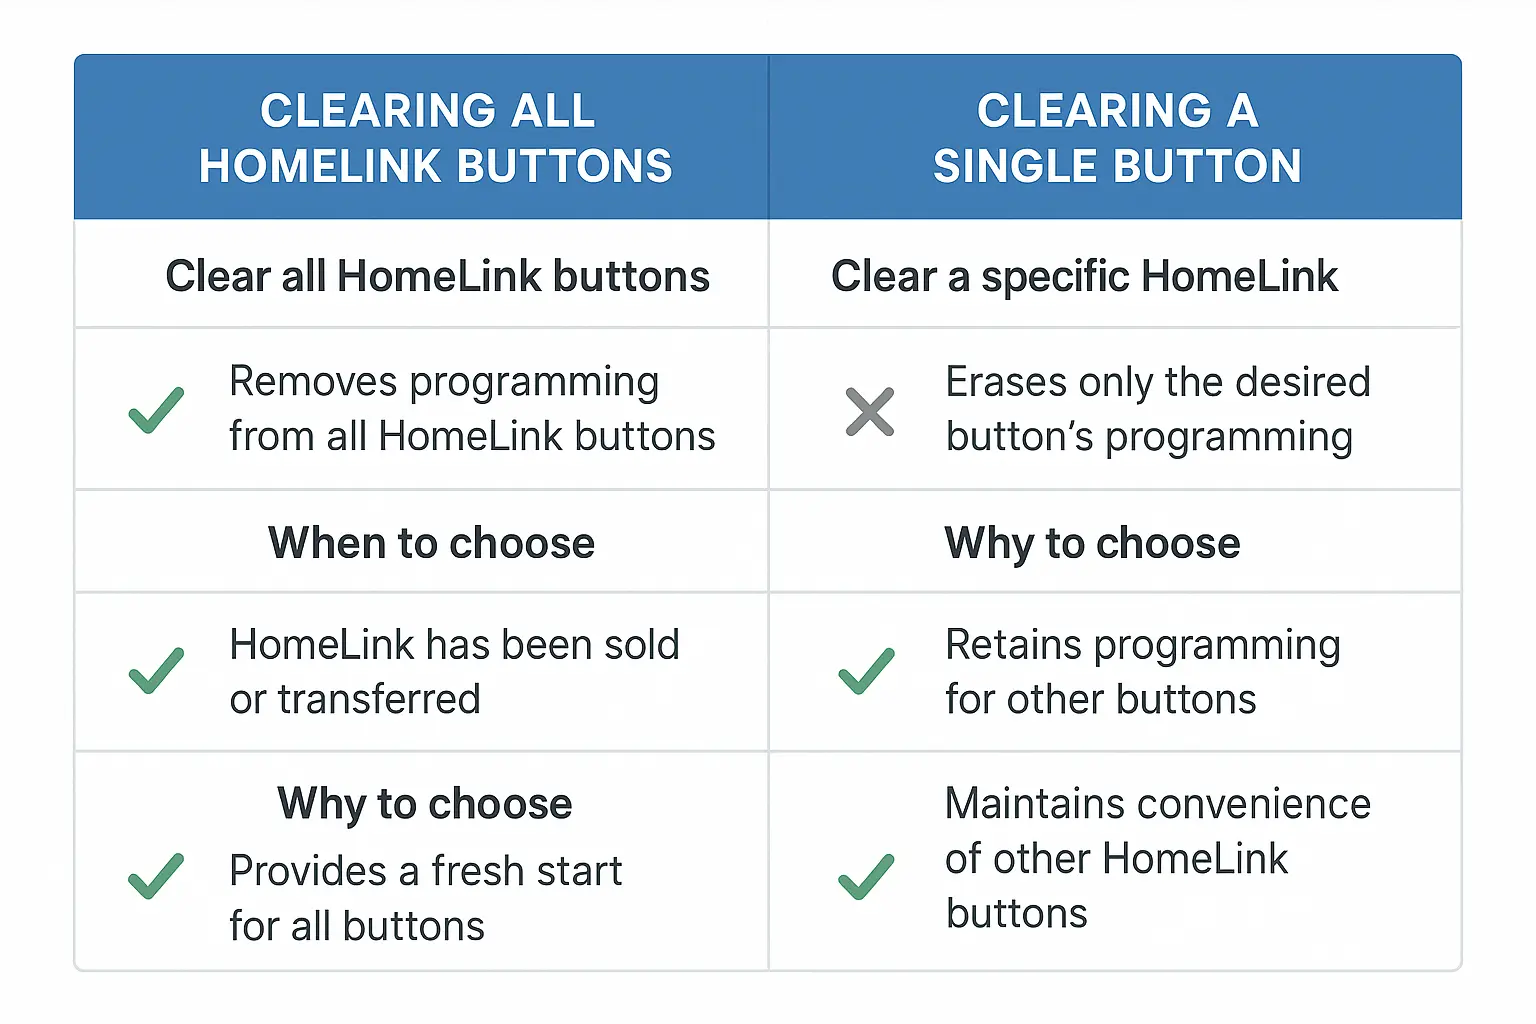
Decide how to reset your HomeLink: comparing the benefits and use cases of clearing all buttons versus just one to prepare for LiftMaster pairing.

Option 1: Clearing All HomeLink Buttons (Recommended)

This is the “factory reset” method and the best way to ensure a fresh start.

  1. Turn On Your Vehicle: Start your car or turn the ignition to the “accessory” mode. The HomeLink system needs power to operate.
  2. Press and Hold: Press and hold the two outer HomeLink buttons simultaneously. Do not release them.
  3. Watch the Indicator Light: After about 10-20 seconds, the indicator light on your HomeLink system (usually near the buttons) will change from solid to flashing rapidly.
  4. Release: Once the light begins to flash rapidly, you can release both buttons.

Success Checkpoint: The rapid flashing confirms that all previously stored codes have been erased. Your HomeLink is now a clean slate, ready to be programmed. If you’re still having issues, you may want to consult a guide on how to reset car garage door opener systems for more vehicle-specific tips.

Option 2: Clearing a Single HomeLink Button

If you have other devices programmed (like a gate opener) and only want to clear the button for your old garage door, you can often reprogram a single button. Note that this process can vary slightly by vehicle model.

  1. Press and Hold: Press and hold the specific HomeLink button you wish to reprogram.
  2. Watch for the Flash: Continue holding the button. After about 20 seconds, the indicator light should start to flash.
  3. Begin Reprogramming: While still holding the HomeLink button, you would then proceed with the first step of the programming process (which typically involves holding the original remote near the HomeLink unit).

Pro Tip: For pairing a brand-new opener, Option 1 is almost always the better choice. It eliminates potential crosstalk between buttons and ensures the cleanest possible connection.

Troubleshooting: What the Lights Mean and What to Do Next


Sometimes things don’t go exactly as planned. If your car garage door opener not working after the reset, the indicator light is your best friend for diagnosing the issue.

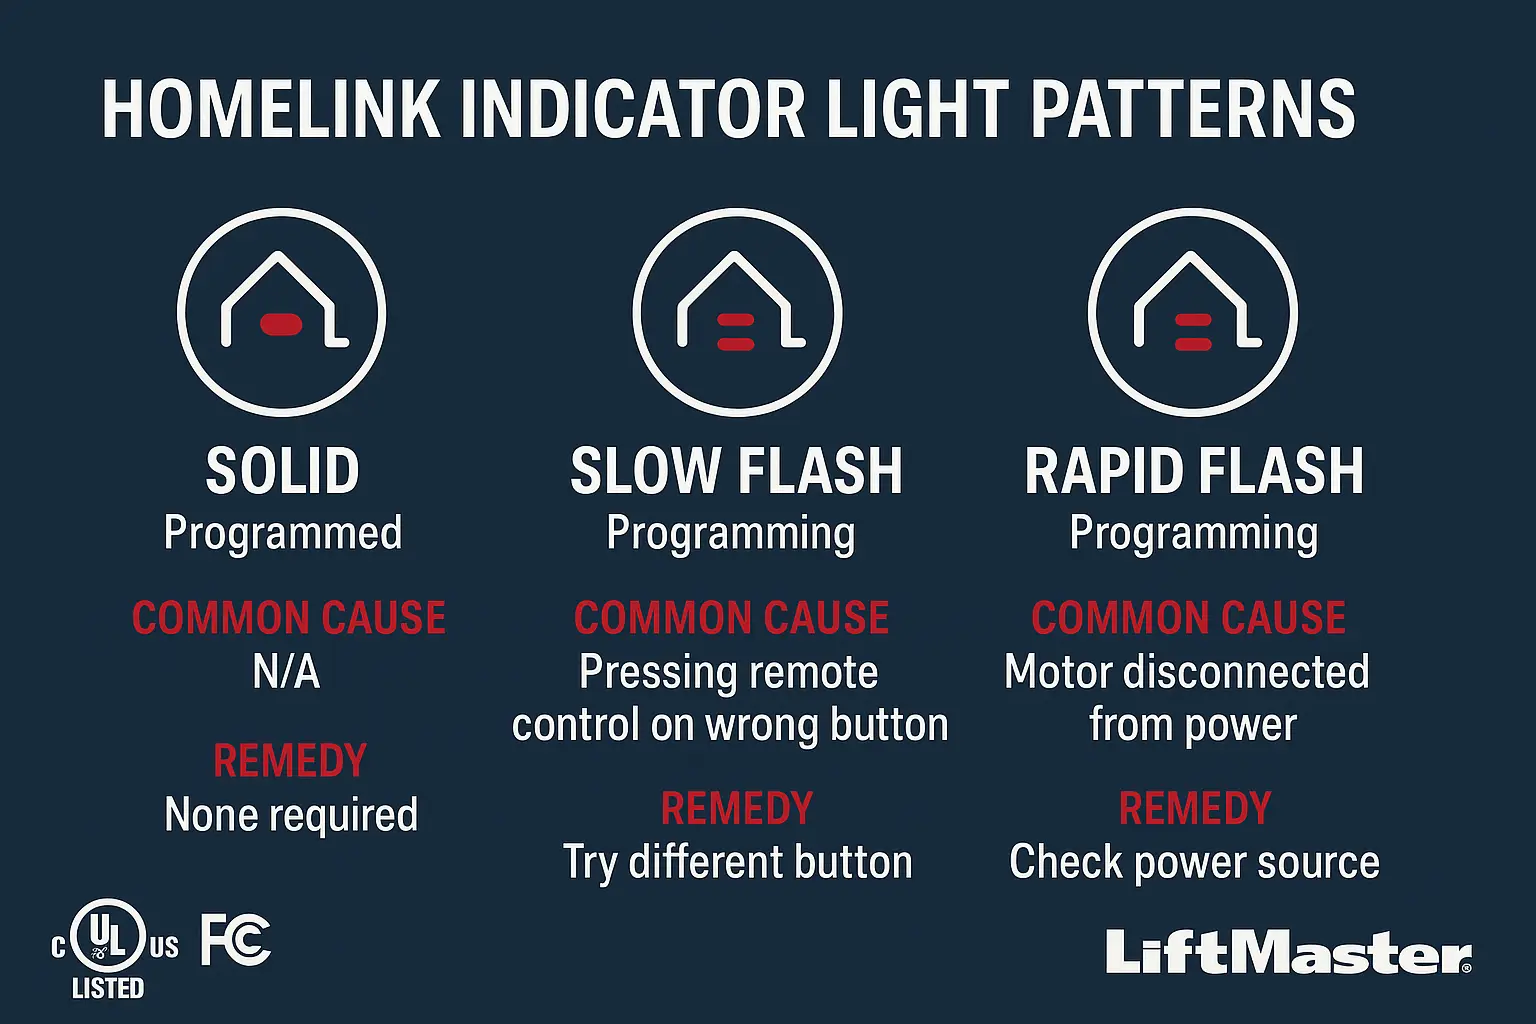
Identify and resolve common HomeLink programming issues: understanding indicator light patterns to troubleshoot with confidence.

Here’s a quick guide to what those flashes mean:

  • Solid Light: The system is in the middle of a process. Keep holding the buttons.
  • Slow, Steady Flash: This typically means the HomeLink button is in “training” mode and is ready to learn a code from a remote.
  • Rapid, Quick Flash: This usually indicates that the programming or clearing process is complete and successful.
  • No Light at All: Check if your car’s ignition is in the correct “on” or “accessory” position. The system needs power to work.

If you’ve successfully cleared the memory but still struggle with pairing, it’s worth checking your car garage opener programming compatibility to ensure your vehicle’s HomeLink version works with your new LiftMaster opener. Most do, but some older vehicles may require a compatibility bridge.

Your Next Step: Programming Your LiftMaster


With your HomeLink memory successfully cleared, you’re now ready for the main event. The next phase involves two key steps: teaching your HomeLink button the code from your LiftMaster remote, and then syncing your car directly with the opener motor unit.

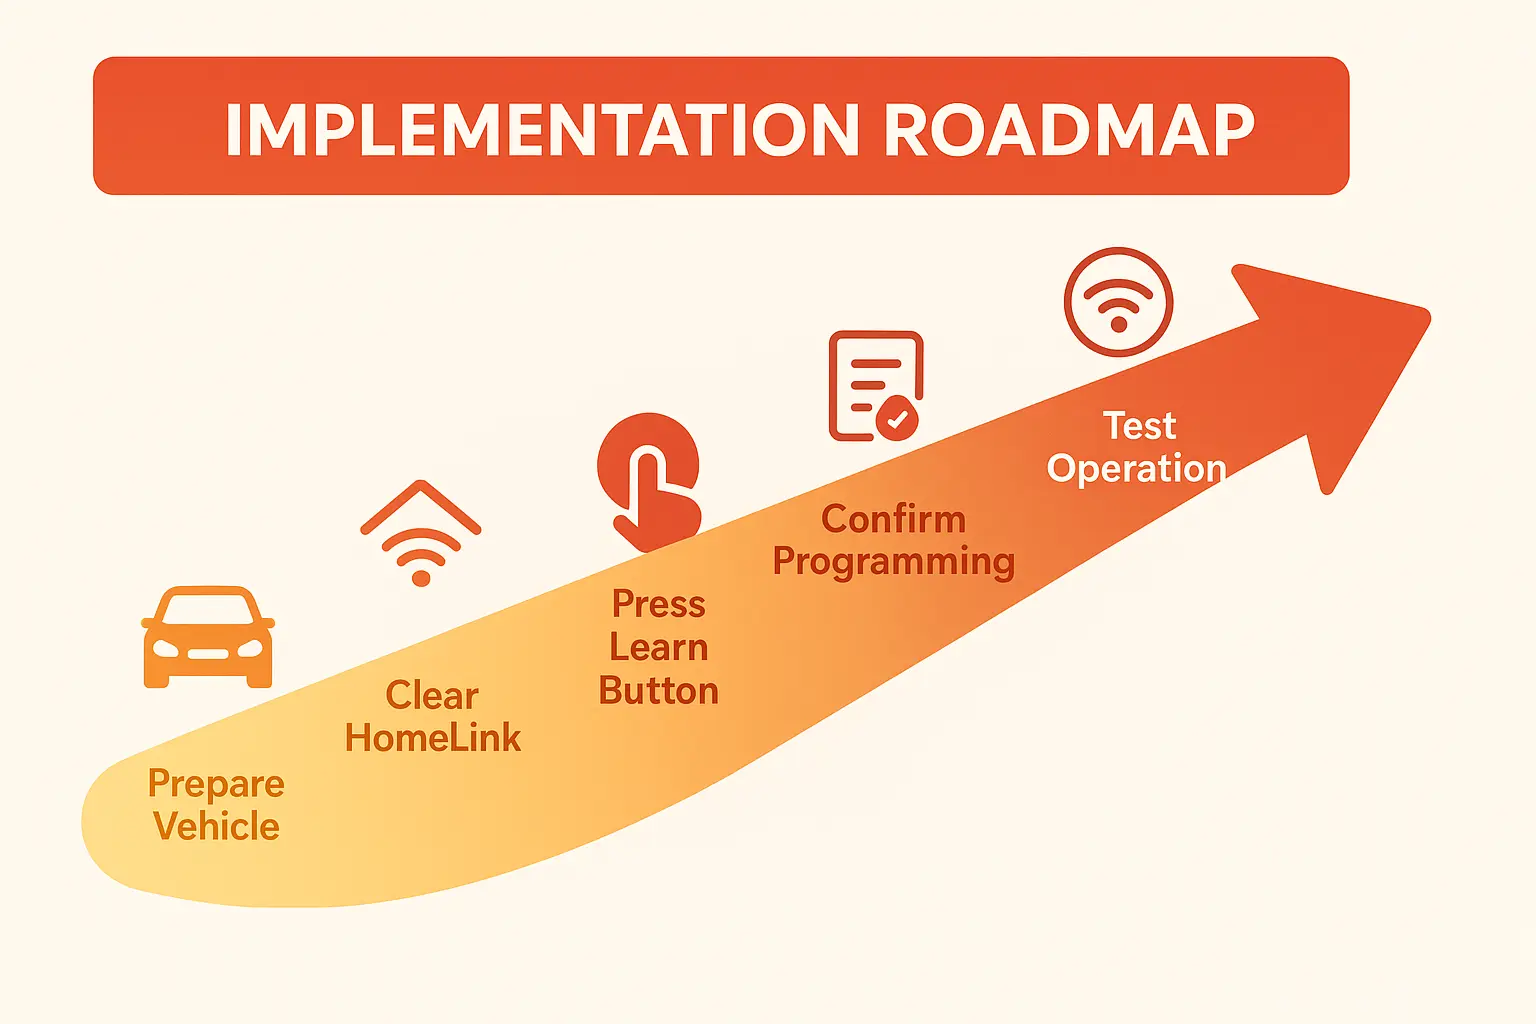
Your path to success: a clear roadmap for pairing HomeLink with your new LiftMaster opener after clearing existing codes.

This second part requires you to press the “Learn” button on your opener motor. If you’re not sure where to find it, our guide on where is the learn button on garage door opener units can help you locate it quickly.

For a complete walkthrough of the next phase, follow our detailed instructions on how to program LiftMaster garage door opener systems to your car.

Frequently Asked Questions


Do I have to clear all my HomeLink buttons to program a new one?

While some vehicles allow you to overwrite a single button, it is highly recommended to clear all buttons when programming a new garage door opener. This “factory reset” prevents any potential signal interference from old codes and provides the cleanest and most reliable connection to your new LiftMaster system.

Why won't my HomeLink clear? The light isn't changing.

This is a common issue often related to timing or power. First, ensure your car is running or in accessory mode, as the HomeLink system requires power. Second, be patient. You may need to press and hold the two outer buttons for up to 30 seconds. If it still doesn’t work, consult your vehicle’s owner manual, as some models have slightly different procedures.

Is clearing my HomeLink the same as resetting my LiftMaster opener?

No, they are two separate actions. Clearing your HomeLink erases the saved codes from your car’s memory only. It does not affect the garage door opener unit itself. Conversely, if you how to reset garage door opener motors, it will erase all paired remotes, keypads, and vehicles from the opener’s memory, but it will not clear the old code stored in your car’s HomeLink. For a new installation, you must clear the HomeLink first.

Contact / Request a Call