You pull into the driveway, tap that convenient button built into your car’s visor, and… nothing. The garage door sits there, unmoved. It’s a small frustration, but one that completely defeats the purpose of that handy, built-in remote. Whether you’ve just moved, gotten a new car, or recently installed a new garage door opener, syncing your vehicle to your garage is a common hurdle.
The good news? You can absolutely solve this yourself. Think of this guide as your knowledgeable friend who’s done this a dozen times. We’ll walk through every step, from clearing old codes to syncing new ones, and even troubleshoot the common hiccups that leave most people scrambling for a manual.
How to Reset and Reprogram Your Car’s HomeLink or Car2U Buttons
Published: May 27, 2026 | Updated: Jul 28, 2026
First, Let's Understand the Tech in Your Car
Before we start pressing buttons, let’s have a quick “aha moment” about what we’re working with. Those buttons in your car are part of a system, most commonly HomeLink or, in some Ford/Lincoln/Mercury models, Car2U. They are essentially universal remotes that learn the signal from your existing garage door opener remote.
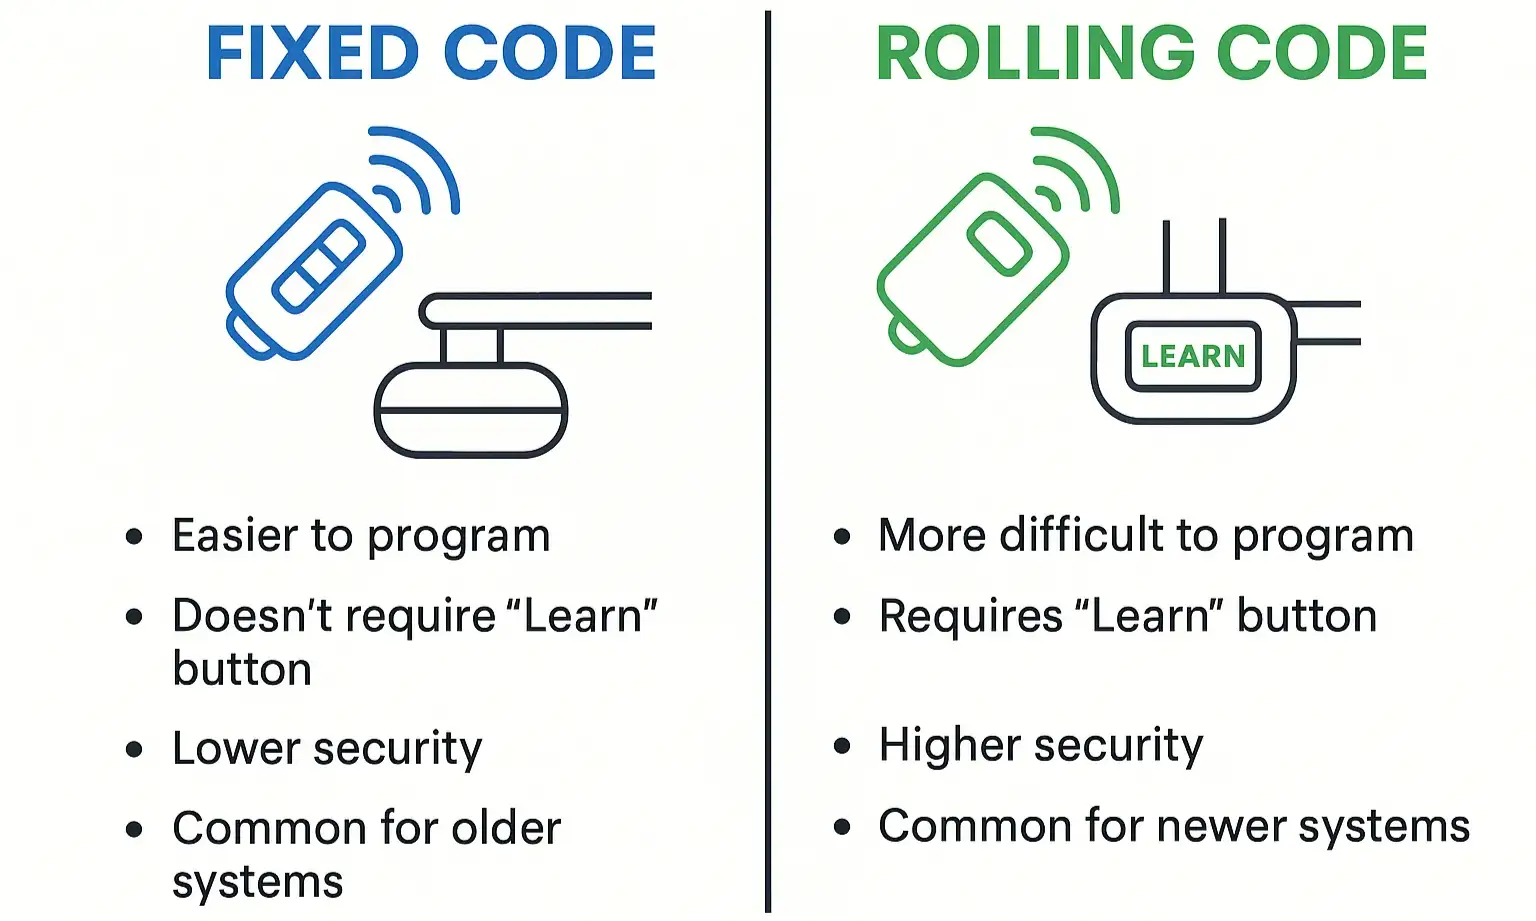
The most important concept to grasp is the difference between the two main types of security systems used by garage door openers:
The most important concept to grasp is the difference between the two main types of security systems used by garage door openers:
Understanding which system you have is the key to a frustration-free programming experience. If your opener was made in the mid-90s or later, it almost certainly uses rolling code technology.
Your Pre-Flight Checklist
Before you begin, gather these items to make the process smooth:
The Step-by-Step Programming Guide
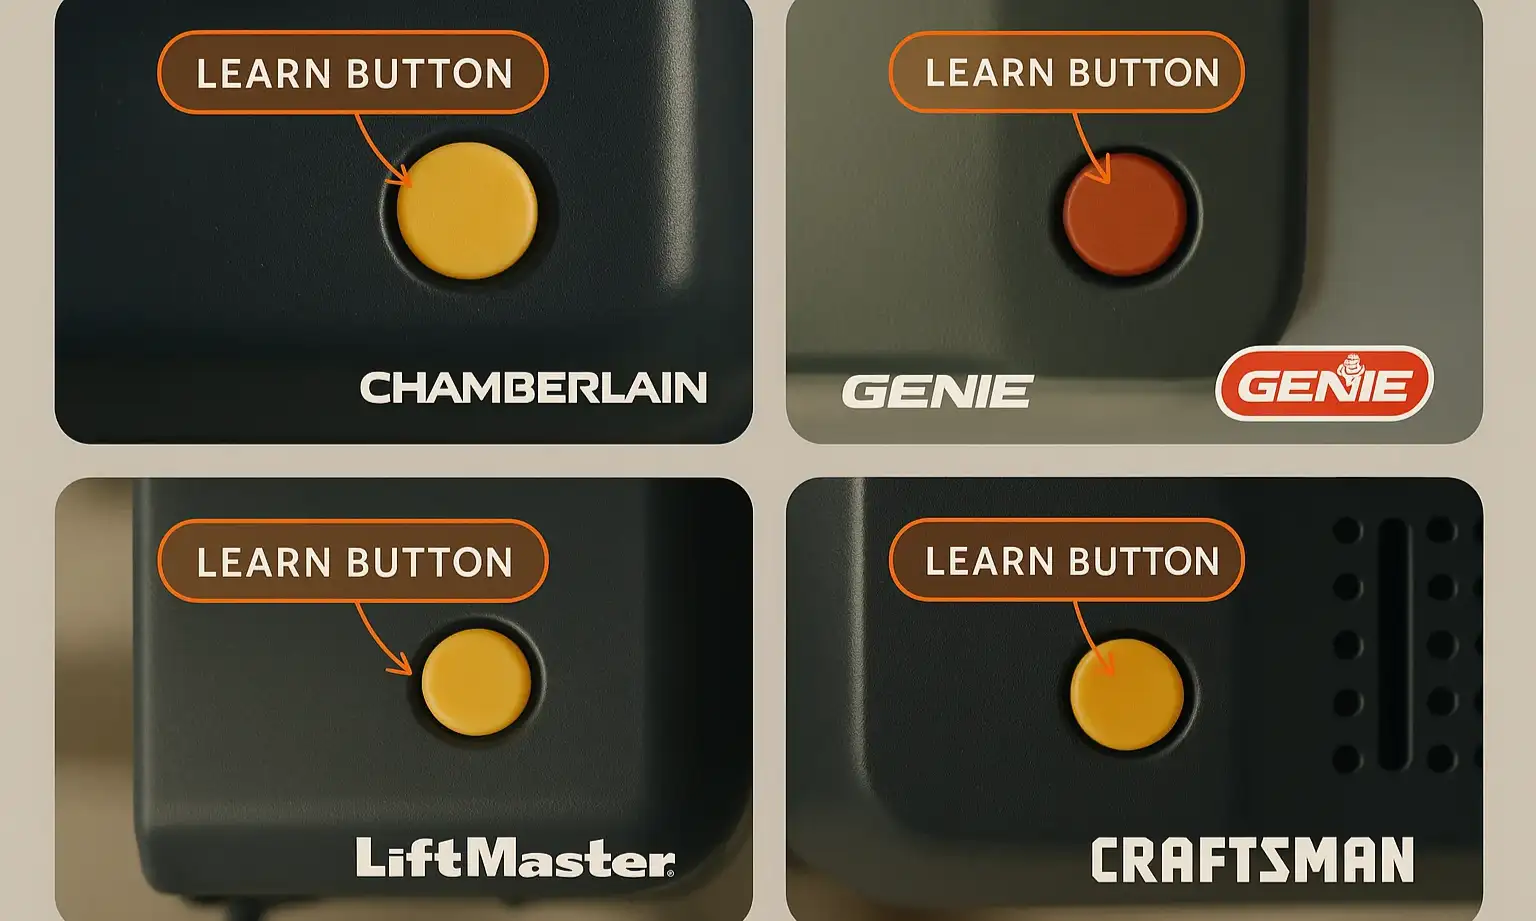
Let’s get your car and garage door speaking the same language. We’ll start by giving your car’s system a fresh start.
Step 1: Start with a Clean Slate – Clearing Your System’s Memory
Whether your car is new to you or you’re just reprogramming, it’s always best to wipe any old codes first. This prevents signal conflicts and ensures you’re starting fresh.
For a more detailed breakdown, especially if you’re dealing with multiple old devices, you might want to learn more about how to clear garage door opener in car systems completely.
Step 2: The Basic Sync (Training Your Car’s Button)
Now you’ll teach your car’s button the signal from your handheld remote.
Progress Checkpoint: At this point, press the newly programmed HomeLink button.
If the door moves: Congratulations! You have a fixed code system, and you’re all done.
If the light blinks rapidly for a few seconds and then turns solid, but the door doesn’t move: This is not a failure! It’s your car telling you, “I’ve learned the remote, but we have a rolling code system. We need to complete one more step to get synchronized with the motor.” Proceed to Step 3.
If the door moves: Congratulations! You have a fixed code system, and you’re all done.
If the light blinks rapidly for a few seconds and then turns solid, but the door doesn’t move: This is not a failure! It’s your car telling you, “I’ve learned the remote, but we have a rolling code system. We need to complete one more step to get synchronized with the motor.” Proceed to Step 3.
Step 3: The Rolling Code Connection (Using the ‘Learn’ Button)
This final step introduces your car to the garage door motor, officially adding it to the circle of trust.
Mastery: The Troubleshooting Guide
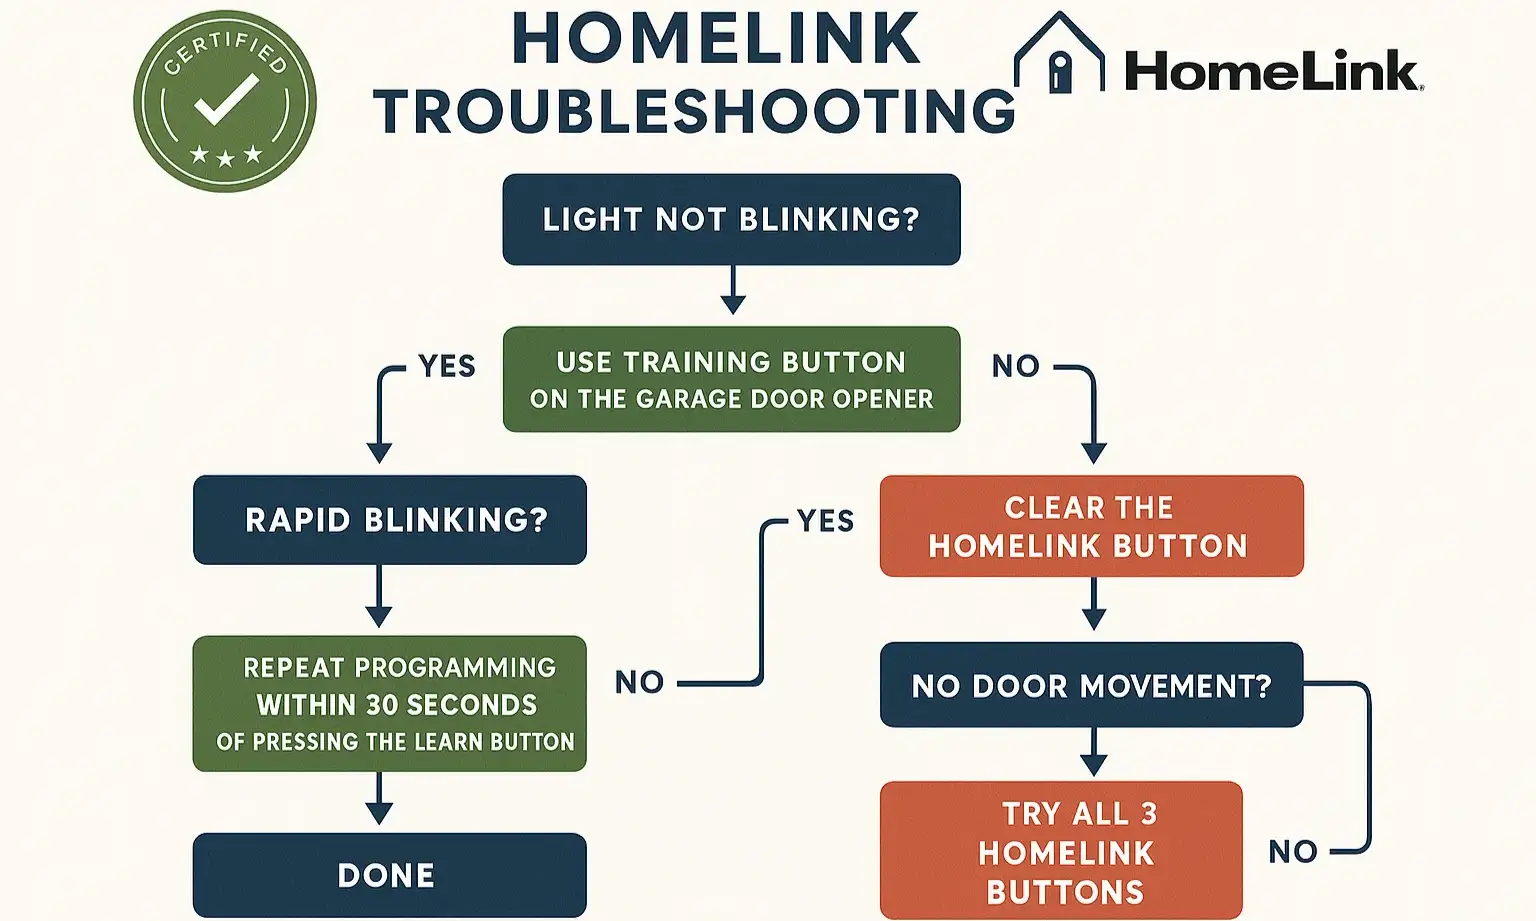
Sometimes, things just don’t go according to plan. If your car garage door opener not working after following the steps, don’t worry. Let’s diagnose the common issues.
Symptom: The HomeLink indicator light never flashes rapidly in Step 2.
Symptom: The HomeLink indicator light never flashes rapidly in Step 2.
Symptom: You completed all steps, but the door still won’t move.
Symptom: Everything stopped working after a power outage.
Your Quick-Reference Reprogramming Checklist
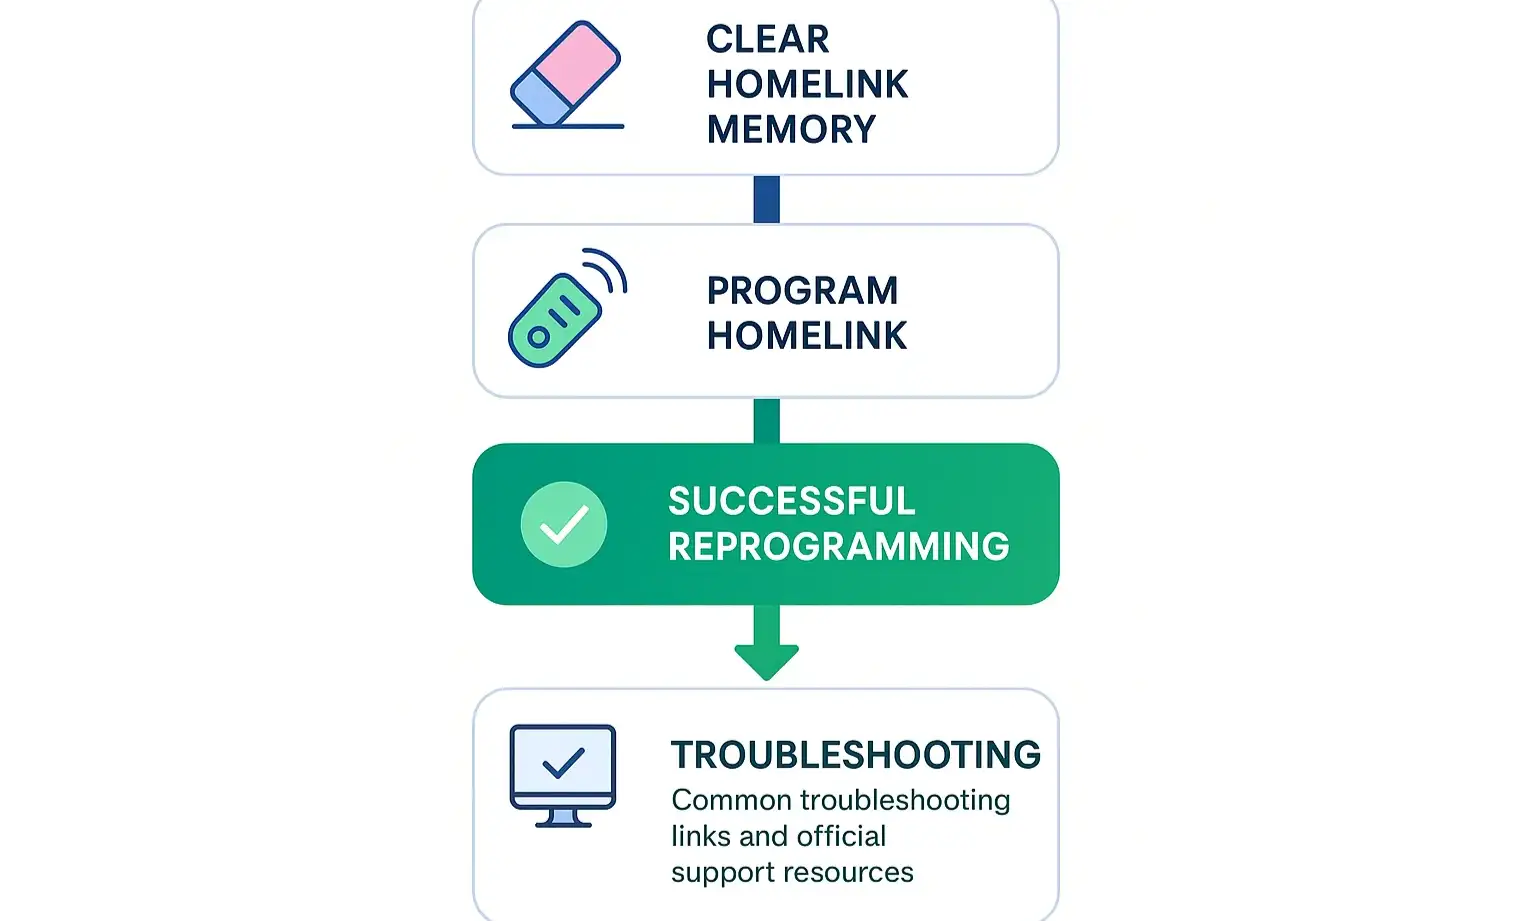
Here’s a simple roadmap you can save to your phone for quick reference.
Frequently Asked Questions
Can I program HomeLink if I lost my original garage door remote?
Unfortunately, no. The HomeLink system learns from a working remote. You’ll first need to get a replacement remote for your opener model and complete the garage door remote programming before you can teach your car.
How do I know if my garage door opener is compatible with my car’s HomeLink?
Most openers made after 1995 are compatible. HomeLink’s official website has a compatibility checker you can use. If you have a very new opener and an older car, you may need a compatibility bridge kit to make them work together.
I only want to reprogram one button, not all of them. What do I do?
You don’t need to clear the whole system. Simply follow Step 2 and Step 3 for the specific button you want to change. The new programming will override the old code for that single button.
Beyond the Button: Keeping Your System Healthy
Successfully programming your car is a great feeling of self-sufficiency. This process also highlights how your car, remote, and opener motor all work together as a system. If you found the programming process difficult or if the door’s operation seems sluggish or noisy, it could be a sign that the opener itself needs attention. Regular maintenance ensures that when you press that button, your door responds smoothly and safely every time.
If you’ve gone through all the troubleshooting steps and are still stuck, don’t hesitate to reach out to a professional. Sometimes a fresh set of expert eyes is all it takes to solve a stubborn programming puzzle or diagnose a deeper issue with the opener. The ultimate goal is a system that works for you, seamlessly and reliably, every time you pull into your driveway.
If you’ve gone through all the troubleshooting steps and are still stuck, don’t hesitate to reach out to a professional. Sometimes a fresh set of expert eyes is all it takes to solve a stubborn programming puzzle or diagnose a deeper issue with the opener. The ultimate goal is a system that works for you, seamlessly and reliably, every time you pull into your driveway.
Frequently Asked Questions
Can I program HomeLink if I lost my original garage door remote?
Unfortunately, no. The HomeLink system learns from a working remote. You’ll first need to get a replacement remote for your opener model and complete the garage door remote programming before you can teach your car.
How do I know if my garage door opener is compatible with my car's HomeLink?
Most openers made after 1995 are compatible. HomeLink’s official website has a compatibility checker you can use. If you have a very new opener and an older car, you may need a compatibility bridge kit to make them work together.
I only want to reprogram one button, not all of them. What do I do?
You don’t need to clear the whole system. Simply follow Step 2 and Step 3 for the specific button you want to change. The new programming will override the old code for that single button.