main logo

Adjusting Garage Door Opener Settings for Wood vs. Aluminum Doors


Published: May 1, 2026

Have you ever noticed how a heavy, solid wood garage door closes with a commanding thud, while a sleek aluminum one glides to a whisper-quiet stop? You might think it's just the door, but the secret is in the fine-tuning of the garage door opener. Using the same "one-size-fits-all" settings for these two very different doors is a recipe for disaster—leading to everything from annoying operational quirks to costly damage.

Generic online guides show you which screw to turn, but they miss the most important part: why and how your door’s material dictates those adjustments. This guide is different. We're going to pull back the curtain on how professionals think, turning you from a "how-to" follower into an informed diagnostician of your own garage door system.

The Big Secret: Your Opener Isn't Doing the Heavy Lifting


Before you touch a single dial on your opener, let's clear up the single biggest myth in garage door maintenance.
MYTH: Cranking up the force setting will fix a door that's heavy to lift.
FACT: This will burn out your opener motor. The problem isn't the opener; it's your springs.
Diagram of opener motor and torsion spring lift roles
Your garage door opener's motor isn't a bodybuilder. Think of it more as a guide—its real job is to manage the door's movement along the track. The true muscle of the operation is the spring system (either torsion or extension springs). These powerful springs are calibrated to perfectly counterbalance the weight of your door.
When the system is balanced, the door is essentially weightless, and the opener only needs a small amount of force to overcome inertia and friction. Understanding this changes everything about how you approach adjustments. You're not forcing the door; you're fine-tuning a beautifully balanced system.

Diagram of opener motor and torsion spring lift roles

The Pro's First Step: The 30-Second Balance Test


Adjusting your opener without first checking the door's balance is like trying to tune a guitar with a broken string. You’ll just be masking a deeper problem. Here’s how to perform the simple diagnostic test that every good technician starts with.
Safety First: Ensure the garage door is fully closed before you begin.
Infographic showing steps to test garage door balance
1. Disconnect the Opener: Pull the red emergency release cord hanging from the opener's trolley. This will disengage the door from the opener chain or belt. You should hear a click.
2. Lift the Door Manually: Now, lift the door by hand. It should feel relatively light and move smoothly without catching or grinding. If it feels extremely heavy, stop immediately—your springs are likely worn or broken and need professional service. Attempting a garage door spring installation yourself is extremely dangerous.
3. The Halfway Test: Lift the door to about waist height (three to four feet off the ground) and gently let go.

  • A perfectly balanced door will stay in place, or move just an inch or two up or down before settling.
  • If the door slams shut, your springs are weak and no longer counterbalancing the door's weight.
  • If the door flies up towards the ceiling, the springs are too tense.
This quick garage door balance test tells you the true state of your system. If your door isn't balanced, no amount of opener adjustment will provide a safe, long-term fix.
Infographic showing steps to test garage door balance

The Fine-Tuning Process: A Tale of Two Doors


Once you've confirmed your door is balanced, you can start adjusting the opener's two key settings: Travel Limit and Force.
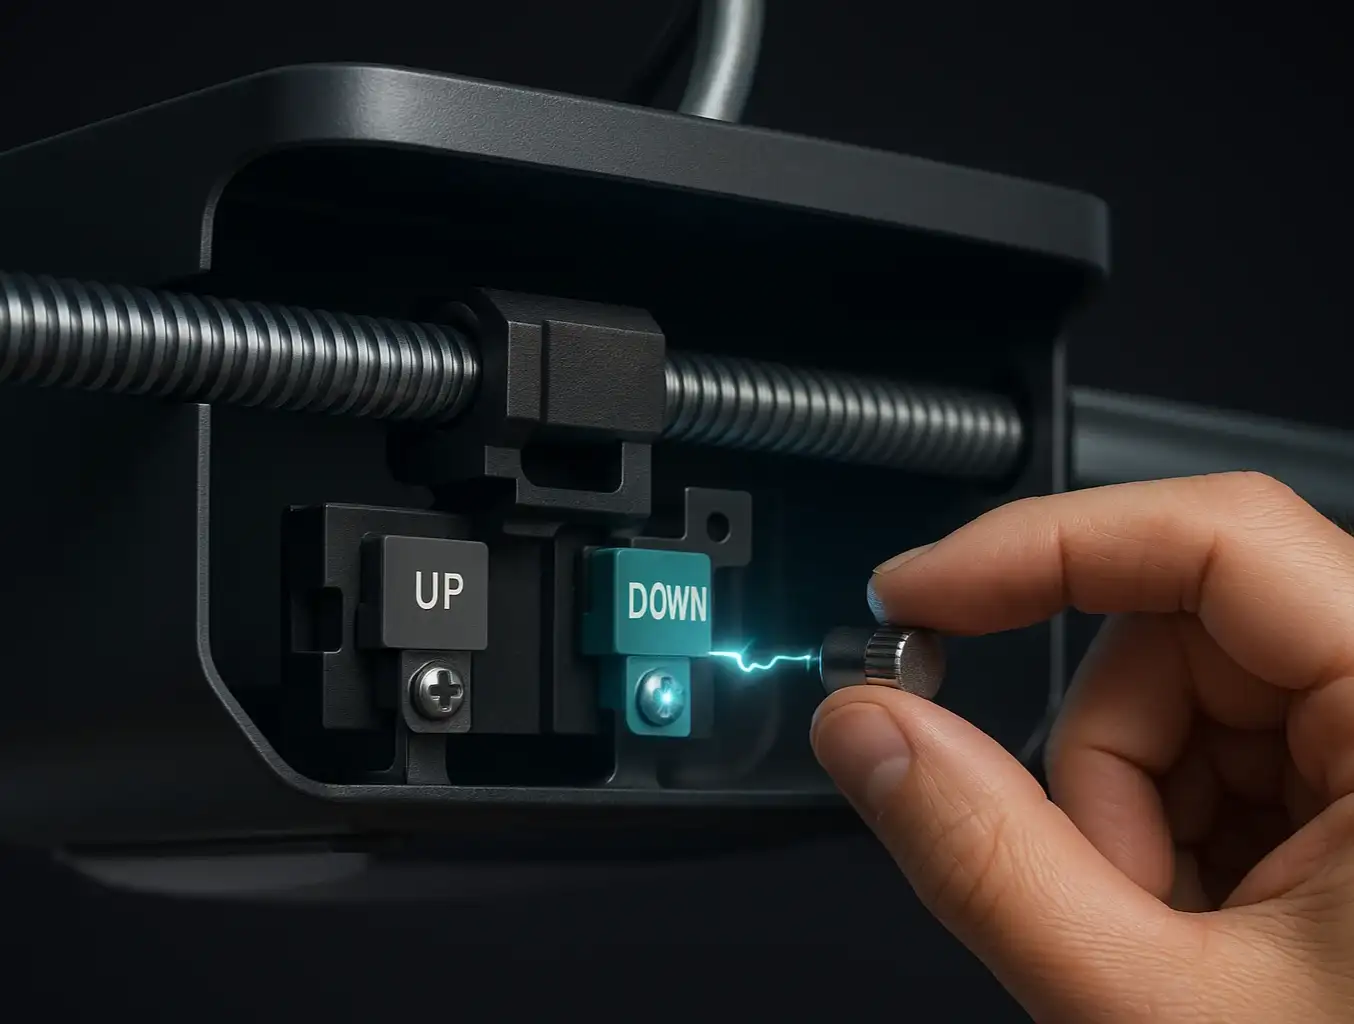
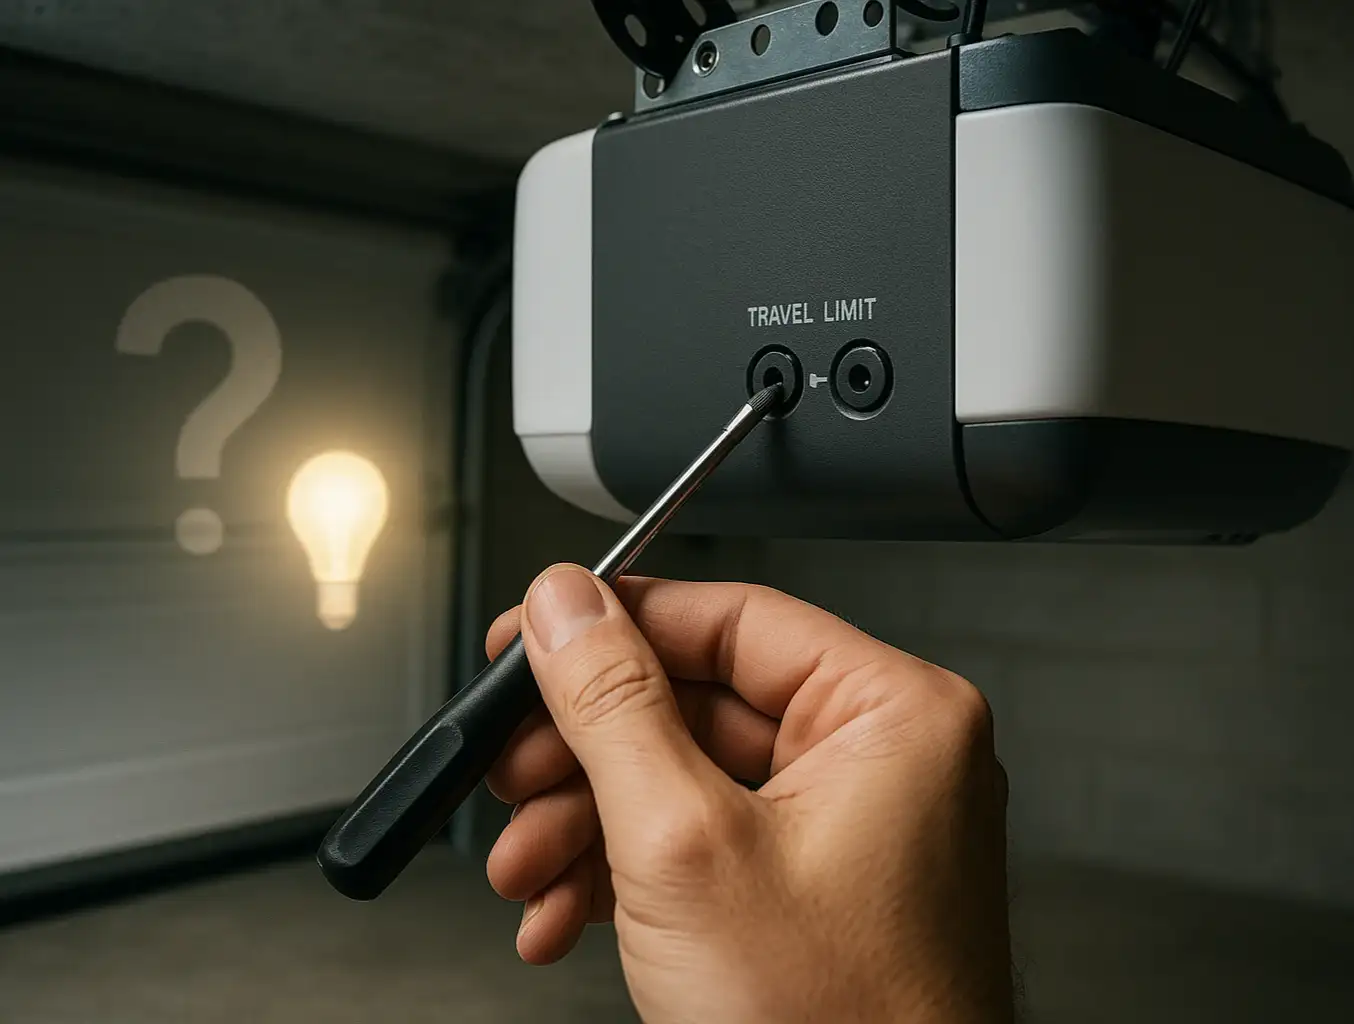
  • Travel Limit: This tells the opener how far to move the door to be fully open or fully closed. Think of it as the "stopping point."
  • Force: This dictates how much pressure the opener will exert before it stops and reverses. It’s a safety feature designed to prevent the door from crushing an object (or person).
Chart comparing adjustments for wood vs aluminum garage doors
The strategy for setting these differs dramatically based on your door's weight and material.

Part A: Tuning for Heavy Doors (Wood, Composite, Insulated Steel)

With heavy doors, the primary challenge is managing inertia and momentum. They need more energy to get started and have more force behind them when stopping.
Travel Limit Settings
UP-Limit: Set the open limit so the bottom edge of the door is level with the bottom of the garage door header. Setting it too high can cause the door to "hang" on the opener, putting stress on the top panel and the motor. A properly set garage door limit switch is key.
DOWN-Limit: A heavy door carries significant momentum on its way down. You want to set the closing limit so the door stops the instant the bottom weatherseal makes firm contact with the floor. If it's set too low, the door will slam into the concrete, which can damage the door and the opener. If it's too high, it won't create a weatherproof seal.
Force Settings
UP-Force (Opening): A heavy door requires more initial force to overcome its static weight (inertia). You may need to set the opening force slightly higher than the factory default. Increase it in small increments until the door opens smoothly without hesitating or reversing.
DOWN-Force (Closing): Be conservative here. Gravity is already helping! The closing force only needs to be high enough to ensure a complete close without reversing prematurely. Setting it too high can defeat the purpose of the safety reversal feature. If you're having issues with reversal, explore other causes before simply adjusting force on your garage door opener.

Part B: Tuning for Lightweight Doors (Aluminum, Fiberglass)

With lightweight doors, the main goal is to prevent physical damage. Their panels are much more susceptible to bending or buckling under excessive force.
Travel Limit Settings
UP-Limit: Same principle as a heavy door—level with the header. Because the door is light, there's less risk of it stressing the opener if set slightly too high, but precision is always best.
DOWN-Limit: Your focus is on a gentle close. Set the limit so the door closes until the weatherseal compresses slightly, creating a good seal. An over-set limit will cause the opener to push down on the door after it has already stopped, which can bend the thin panels over time.
Force Settings
UP-Force (Opening): Use the minimum force necessary. These doors have very little inertia. Start with the lowest setting and only increase it if the door fails to open fully.
DOWN-Force (Closing): This is the most critical setting. You need just enough force for the door to close securely, but not so much that it could damage the door if it encounters even minor resistance. A lightweight door with too much closing force can easily buckle if it closes on a small object.

Chart comparing adjustments for wood vs aluminum garage doors

Advanced Troubleshooting Chart


Is your door acting up? Before you start turning dials, you can diagnose the likely cause based on your door's material.

Door Reverses When Closing

When your door reverses while closing, a heavy wood door usually indicates that the down-force is set too low or there is a binding spot in the tracks preventing the door's momentum from carrying it through. If you have a lightweight aluminum door, the down-force might actually be correct, but it could be hitting a minor obstruction. A loose chain can also cause an aluminum door to reverse, so it is a good idea to check if your garage door chain has too much slack.
Chart to diagnose garage door issues by door weight and type

Door Stops and Reverses While Opening

If the door stops and reverses while opening, a heavy wood door likely has the up-force set too low to overcome its own inertia, or the springs are failing and causing the door to be unbalanced. For a lightweight aluminum door, an incorrectly low up-force setting or catching on misaligned tracks and weatherstripping are the most common culprits.

Door Slams Shut

A door that aggressively slams shut requires immediate attention. With a heavy wood door, this usually means the down-travel limit is set too low, causing the opener to drive the door directly into the ground instead of stopping it smoothly. However, if a lightweight aluminum door slams shut, it is severely out of balance, which almost always points to a broken spring. In this case, you should disconnect the opener and call a professional immediately.

Opener Motor Runs, But the Door Doesn't Move

Sometimes the opener motor runs, but the door refuses to move. Whether you have a wood or aluminum door, this often means the trolley has simply been disconnected from the chain or belt. On lightweight aluminum doors, it could also mean the gear and sprocket assembly inside the motor unit has been completely stripped.

Gap Under the Door When Closed

Finally, if you notice a gap under the door when it is fully closed, the diagnosis is the same regardless of what the door is made of. The down-travel limit is simply set too high and needs to be adjusted so the door can properly reach the floor.

Chart to diagnose garage door issues by door weight and type

Need more information?

Final Safety Checks & Next Steps


After making any adjustment, you must perform two critical safety tests:

  1. The 2x4 Reversal Test: Place a 2x4 flat on the ground in the center of the door's path. When you close the door, it should touch the wood and immediately reverse. If it doesn't, the down-force is too high. Decrease it and test again.
  2. The Manual Reversal Test: As the door is closing, stand clear and use your hands to apply gentle upward pressure to the bottom of the door. The door should immediately stop and reverse.
Completing these checks is a non-negotiable part of a responsible adjustment. A complete garage door safety checklist can help you spot other potential issues before they become serious problems.
By understanding the physics of your specific door, you can tune your opener with the precision and care it deserves, ensuring years of safe, reliable, and smooth operation.

Frequently Asked Questions


How do I know what size garage door opener I need for my door?

The opener's horsepower (HP) should be matched to your door's weight and size. A standard aluminum door might only need a 1/2 HP motor, while a heavy, solid wood carriage door often requires a 3/4 HP or even 1 HP opener to handle the initial inertia. If you're wondering what size garage door opener do I need, it's best to consult a guide or a professional.

Can I just set the force to maximum to avoid problems?

Absolutely not. This is dangerous and counterproductive. The force setting is a safety feature, not a power booster. Setting it to maximum disables this safety feature and puts immense strain on your opener's motor and gears, leading to premature failure. The goal is always to use the minimum force necessary for reliable operation.

My door reverses for no reason. Is it always a force setting issue?

Not always. While an incorrect force setting is a common cause, other issues can trigger the safety reversal. These include: misaligned safety sensors at the base of the door, binding or friction in the tracks, an unbalanced door, or even direct sunlight hitting one of the sensors. Always check the simple things first.

How often should I check my garage door's balance and settings?

It's a good practice to perform the balance test twice a year—once in the spring and once in the fall. Temperature changes can affect the tension of your springs. If you notice any change in your door's operation, the balance test should be your first diagnostic step.

You may also like


blog photo

Understanding the Role of Up and Down Limit Switches

Have you ever pressed the button for your garage door and watched it stop an inch from the ground, leaving an annoying gap? Or maybe it closes perfectly but the motor keeps humming for a few seconds, sounding like it doesn’t know when to quit. These common frustrations often point to one of the most important yet least understood parts of your opener: the limit switches. Think of limit switches as the silent conductors of your garage door orchestra. Like setting an alarm clock, you tell them exactly when the motor needs to “wake up” (start moving) and “go to sleep” (stop). When these settings are off, the entire performance falls flat. Understanding how they work is the first step to solving some of the most common garage door problems and ensuring your door operates smoothly and safely.

blog photo

Troubleshooting Garage Door Opener Force Reversal Issues

You did everything right. You looked up a guide, grabbed a screwdriver, and tweaked the settings on your garage door opener. But instead of fixing the problem, you made it worse. Now, the door hits the floor and immediately reverses, or it struggles and gives up halfway. It’s a frustrating scenario that leaves many homeowners feeling stuck. If this sounds familiar, take a deep breath. You’re not alone, and you haven’t broken anything. You’ve just stumbled upon one of the most misunderstood aspects of garage door mechanics. The problem isn’t that you didn't adjust it enough—it’s that you likely adjusted it in the wrong direction. This guide is for you. It’s the next chapter for when the basic fixes fail. We’ll walk through why this happens and how to perform a simple recalibration that solves the problem for good.