How To Integrate Smart Tech into Your Bespoke Garage Door
Published: Jul 7, 2026
You’ve invested in a bespoke garage door—a stunning piece of architecture that elevates your home's curb appeal. Whether it's the rich grain of solid cedar on modern carriage garage doors or the clean lines of flush-panel aluminum, it's a statement. The last thing you want is for that carefully curated design to be marred by a pair of clunky plastic sensors and a tangle of visible wires.
For years, the conversation around smart garages has been dominated by off-the-shelf DIY kits. While great for standard doors, they completely overlook the aesthetic demands of high-end design. This guide fills that gap. We'll explore the art and science of seamless integration, showing you how to hide the hardware, conceal the wiring, and choose the right system to make your garage door both brilliant and beautiful.
Smart Garage Tech 101: Moving Beyond the Standard Kit
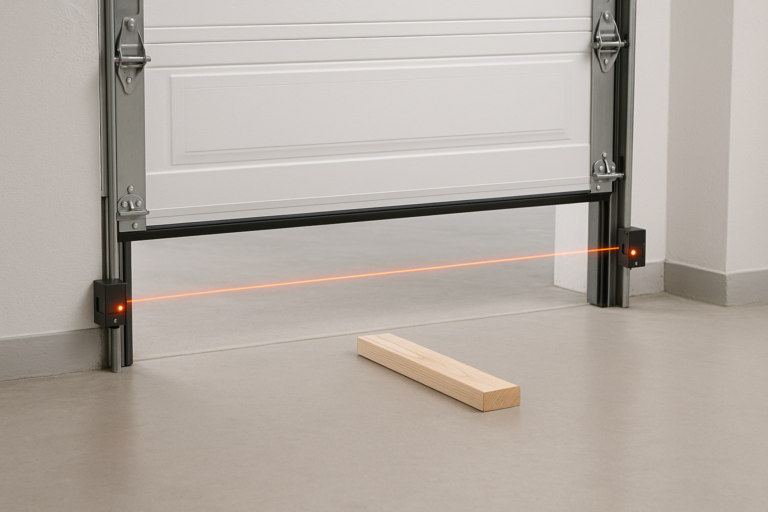
Most people are familiar with the standard safety sensors that come with any modern opener. But if you've ever wondered how do garage door safety sensors work, they simply project an infrared beam across the opening; if anything breaks the beam, the door reverses.
For a bespoke installation, however, we need to think beyond these basic components and consider more sophisticated options designed for discretion:
- Flush-Mount Sensors: These are designed to be recessed into the door frame or even the floor, sitting perfectly flush with the surface for a nearly invisible look.
- Micro-Sensors: Significantly smaller than their standard counterparts, these can be discreetly placed in tight spaces, making them ideal for minimalist designs or doors with extensive glass panels.
- Magnetic Reed Switches: Often used in high-end home security, these can be embedded within the door and frame to detect if the door is open or closed without any visible external parts.
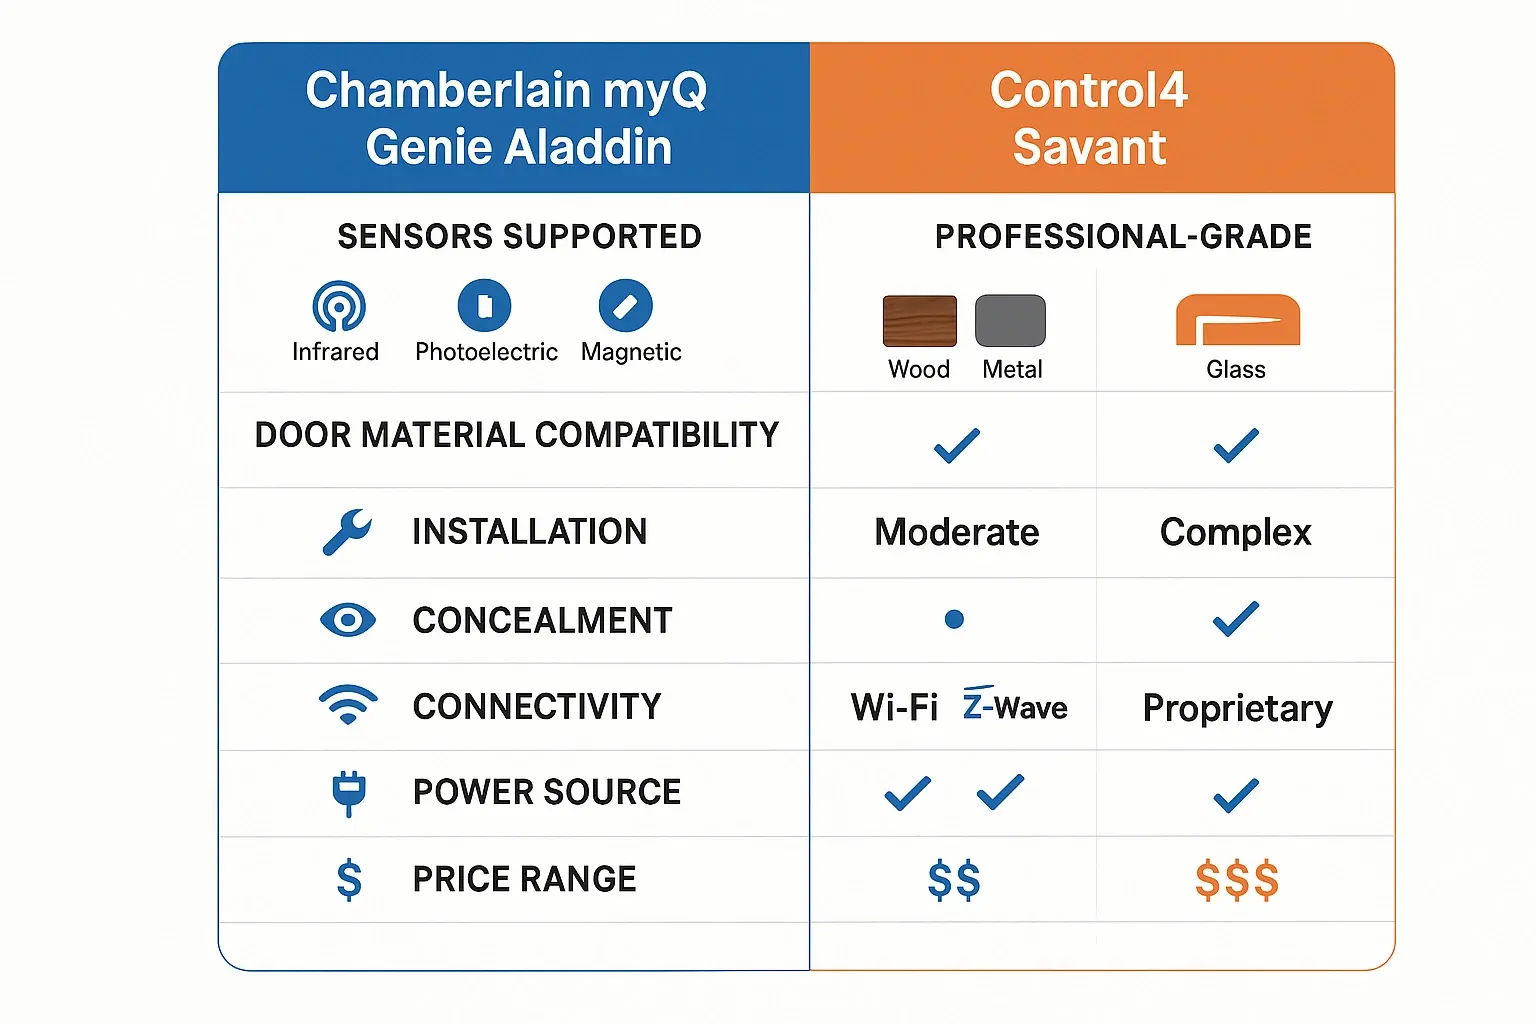
- Professional-Grade Controllers: Unlike consumer kits that attach to your existing opener, professional systems can integrate directly with whole-home automation platforms like Control4 or Savant, offering more robust and reliable performance.
The Art of Integration: Hiding the Hardware
Sensor Concealment Techniques
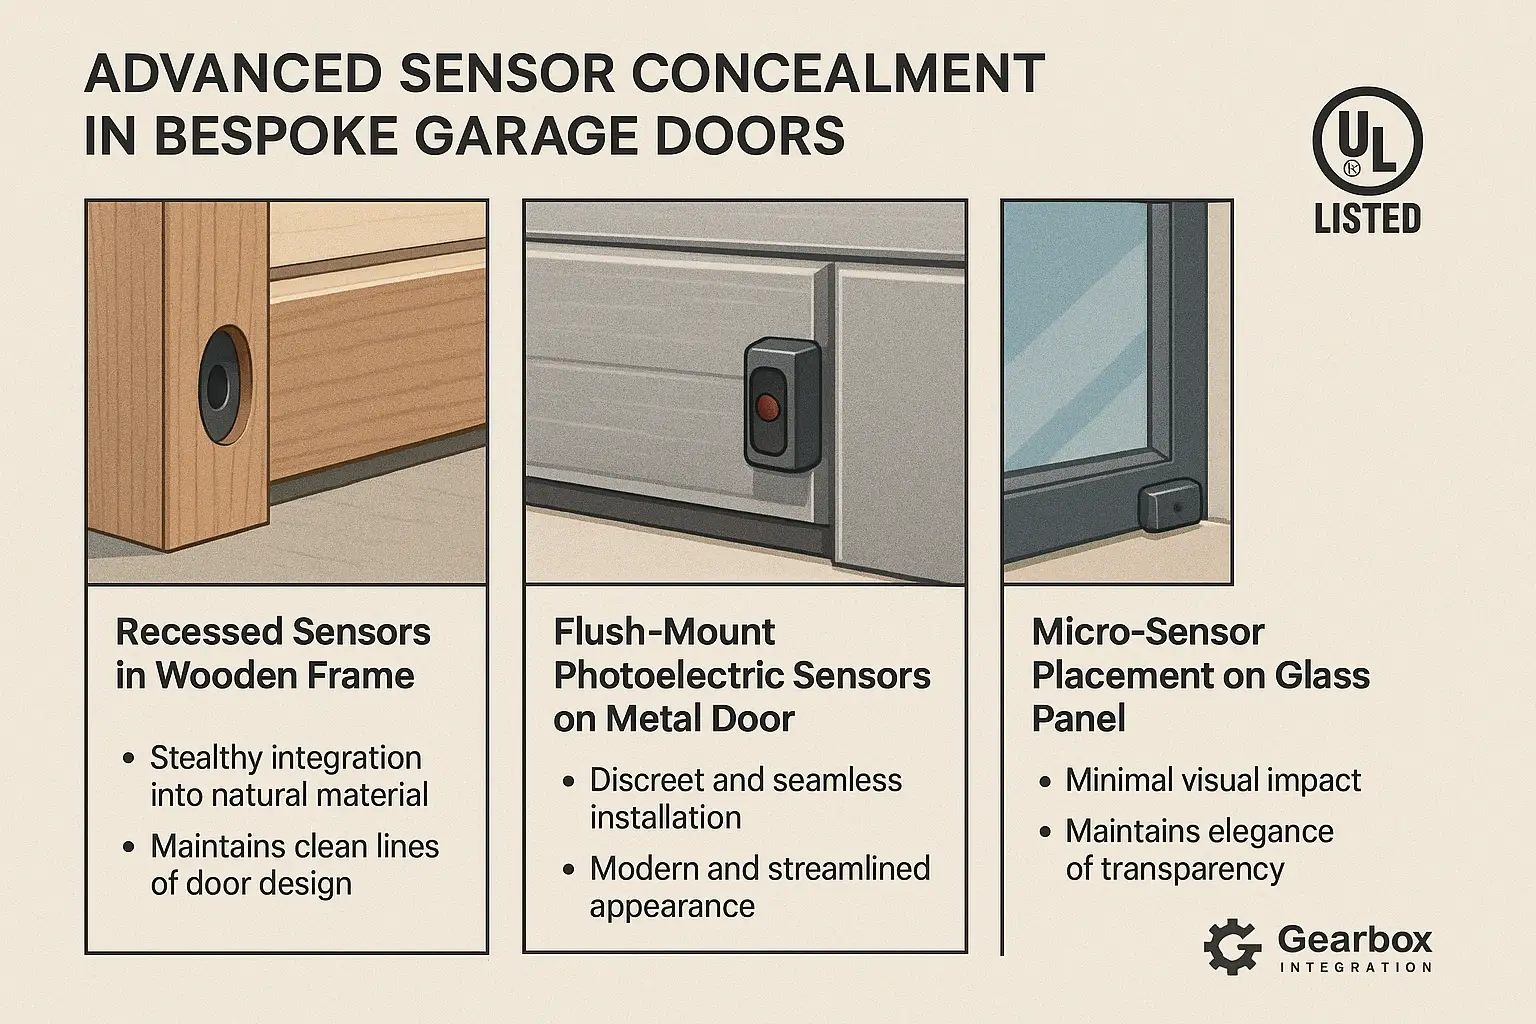
• Recessing into Frames: For wood or composite door frames, a skilled installer can create a small cavity to recess the sensor, so only the tiny lens is visible. This is the gold standard for concealment.
• Flooring Integration: In new builds or major renovations, flush-mount sensors can be set directly into the concrete floor and the bottom of the door jamb, making them completely disappear from the vertical sightline.
• Color-Matching and Painting: When recessing isn't possible, some smaller sensors can be painted to match the exact color of the door frame, using paint formulated for plastics to ensure it adheres properly.
Invisible Wiring Solutions
• Grooved Channels: For solid wood doors and frames, a small channel or "rabbet" can be carved into the back of the trim to lay the wire in, which is then covered or caulked for a perfectly smooth finish.
• Pre-Wired Doors: High-end door manufacturers sometimes offer the option to run wiring for sensors or locks through the panels during construction, providing the cleanest possible solution.
• Wireless and Battery Power: While hardwiring is always preferable for reliability, some newer battery-powered sensors can communicate wirelessly with the hub, eliminating the need for wiring altogether. However, this requires periodic battery changes and is a trade-off between convenience and maintenance.

Material-Specific Guides
• Wood: Wood is the most forgiving material, as it can be routed, drilled, and painted to conceal sensors and wires effectively. The primary consideration is ensuring any modifications are properly sealed to prevent moisture intrusion.
• Steel & Aluminum: Metal doors offer less flexibility for concealment within the door itself. The focus here shifts to the surrounding frame and trim. Routing wires behind the frame and using minimalist, color-matched sensors is the best approach. You must also consider the material's garage door abrasion resistance when mounting any hardware.
• Glass: Full-view glass doors present the biggest challenge. Here, micro-sensors installed discreetly on the thin aluminum frame are essential. Wiring must be meticulously run along the very edge of the frame, often hidden in the track assembly itself.
• Composite: Similar to wood, composite materials are easily workable. They won't rot or warp, making them an excellent and stable choice for integrating recessed hardware.
Choosing the Right System: From DIY Kits to Pro Integration
• DIY Smart Add-Ons (e.g., Chamberlain myQ, Genie Aladdin Connect): These are add-on kits that work with most existing garage door openers.
- Best for: Standard garage doors where aesthetics are not the primary concern. They are a cost-effective way to add smart functionality.
- Limitations: They rely on standard, visible sensors and may have less reliable connectivity. Learning how to connect garage door opener kits is straightforward, but they offer little customization for concealment.
• Professional Smart Home Systems (e.g., Control4, Savant, Crestron): These systems are installed by certified integrators and tie into your entire smart home ecosystem.
- Best for: Custom homes and bespoke garage doors where seamless integration is paramount. They work with a wider range of discreet, pro-grade sensors and offer rock-solid reliability.
- Limitations: They represent a higher investment and require professional installation.
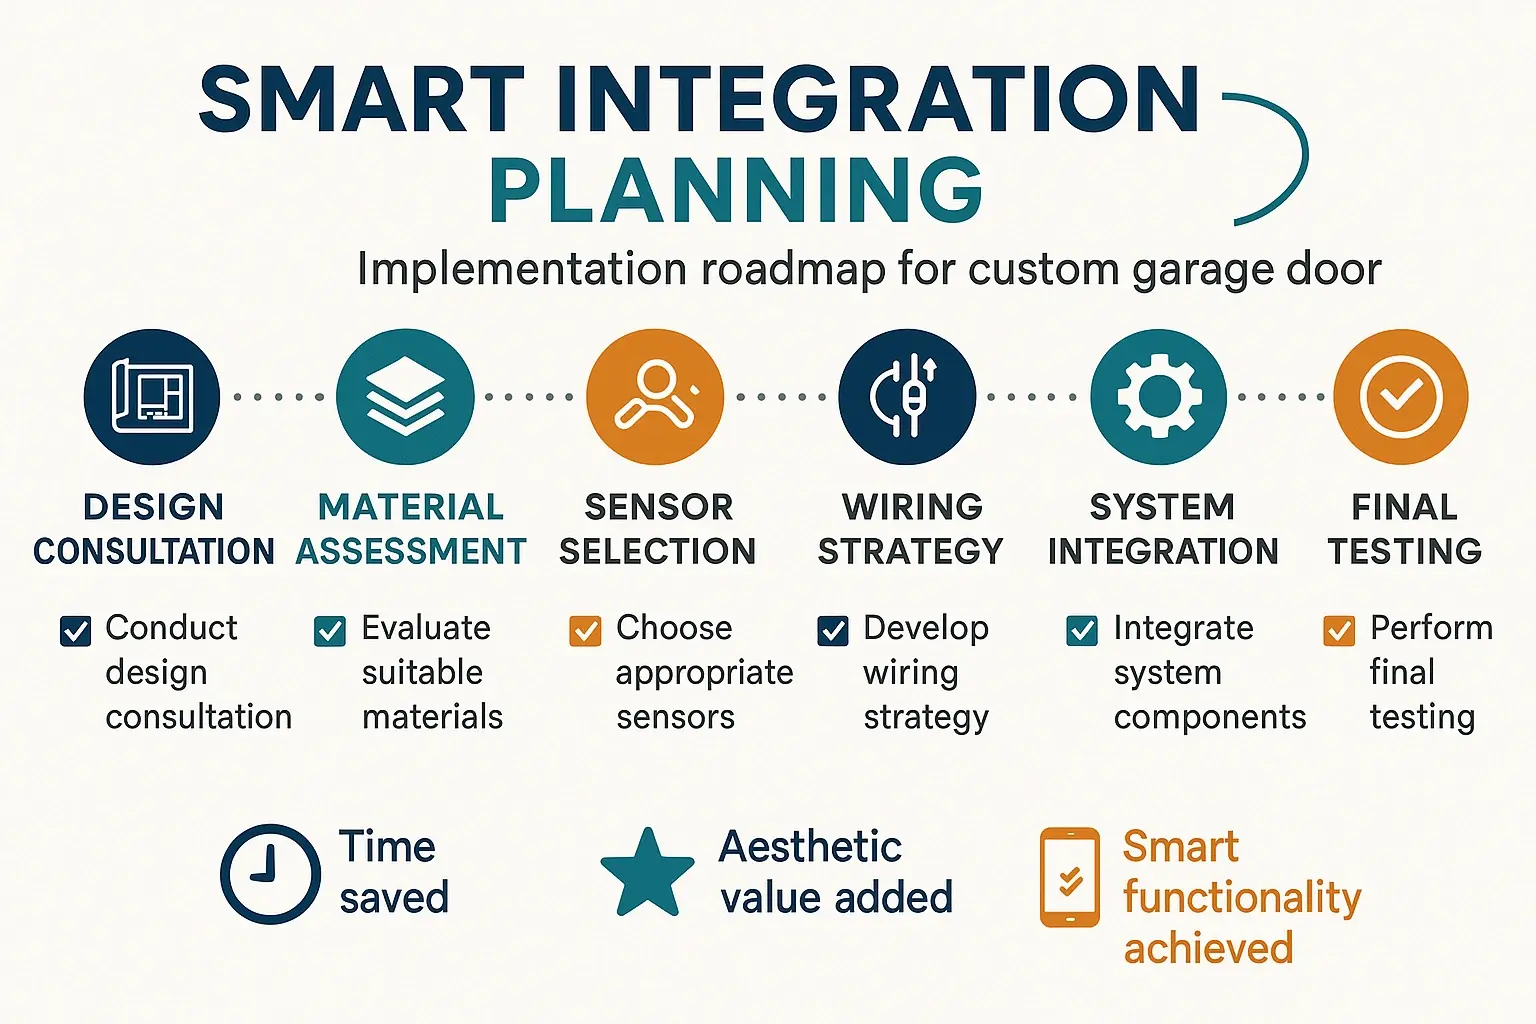
Design & Planning Checklist
- Define Your Goals: Do you just want remote open/close, or do you need integration with lights, security cameras, and locks?
- Select Your System Early: Choose between a DIY solution or a professional integrated system before finalizing door and frame construction.
- Plan Wiring Runs: Where will the power for the opener and sensors come from? Mark locations for low-voltage wiring runs during the framing stage.
- Discuss Sensor Placement: Talk to your installer about the best methods for concealment (recessing, color-matching) based on your door material and frame design.
- Consider Network Connectivity: Ensure you have a strong Wi-Fi signal in your garage. For detached garages, you may need a network extender or a dedicated access point.
- Review Opener Compatibility: Confirm that your chosen smart system is compatible with your garage door opener motor, especially if you're using a specialty opener (e.g., a wall-mount jackshaft opener).
Troubleshooting for Custom Installations
• Recessed Sensor Misalignment: If a recessed sensor isn't working, use a laser level to ensure the embedded sensors are aimed perfectly at each other. Even a slight angle can interrupt the beam.
• Signal Interference with Metal Doors: Solid metal or insulated steel doors can sometimes interfere with the radio frequency of the smart controller. Ensure the controller's antenna is positioned correctly and is not obstructed by metal components.
• Power Issues: In a custom build, it's easy to overlook where the garage door opener power is sourced from. If the system is unresponsive, check the specific circuit breaker it's connected to, which may be different from the main garage power.
Frequently Asked Questions (FAQ)
Can I make my existing custom garage door smart?
Are hidden sensors as safe and reliable as standard ones?
Do smart garage doors work during a power outage?
What is the benefit of a professional system over a DIY kit?
The Best of Both Worlds
For complex projects involving bespoke doors and integrated systems, expert guidance is key. If you're looking for garage door installation near me and want to explore seamless smart home solutions, consulting with a specialist can ensure your vision becomes a reality.
You may also like