
Precision Adjustments & Operational Calibration: The Complete Guide to Garage Door Health


Published: Oct 12, 2026

When your garage door starts acting up—making jarring noises, reversing unexpectedly, or forcing the central rail to bow—it is easy to feel stuck between two bad options. You are forced to balance the safety risks of a heavy moving door against the fear of overpaying for a basic repair.

The truth is that a garage door opener is a finely tuned system. When it loses its calibration, it doesn’t just run louder; it active damages its own mechanical components. To help you find the safest, most efficient path back to smooth operation, this guide breaks down how to diagnose, isolate, and calibrate your system like a professional.

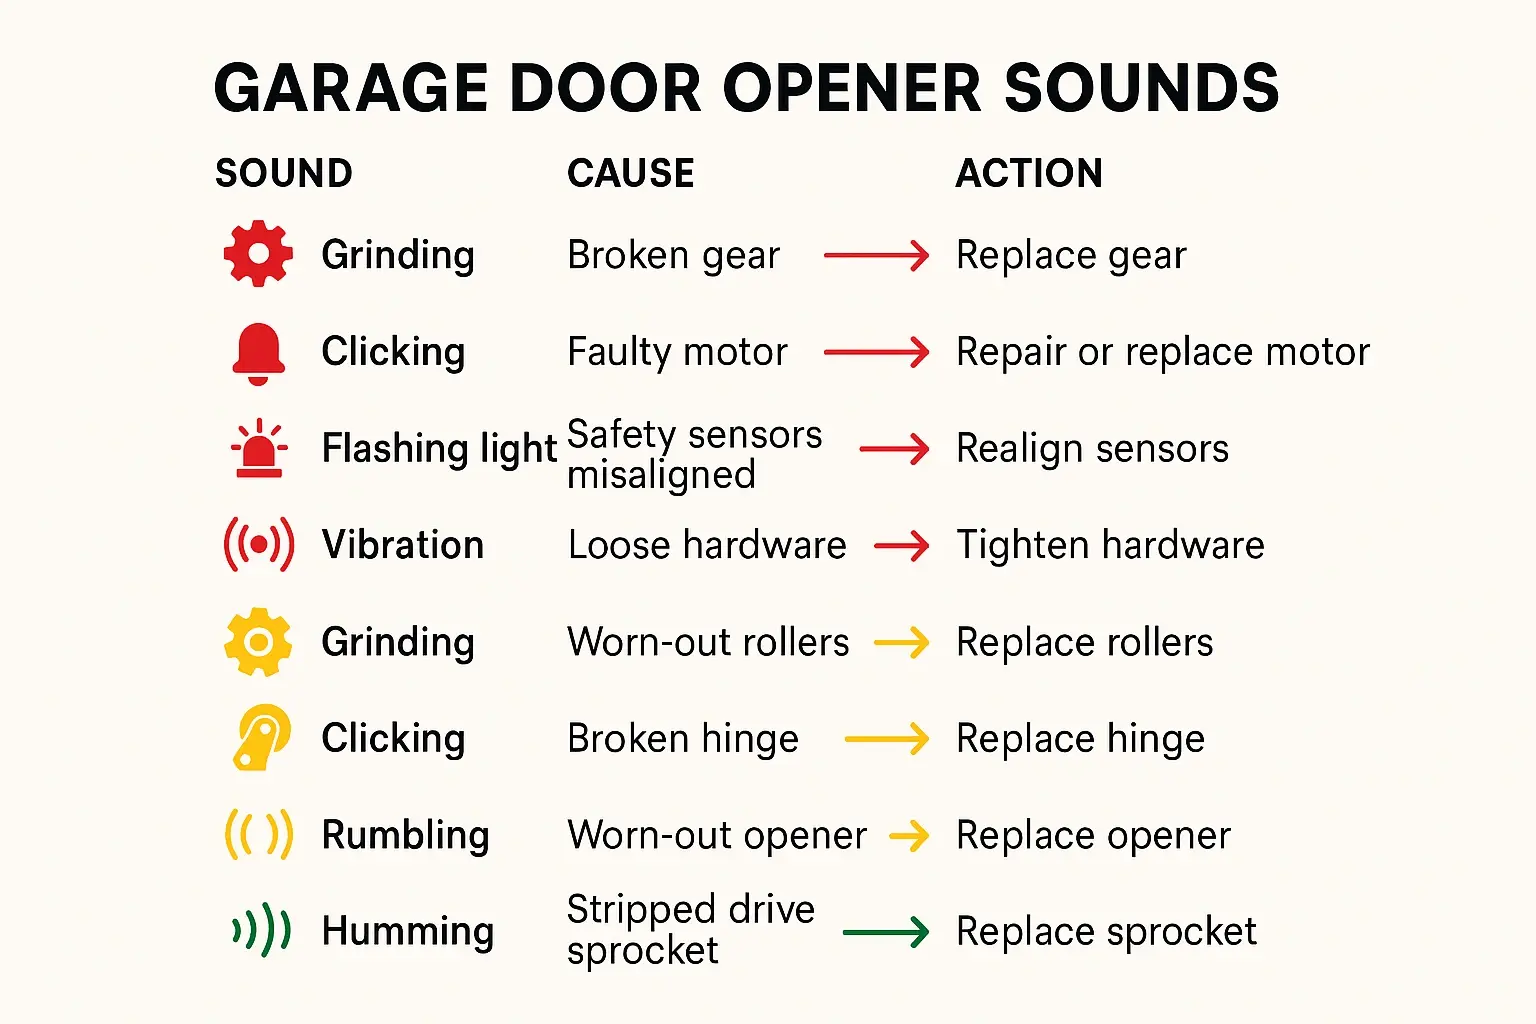
Interactive Diagnostic Triage (Noise & Symptom Matrix)


Before turning any dials or pushing programming buttons, you must translate what your system is telling you. Many homeowners mistake mechanical failures for electronic limit errors. Use this matrix to identify the likely root cause of your opener’s issue.

What You Hear/See Mechanical Root Cause Primary Action
Metal-on-metal grinding Stripped internal plastic gears or a loose chain Inspect gear kit; resolve garage door opener chain loose symptoms immediately.
Repeated clicking, motor stalls Seized motor shaft, faulty capacitor, or over-extended travel limit Isolate the door from the opener to check physical balance.
Two clicks + flashing work lights (10 times) Momentary interruption in the photo-eye safety loop Clean and realign the receiving and transmitting sensors.
Slapping or intense rail vibration Slack chain tension or loose structural mounting brackets Adjust the trolley tension; check for a garage door chain off track.

Diagnostic Triage MatrixThis diagnostic triage visual helps you instantly connect the noises your garage door opener makes with specific mechanical issues and the precise calibration steps needed to fix them safely.

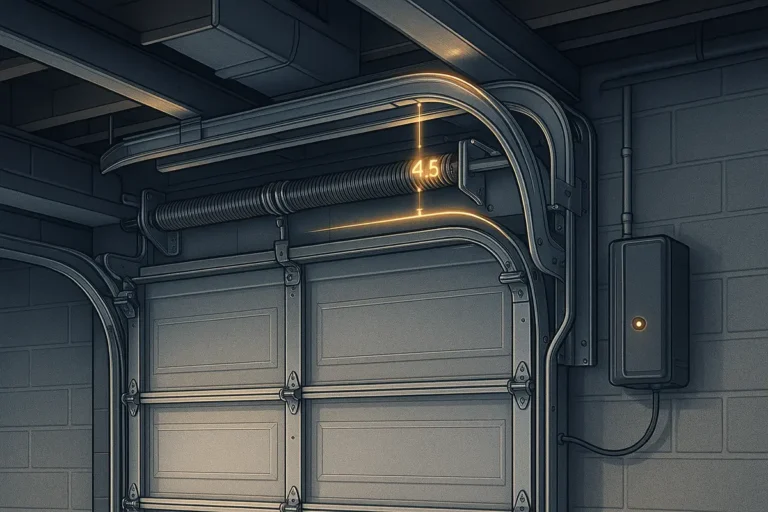
Isolation Protocol (The "Emergency Release" Gatekeeper)


Before adjusting any digital or manual settings, you must determine whether the malfunction lies within the motor unit itself or the physical garage door.

Pull the Red Emergency Release Cord

With the door fully closed, pull the red emergency release cord down and back toward the motor. This disconnects the trolley carriage from the drive chain or belt. Learn how to reset garage door opener after pulling red cord once your diagnostic testing is complete.

Perform the Manual Balance Test

Manually lift the door to its halfway point and let go.

  • If the door stays in place (or drifts slightly): Your springs are properly tensioned. The issue lies within your opener’s settings.
  • If the door slams down or shoots upward: The springs are out of balance. Do not attempt to calibrate the opener. This requires immediate professional spring adjustment.
  • If the door binds or resists: Check your tracks. Improper garage door track alignment will force the opener to work too hard, causing it to shut down to prevent motor burnout.

Brand & Model Generation Identifier


If your door passes the manual balance test, you are ready to calibrate. However, programming protocols vary wildly by generation. Following the wrong instructions can scramble your opener’s logic board.

Generation Identifier GuideQuickly recognize your garage door opener model generation with this clear visual guide. Matching your opener to the right calibration protocol starts here.
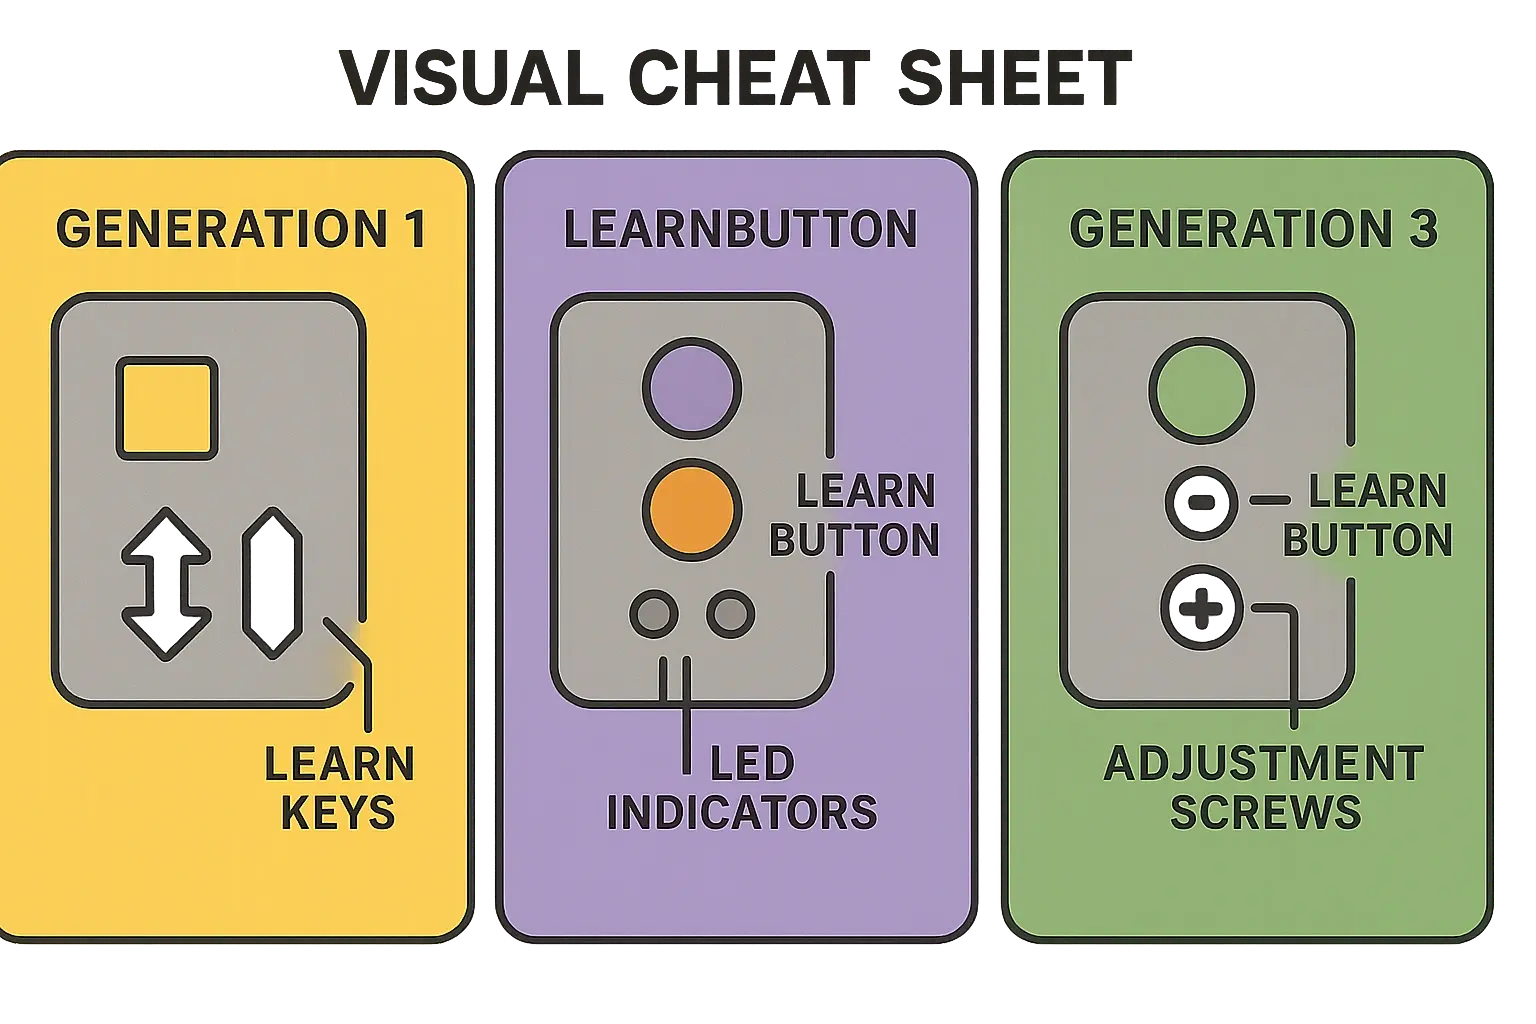
  • Generation 1 (Modern digital): Features a Yellow “Learn” button alongside electronic square UP/DOWN adjustment arrows.
  • Generation 2 (Mid-Gen): Features Purple, Orange, or Red round learn buttons with manual force dials.
  • Generation 3 (Legacy): Uses white plastic adjustment screws located on the outer casing of the chassis.

Step-by-Step Calibration Protocols


Once you have identified your system’s generation, you can safely adjust garage door opener limits using the correct protocol below.

Protocol A: Modern Digital Logic Boards (Yellow Learn Button)

On these models, setting the travel limits automatically programs the operating force settings.

  1. Press and hold the square Adjustment Button between the arrow keys until the UP button begins to flash.
  2. Press and hold the UP arrow until the door reaches your desired open position.
  3. Press the Adjustment Button once to lock this limit. The DOWN arrow will now flash.
  4. Press and hold the DOWN arrow until the door rests flat against the garage floor.
  5. Press the Adjustment Button to save. The opener light will flash, signaling that the safety force settings have been successfully learned.

Protocol B: Legacy Mechanical Screws (White Plastic Dials)

For older systems, manual adjustments are made directly on the unit housing using a flathead screwdriver. Use a “Quarter-Turn = 2 Inches of Travel” rule to avoid over-correcting your garage door limit switch.

  • To increase down travel: Turn the “Down” screw counterclockwise.
  • To decrease down travel: Turn the “Down” screw clockwise.

The Crucial Limits-to-Force Alignment (The Mechanical "Why")


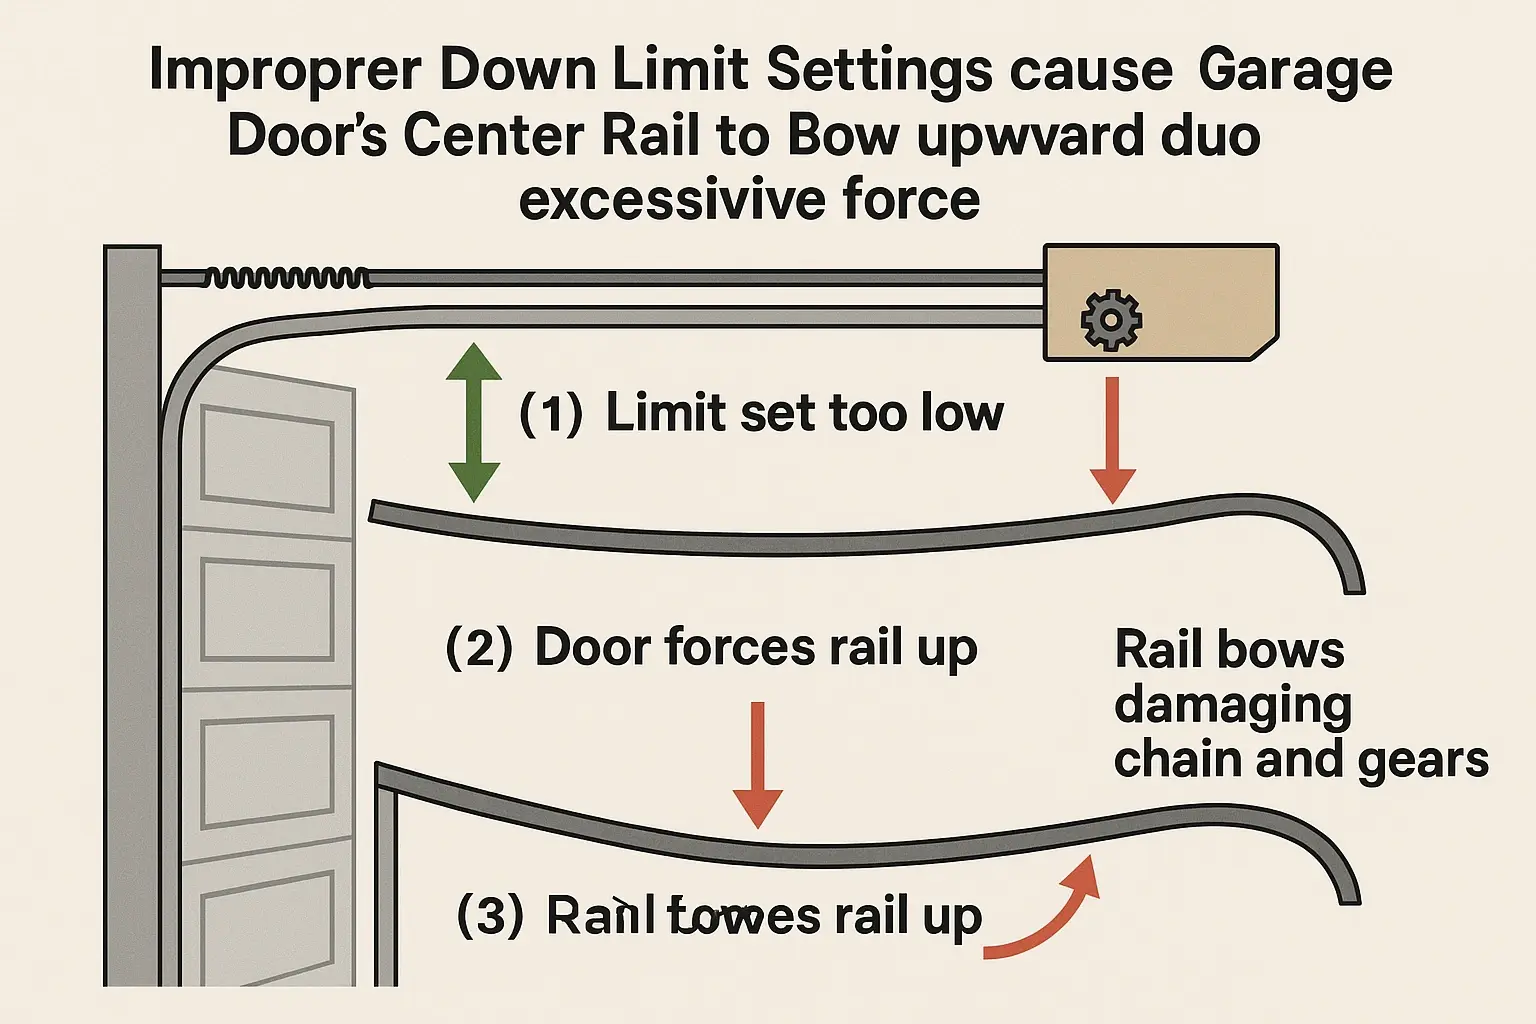
A common error among DIYers is setting the travel limit too far down. When the opener forces the door too hard against the concrete, the central rail bows upward.

Rail Bow IllustrationUnderstand why setting your garage door’s travel limits correctly matters. This diagram shows how excessive force from an incorrect limit causes the track to bow, leading to costly mechanical wear.
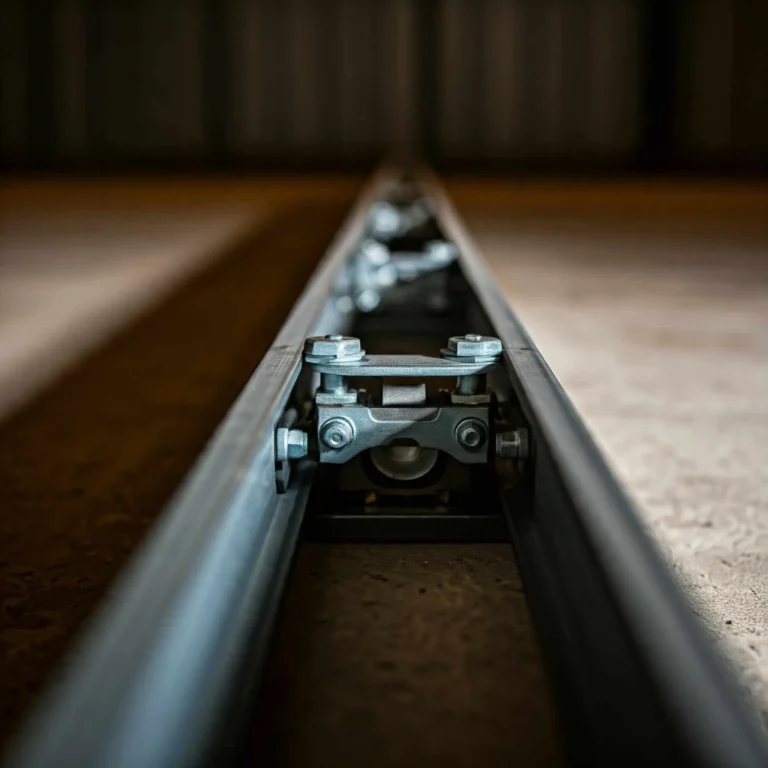
This bowing triggers the opener’s safety system, causing a symptom where the garage door reverses before hitting the floor. Correcting this requires careful adjusting force on garage door opener configurations to comply with UL 325 safety mandates.

To test your system’s physical safety calibration, place a flat 2×4 wood block flat on the floor directly under the door’s path. Run the door down. Upon striking the wood, the door must immediately reverse. If it presses into the block and stalls, the force settings are too high, presenting a severe safety hazard to your family and pets.


Take the Risk Out of Garage Door Calibration


While programming limit switches is a manageable DIY task, resolving complex mechanical binding, track alignment issues, or faulty gear systems requires professional precision.

If you are experiencing persistent operational issues, noise, or safety test failures, let a professional handle it. Secure, certified garage door opener repair ensures your home remains safe, quiet, and fully protected. Contact us today to schedule a comprehensive calibration and safety diagnostic.

FAQs & Troubleshooting Common Obstacles


Why does my garage door opener double-click and flash its lights without moving?

This indicates a safety loop failure. Check the small LED lights on your photo-eye sensors near the floor. If one is blinking or dark, they are misaligned, dirty, or have suffered a wire break.

Can I fix a grinding motor by simply lubricating the tracks?

No. Grinding noises point to worn internal nylon gears or a loose drive chain. Adding lubricant to a failing gear will not restore it; you likely need a replacement gear-and-sprocket assembly.

When should I stop trying DIY adjustments?

If your diagnostic testing reveals a broken torsion spring, frayed cables, or bent track brackets, stop immediately. These components hold high-tension energy that can cause catastrophic injury.


Contact / Request a Call