main logo

Heat, Cold, and Humidity: How to Protect Your Garage Door Batteries From Extreme Weather


Published: Jul 22, 2026

Ever noticed how the batteries in your TV remote seem to last for years, but the ones in your wireless garage door sensors give up ghost in the middle of winter? It’s a common frustration, and it’s not because you bought a bad batch of batteries.

The truth is, your garage is one of the most hostile environments in your home for small electronics. It’s a battleground of extreme temperatures, moisture, and dust that your TV remote never has to face. Understanding this battle is the key to winning the war on short battery life. This guide will shift your focus from "my battery is failing" to "my environment is challenging my battery," and give you the tools to help it win.

Your Garage is a Battery's Worst Enemy


Before we can extend your sensor's battery life, we need to understand what’s attacking it. Unlike the stable, climate-controlled conditions inside your house, the garage exposes electronics to three primary threats. Learning about these factors is the first step in understanding not just the problem, but also how do garage door safety sensors work in the real world.

1. Extreme Temperatures (The Energy Thief)

Batteries are chemical devices. Extreme cold slows down their chemical reactions, drastically reducing their ability to produce power. An alkaline battery can lose up to 50% of its effective capacity at freezing temperatures. Heat, on the other hand, accelerates the chemical reactions, causing the battery to self-discharge much faster, permanently shortening its lifespan. A sensor sitting in direct summer sunlight is literally baking its battery away.
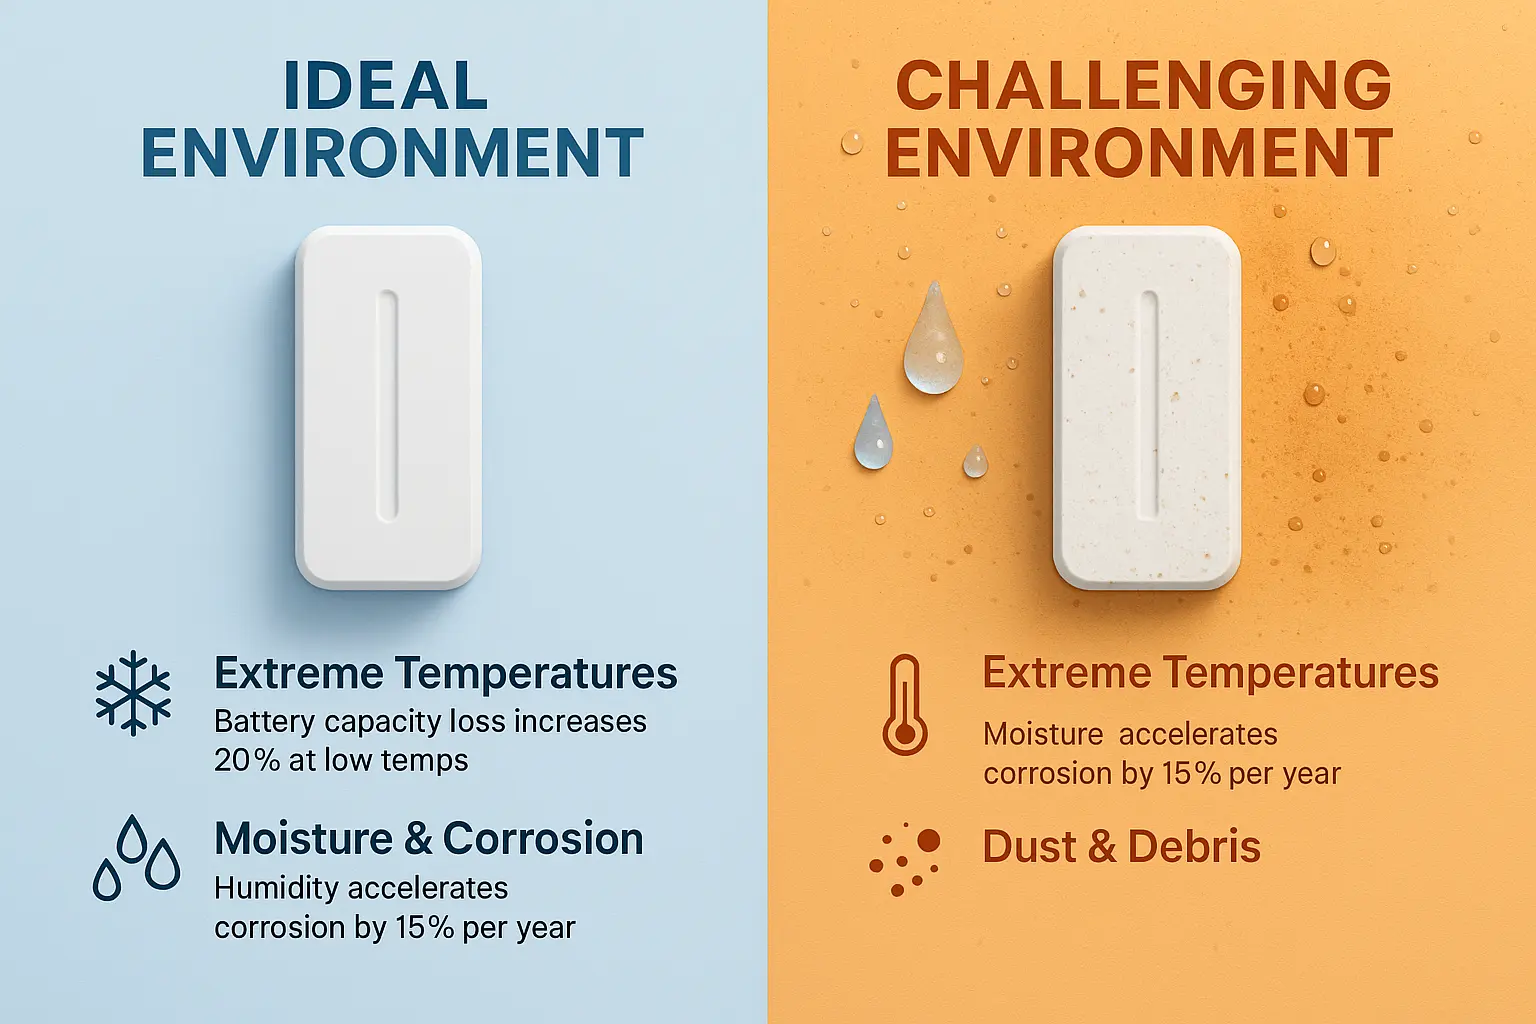
Understanding how extreme temperatures, moisture, and dust reduce battery life helps prioritize protective measures for your wireless garage door sensors.

2. Moisture & Corrosion (The Silent Killer)

Garages are often damp. Rain, snowmelt from your car, and general humidity create a perfect environment for moisture to seep into the sensor's battery compartment. This leads to corrosion on the battery contacts—that chalky white or greenish buildup—which blocks the flow of electricity. Even a tiny amount of corrosion can create enough resistance to make the sensor think the battery is dead.

3. Dust & Debris (The Communication Blocker)

Garages are dusty places. Sawdust, dirt, and grime can accumulate on the sensor's eye and its internal components. This has two negative effects. First, a dirty lens can obstruct the infrared beam, forcing the sensor to work harder or send weaker signals, which can drain power. Second, conductive dust can sometimes create tiny short circuits on the electronics, leading to a mysterious and rapid power drain, similar to the frustrating experience when you find your garage door remote eating batteries.

Understanding how extreme temperatures, moisture, and dust reduce battery life helps prioritize protective measures for your wireless garage door sensors.

The Right Battery for the Battle - A Chemist's Guide for Homeowners


Now that we know the enemy, it's time to choose the right soldier. Not all batteries are created equal, and the cheap pack of alkaline batteries that works fine in a desk clock is simply not equipped for the harsh reality of your garage.
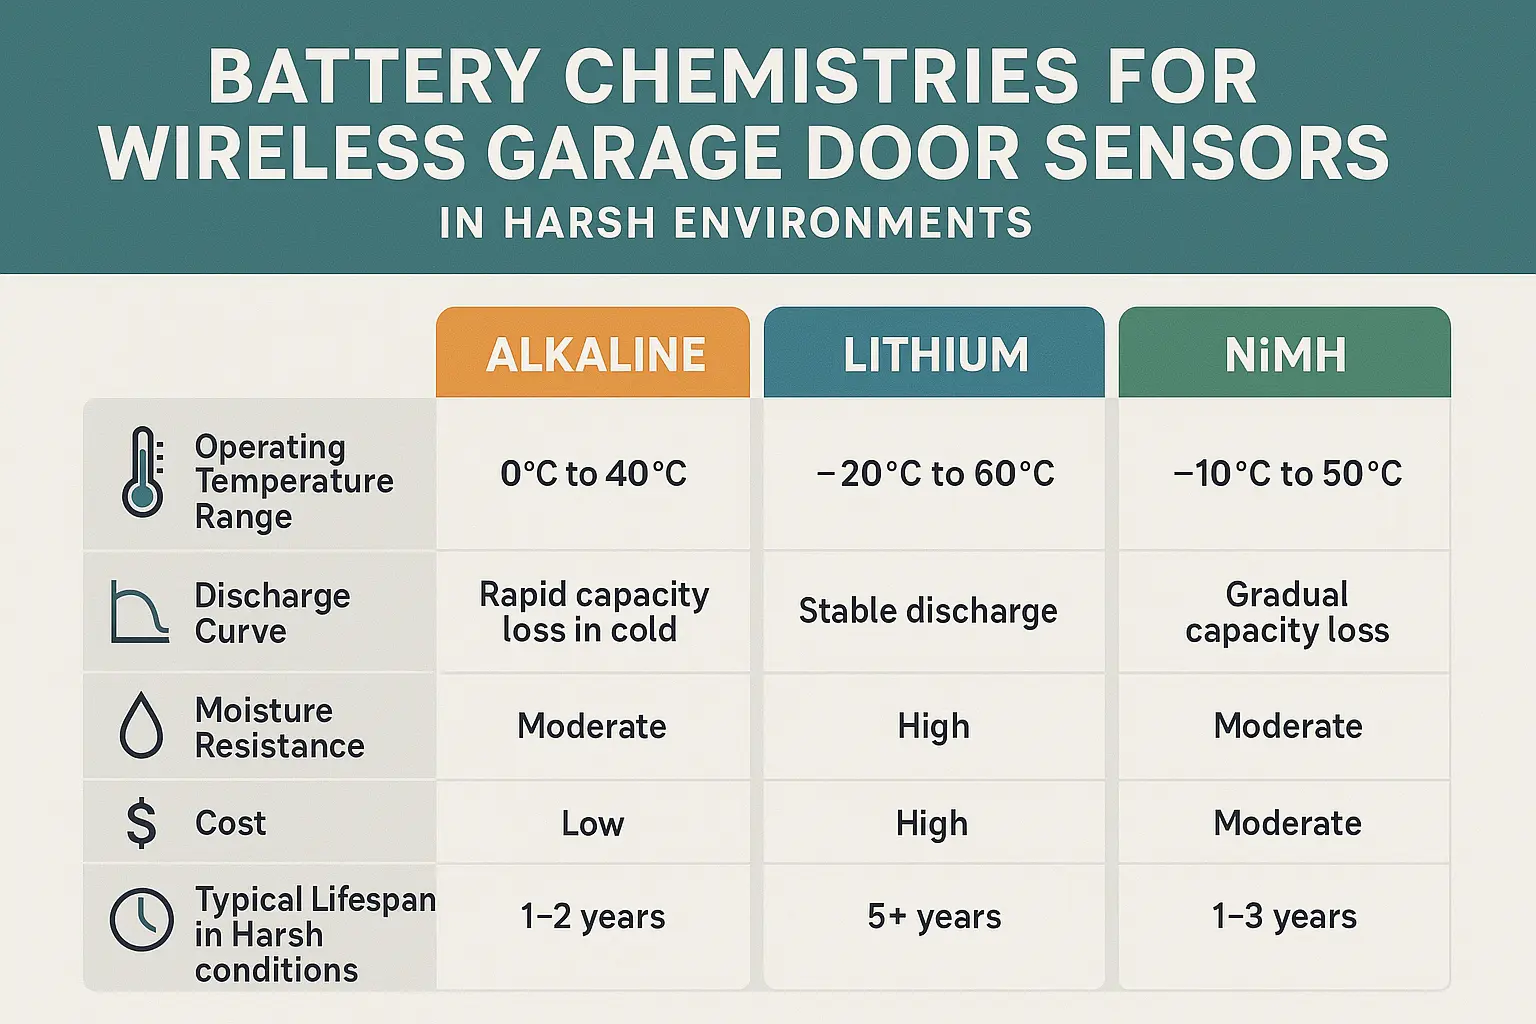
Compare battery types side-by-side to select the optimal chemistry that stands up to your garage’s environmental challenges.

Challenging Environment Battery Scorecard

While Lithium batteries cost more upfront, they often last 2-3 times longer in a garage environment. This means fewer replacements, less frustration, and better long-term value. For a device critical to your home's safety and security, investing in the right chemistry pays off. If you need a guide for a specific model, knowing the right myq garage sensor battery type is the first step.

Compare battery types side-by-side to select the optimal chemistry that stands up to your garage’s environmental challenges.

Proactive Protection - How to Weatherproof Your Sensors


Choosing the right battery is half the battle. The other half is creating a better environment for it to live in. A few simple, proactive steps can dramatically increase the reliability and lifespan of your sensors.

1. Create a Moisture Barrier

  • Check the Seal: Ensure the battery compartment cover is on tight and the gasket (if it has one) is in good shape.
  • Apply Dielectric Grease: When changing the battery, apply a tiny dab of dielectric grease to the battery contacts. This non-conductive, waterproof grease prevents moisture and oxygen from causing corrosion, ensuring a perfect connection. You can find it at any auto parts store.
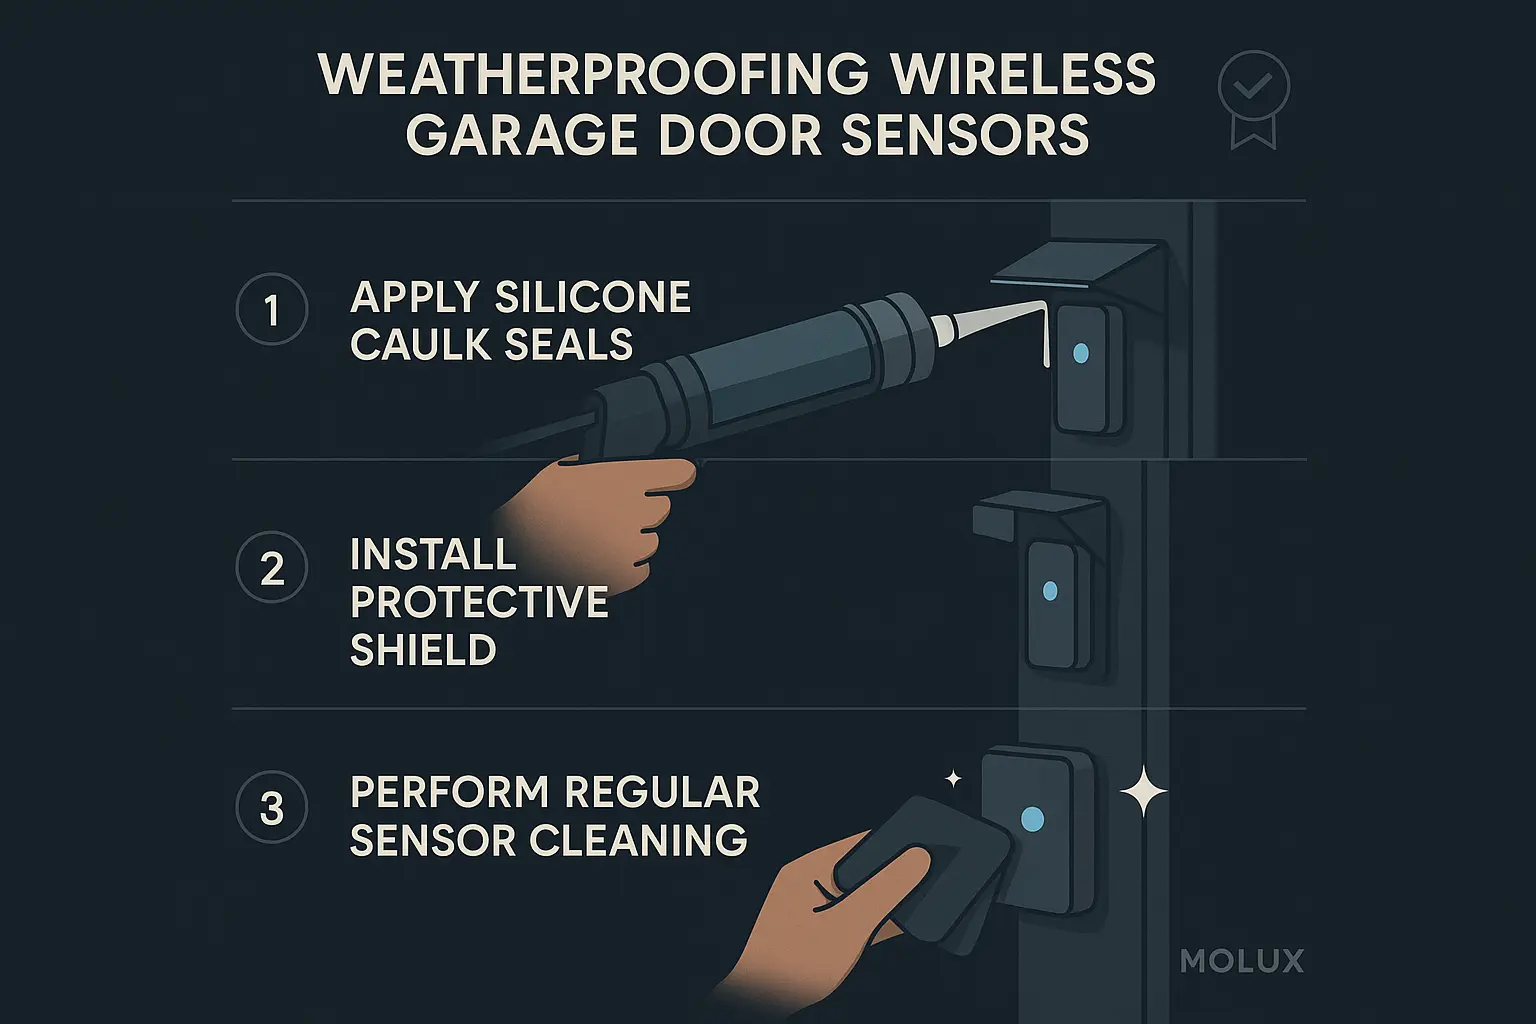
Protect your investment with proven weatherproofing steps that extend sensor battery life and prevent environmental damage.

2. Shield from Sun and Dust


  • Build a Mini-Awning: If your sensor is exposed to direct sunlight, you can fashion a small shield out of plastic or wood and mount it just above the sensor. This keeps it out of the intense heat, which is a major battery life killer.
  • Regular Cleaning: Once a month, use a soft, dry cloth to wipe the sensor's eye and the casing. This prevents dust buildup that can interfere with the signal and cause the device to work harder. Keeping this path clear is a key part of troubleshooting garage door remote and sensor performance.

3. Ensure a Strong Signal

Your wireless sensor is a tiny radio. If it has to "shout" to be heard by the main unit, it will use more power. Make sure the hub or opener unit is located in a central location with a clear line of sight, free from large metal obstructions like tool chests or water heaters that can block the signal.
Protect your investment with proven weatherproofing steps that extend sensor battery life and prevent environmental damage.

The Ultimate Longevity Checklist


Bookmark this page and use this simple checklist to keep your wireless garage door sensors running reliably for years to come.
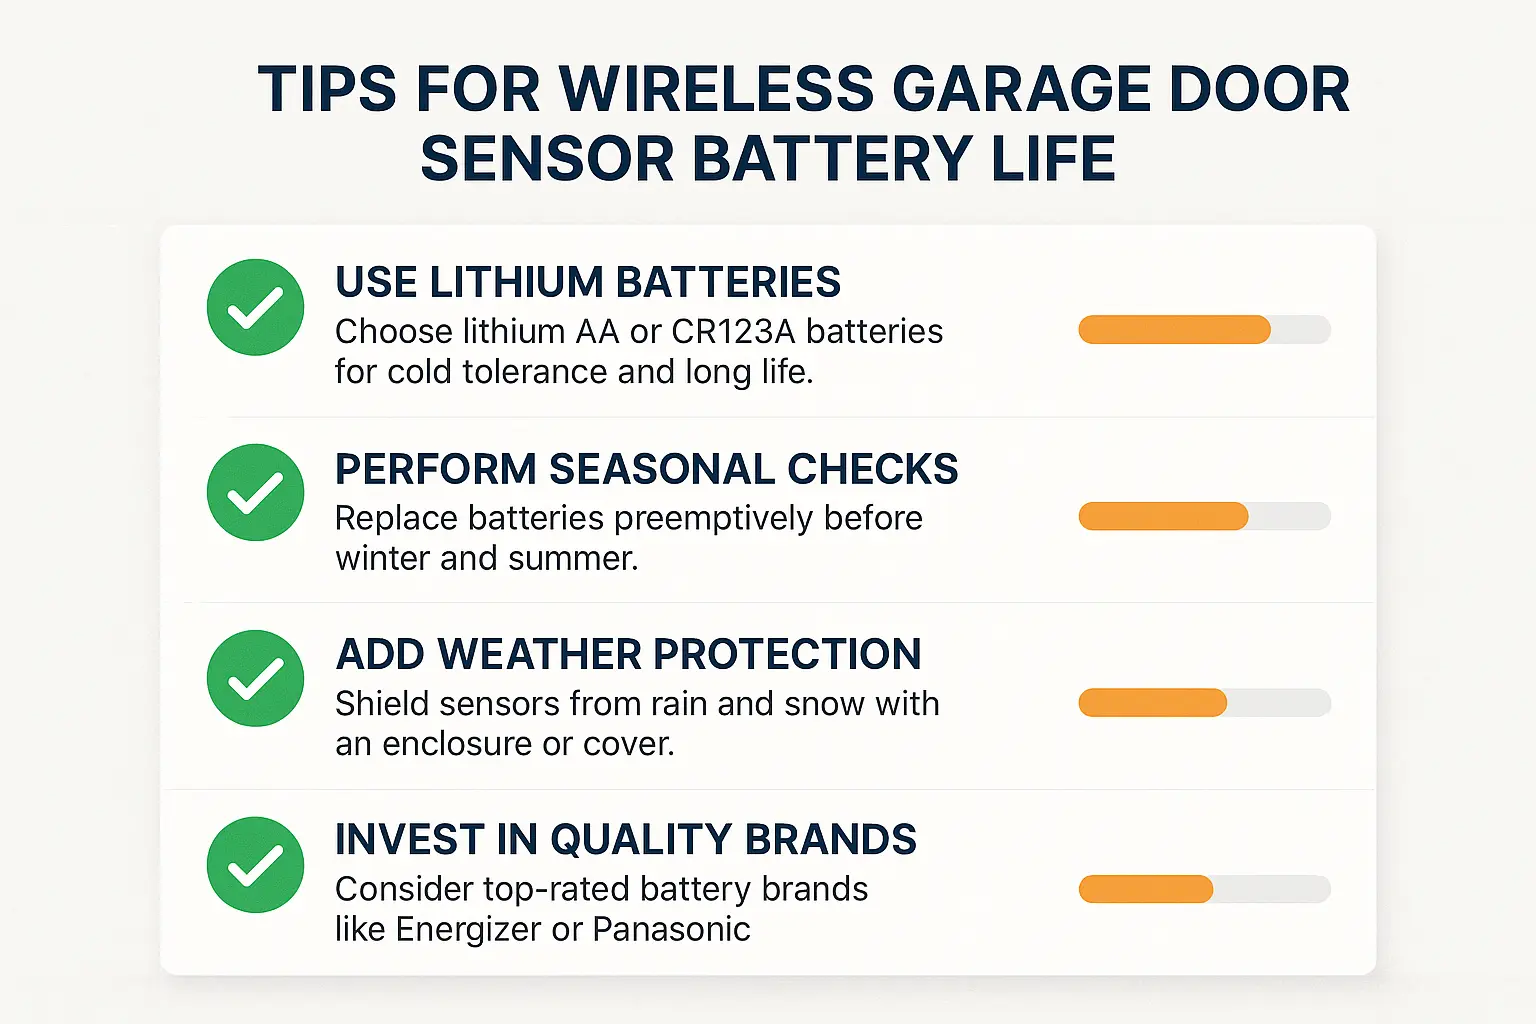
Your go-to checklist for maximizing sensor battery life—easy to share and implement for reliable garage door safety.

  • Choose the Right Chemistry: Opt for Lithium batteries, especially if you live in a climate with cold winters or hot summers.
  • Clean the Contacts: When replacing a battery, lightly clean the metal contacts inside the sensor with a pencil eraser to remove any minor oxidation.
  • Use Dielectric Grease: Apply a small amount to the contacts to create a corrosion-proof seal.
  • Wipe Down Monthly: Clean the sensor eye and housing with a dry microfiber cloth to remove dust and grime.
  • Shield from Direct Sun: If applicable, create a small cover to protect the sensor from intense solar heat.
  • Check for a Clear Signal Path: Ensure there are no large metal objects between your sensor and the opener's main unit.
  • Prioritize Safety: Always follow the manufacturer's guidelines for battery replacement and handling, and refer to best practices for garage door opener battery safety.
By following these steps, you’re not just replacing a battery; you’re creating a sustainable system that respects the challenging environment of your garage and ensures your safety sensors are ready when you need them most.
Your go-to checklist for maximizing sensor battery life—easy to share and implement for reliable garage door safety.

Frequently Asked Questions (FAQ)


What battery is for a garage door sensor?

Most wireless garage door sensors use 3-volt coin-cell lithium batteries, with the CR2032, CR2450, and CR2016 being the most common types. Always check your sensor's manual or the old battery itself to confirm the exact model you need.

How long do garage door sensor batteries usually last?

Under ideal conditions, a standard alkaline battery might last 1-2 years. However, in a challenging garage environment (with extreme temperatures), that life can be cut in half. A high-quality lithium battery can last anywhere from 3 to 5 years in the same environment, making it a much better long-term investment.

Why does my garage door sensor battery keep dying in the winter?

This is a classic symptom of using an alkaline battery in the cold. The cold temperature slows the battery's chemical reactions, drastically reducing its power output. The sensor detects this low power as a "dead" battery, even though it might still have charge. Switching to a lithium battery, which is designed to perform in freezing temperatures, will almost always solve this problem.

Can I use a different type of battery in my garage sensor?

You must use a battery with the same voltage and physical size as the original. However, you can (and should) upgrade the chemistry from Alkaline to Lithium if they are available in the correct size. Never try to use a rechargeable battery unless specifically stated as compatible by the sensor's manufacturer, as their voltage characteristics are different and can cause issues.

My sensor battery is fine, but the door won't close. What's wrong?

If the battery is good, the issue is likely with the sensor alignment or a blockage. Check to make sure the two sensor eyes are pointing directly at each other and that their indicator lights are solid (not blinking). Also, ensure nothing is obstructing the beam path. If problems persist even when the sensors seem fine, it could indicate a deeper issue with the system, similar to when the main garage door wall button not working points to a wiring problem.

You may also like


blog photo

Your Garage Door Opener is Beeping. Here’s How to Know if the Battery is Dying

That relentless, rhythmic beep coming from your garage is more than just an annoyance—it's a message. Your garage door opener is trying to tell you something important, and there's a good chance it's about its backup battery. This small but mighty power pack is your key to getting in and out during a power outage, but like all batteries, it has a finite lifespan.You don't need to be a professional technician to find out. We're going to walk you through a simple, four-level diagnostic process that takes you from a casual listener to a confident diagnostician. Think of it as a funnel: we'll start with the easiest checks and progressively move to more definitive tests, empowering you to understand exactly what’s happening with your system.