A standard 16-foot double-car garage door with a subtle 1/4-inch gap allows over 120 gallons of water per hour to pass through during a severe storm dropping 1 inch of rain per hour. For homeowners, discover water pooling behind the door frame after downpours is frustrating—especially when you have already swapped out the bottom rubber strip. Stopping moisture intrusion requires looking beyond superficial fixes to address the precise mechanical, structural, and material failures along the door perimeter.
Water Pooling Inside Garage After Heavy Rain: Door-Side Root Causes & Solutions
Published: Oct 23, 2026
The 5 Door-Side Causes of Garage Water Pooling
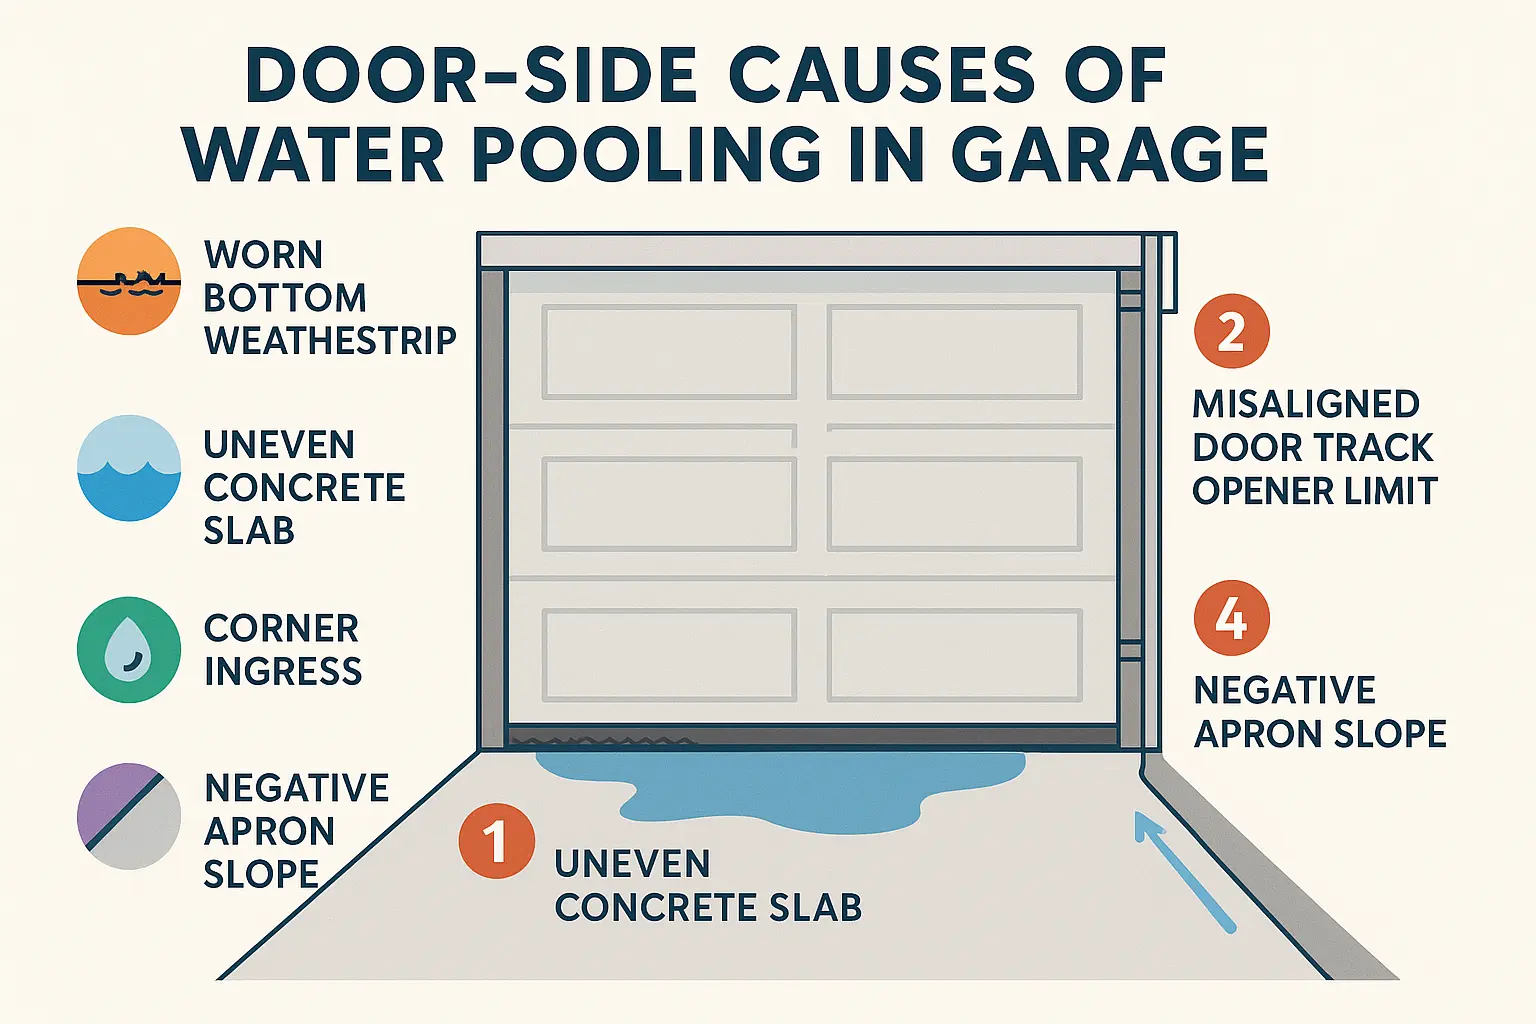
- Worn or Brittle Weatherstripping: Vinyl and PVC seals degrade under UV exposure and freeze-thaw cycles, hardening within 18–24 months. Once stiffened, they fail to compress against the floor.
- Concrete Slab Deflection & Spalling: Concrete floors settle unevenly over time. A low spot in the middle of your garage door threshold creates a subtle basin where water bypasses flat seals.
- Corner Ingress at Track Jamb Ends: Water frequently creeps in through the outer 3 inches of the door frame. If the bottom weatherstrip does not extend flush to the vertical track jambs, wind-driven rain funnels straight into the corners.
- Opener Limit Switch & Mechanical Misalignment: If your opener travel limits are set incorrectly, the door stops millimeters short of the floor. Even a minute misalignment leaves a noticeable gap at bottom of garage door openings.
- Inadequate Apron Slope: Per IRC Section R401.3, surfaces must slope away from foundations at a minimum 5% gradient (6 inches over 10 feet), with garage aprons requiring a 1/8″ to 1/4″ per foot drop. Negative pitch forces runoff to pool directly against the rubber barrier.
Diagnostic Testing – How to Find the Exact Ingress Point
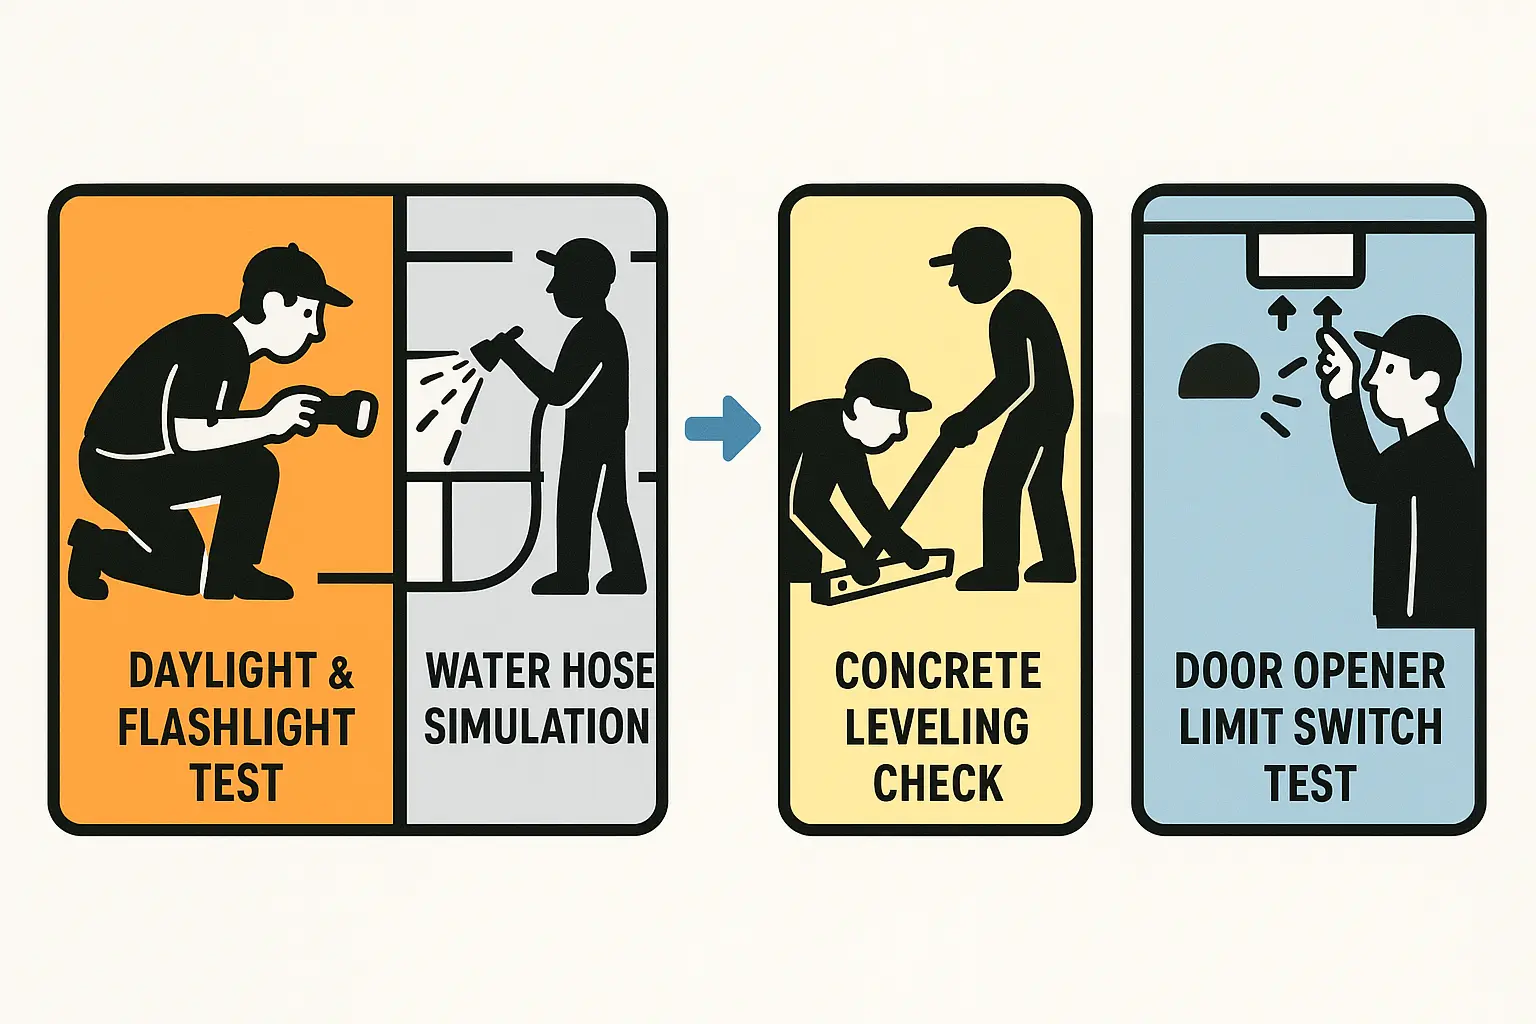
Before investing in remedies, perform these targeted diagnostic tests to pinpoint failure locations:
- The Daylight & Flashlight Test: Close the door fully during daytime, turn off interior lights, and look for light escaping along the bottom edge. Have a partner shine a bright flashlight along the outer threshold at night while you inspect from inside.
- The Water Hose Isolation Test: Spray a steady stream of water exclusively at the left corner, right corner, and center section for two minutes each. Note where water breaches the threshold first to distinguish between side-jamb infiltration and center slab low spots.
- Slab Level Check: Place a 4-foot mason level across the concrete floor where the rubber gasket rests. Identify gaps greater than 1/8 inch under the level line to check for floor concavity.
Evaluating these symptoms will help you choose among various garage door bottom seal types to solve your specific issue.
Solution Evaluation Matrix
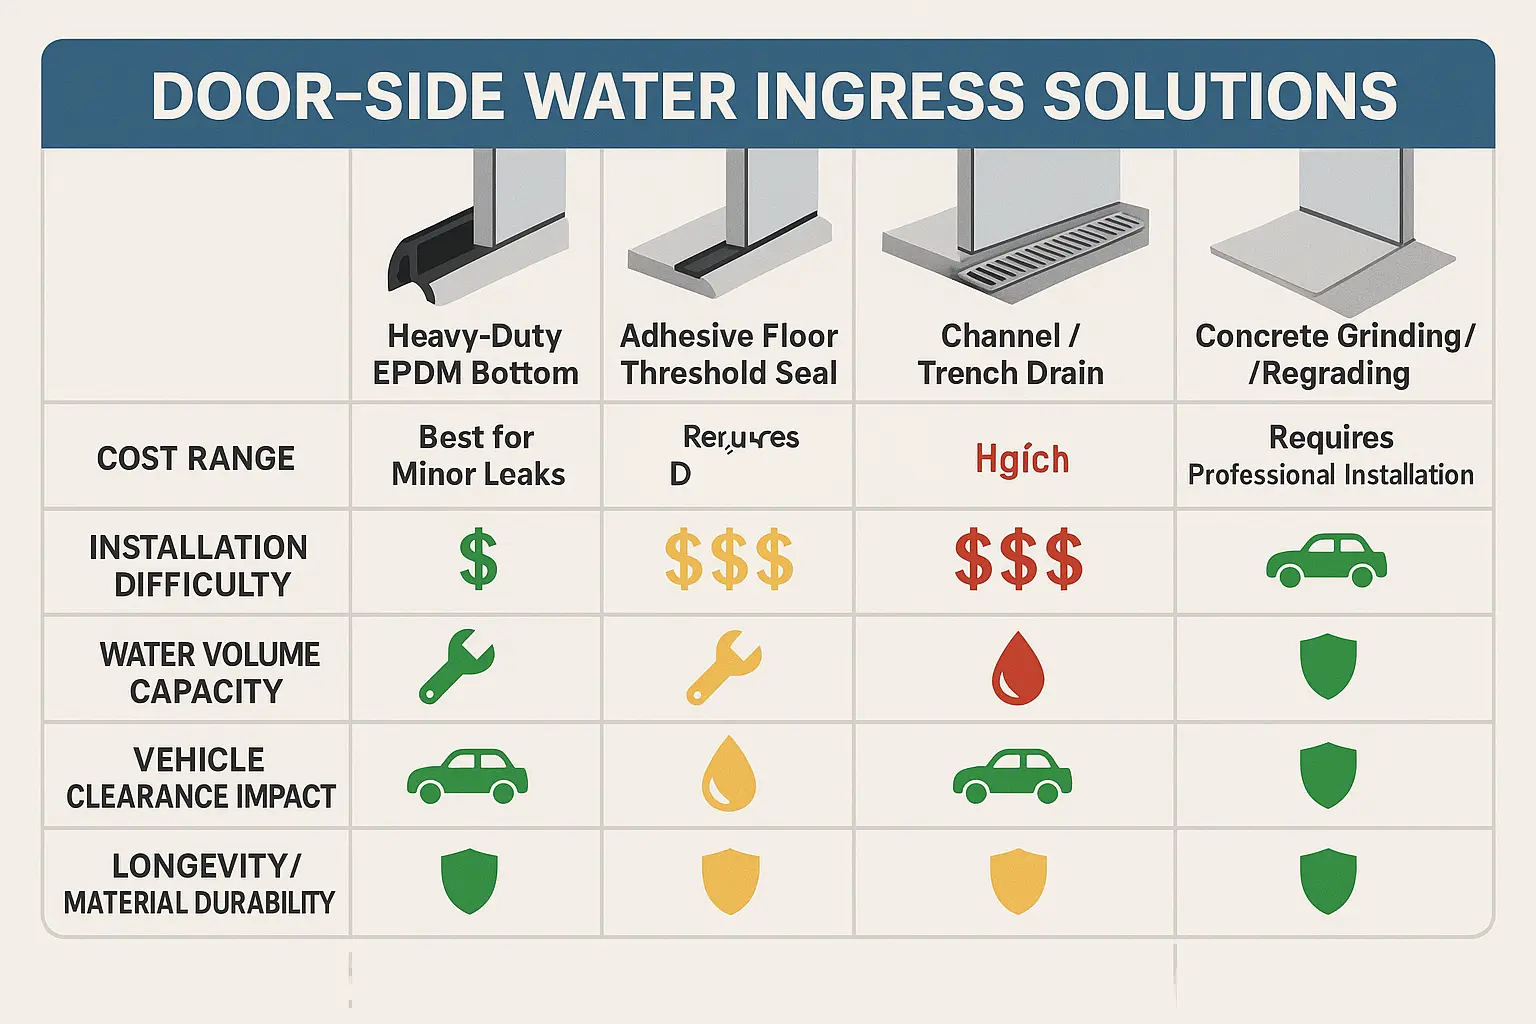
| Solution Option | Best Used For | Typical Cost | Durability Rating | Key Advantage |
|---|---|---|---|---|
| Heavy-Duty EPDM Bottom Seal | Minor gaps on level concrete | $40 – $90 | High (-40°F to 300°F tolerance) | Flexible seal, easy installation |
| Adhesive Floor Threshold Barrier | Uneven floor, low spots up to 1″ | $70 – $180 | High (92% rain reduction) | Blocks wind-driven pooling |
| Channel / Trench Drain | Severe driveway slope toward garage | $400 – $1,500+ | Very High | Captures high volume water flow |
| Concrete Grinding / Epoxy Patching | Pitted, spalling concrete foundations | $200 – $600 | High | Restores level surface foundation |
Combining a 1/2-inch to 1.5-inch raised floor threshold barrier with an intact EPDM bottom weatherstrip reduces wind-driven rain penetration under garage doors by up to 92%. While standard PVC options crack in cold weather, high-grade EPDM synthetic rubber maintains its elasticity across extreme temperature fluctuations.
Critical Installation & Mechanical Rules
Fixing garage water leaks requires coordinating mechanical door operations with threshold barriers:
- Adjust Opener Force and Travel: Adding a raised floor threshold alters where the door stops. Learn how to adjust garage door opener travel limits and downward force settings so the door closes snugly without triggering the automatic safety reversal feature.
- Align Vertical Tracks: If tracks are out of plumb, the door cannot sit flat against the floor. Professional garage door track repair ensures the panels drop evenly across the entire threshold width.
- Seasonal Envelope Sealing: Check exterior stop moldings along the top and side jambs. Knowing how to seal a garage door for winter prevents windblown rain from bypassing structural weatherstripping before reaching the floor.
Frequently Asked Questions
Why is water still pooling in my garage after replacing the bottom rubber seal?
A new bottom seal cannot fully bridge structural concrete dips deeper than 1/4 inch or correct negative driveway slope. If water enters through the far edges, the leak is likely caused by track jamb misalignments or missing corner foam pads rather than defective rubber material.
Will installing an adhesive floor threshold seal damage my garage door opener?
Not if travel limits are recalibrated. Raised threshold seals (1/2″ to 1″ tall) increase resistance at the bottom of the door stroke. You must adjust your opener’s travel limits and downward force so it recognizes the new floor height without triggering safety reversals.
What is the difference between EPDM rubber and standard PVC garage seals?
EPDM (Ethylene Propylene Diene Monomer) synthetic rubber retains its elasticity in extreme temperatures ranging from -40°F to 300°F and resists UV breakdown for over a decade. In contrast, standard PVC/vinyl seals stiffen, crack, and lose compression memory within 18 to 24 months.