End Remote Clutter: The Definitive Guide to Programming Multiple LiftMaster Doors to Your Car’s HomeLink


Published: Sep 17, 2026

Is your car’s sun visor a graveyard of bulky garage door remotes? One for the left bay, another for the right, maybe even a third for your workshop. It’s a common frustration that leads to fumbling in the dark and a cluttered car. What if you could control every LiftMaster opener you own from the built-in buttons already in your car?

Good news: you can. In less than 10 minutes, you can program each of your vehicle’s HomeLink buttons to a different LiftMaster door, creating a seamless, one-touch system.

Many guides show you how to program a single button, but they fail to address the most common question: “How do I add a second door without messing up the first one?” This guide is different. We’ll walk you through the entire process, from the first door to the last, and explain the simple secret that makes it all work.

The 2-Step Truth About HomeLink Programming


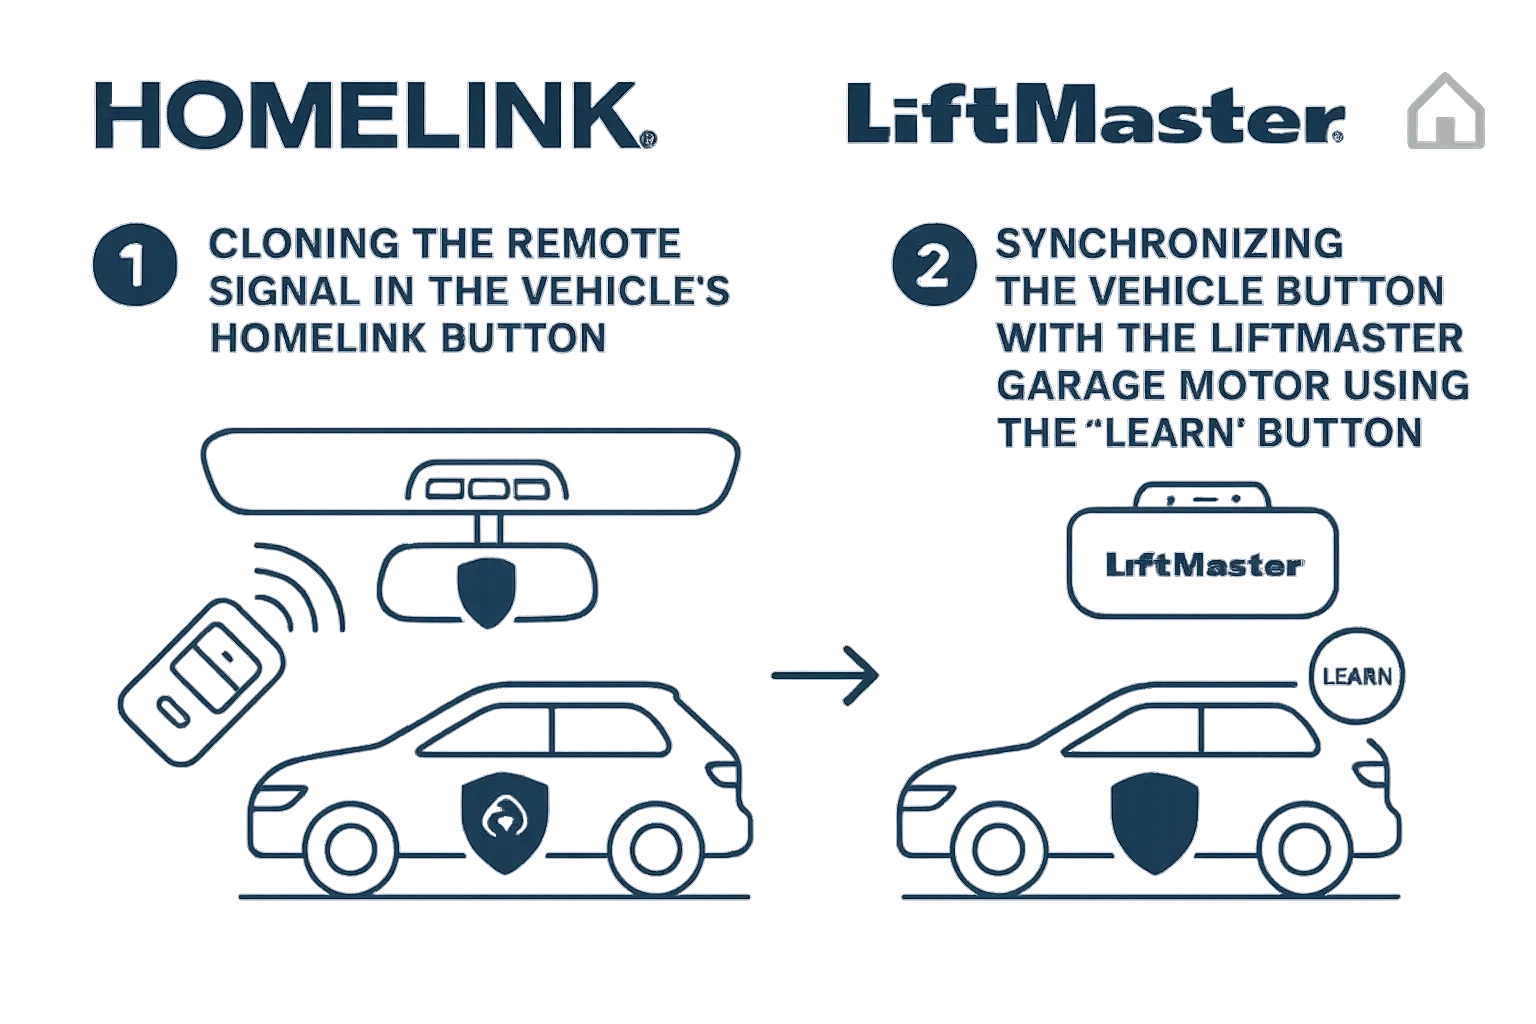
Before we press any buttons, let’s have a quick “aha moment.” Understanding why the process works this way will make the steps intuitive. Programming your HomeLink system to a modern LiftMaster opener is always a two-part process, thanks to something called “rolling code” technology.

  1. Phase 1: Your Car Clones the Remote. First, you teach your car’s HomeLink system to mimic the signal from your existing LiftMaster remote. Think of it as your car learning a specific radio frequency.
  2. Phase 2: Your Opener Authorizes Your Car. For security, your garage door opener won’t open for just any device that knows its signal. You must press the “Learn” button on the motor unit itself to officially add your car to its list of trusted devices.

This two-step handshake ensures that no one can easily copy your signal and gain access to your garage. Many people get stuck because they only complete the first phase.

Visualizing the essential 2-step process behind HomeLink programming to LiftMaster openers, reinforcing user understanding and brand authority.

The Step-by-Step Multi-Door Programming Guide


Ready to get started? We’ll program your first door to HomeLink button I, and then your second door to button II.

What You’ll Need

Before you begin, gather these items to make the process smooth and quick. Having everything in place first prevents you from running back and forth.

  • Your Vehicle: Park it outside the garage, facing the door you intend to program.
  • Your Original LiftMaster Remotes: You will need the working remote for each garage door you want to add.
  • A Sturdy Ladder or Step-Stool: To safely reach the “Learn” button on your ceiling-mounted garage door opener motor.
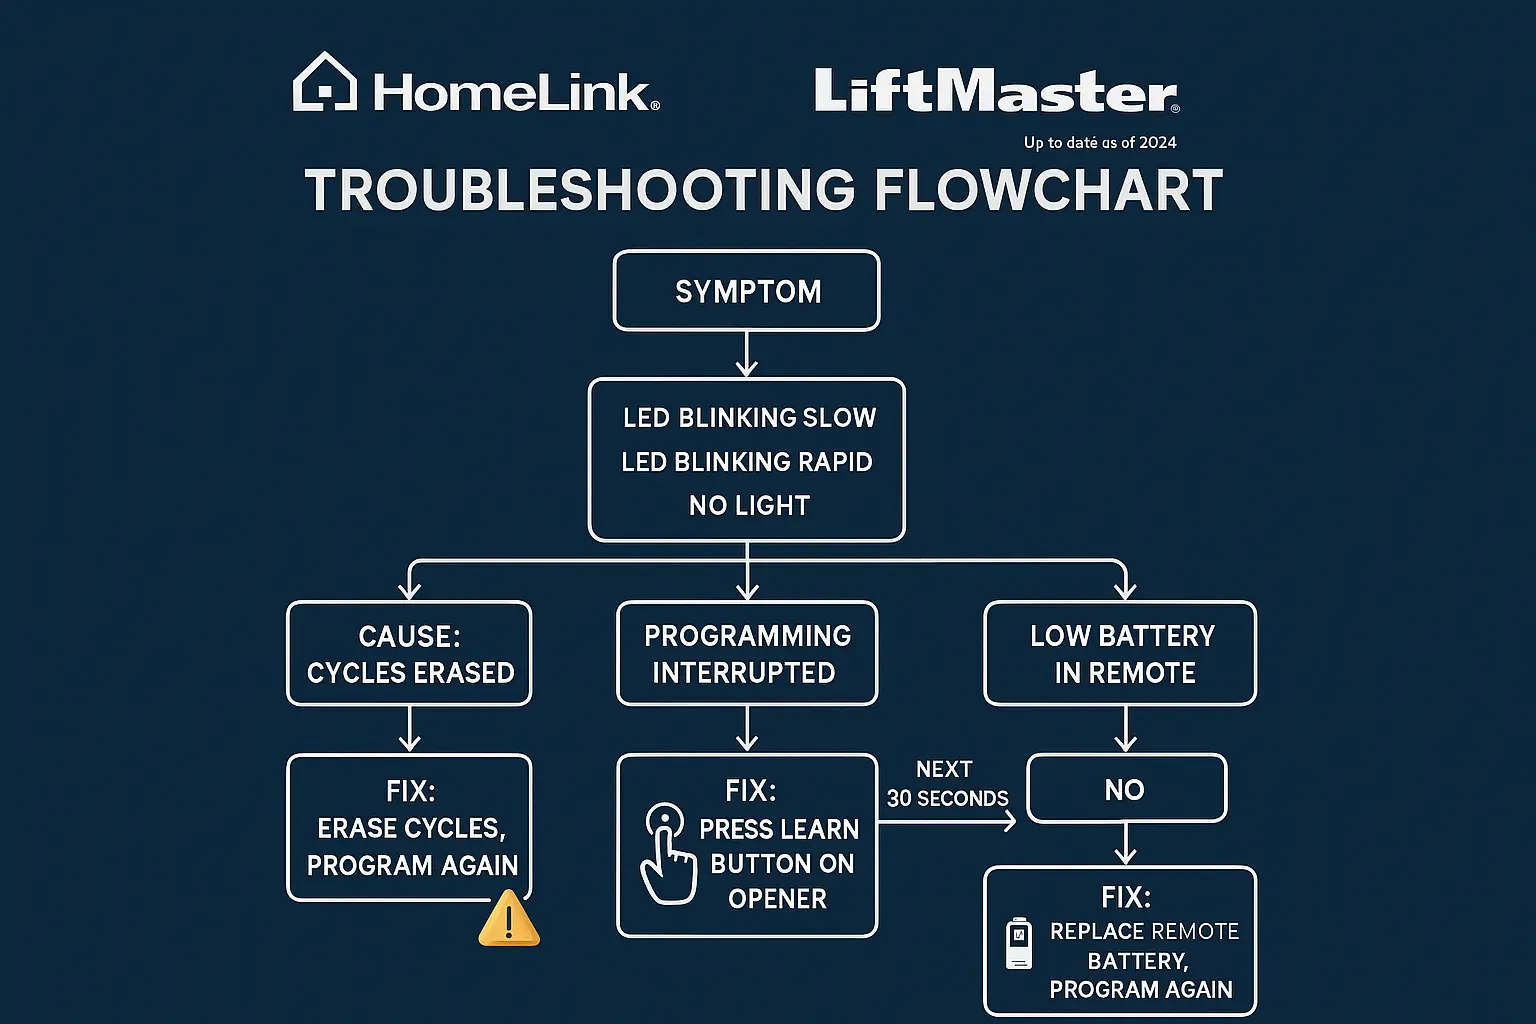
Clear roadmap outlining necessary preparations and sequential steps for multi-door HomeLink programming, building user confidence and reducing purchase anxiety.

Programming Your First Door to Button I

This part covers the standard garage door remote programming process. If you’ve already done this successfully, you can skip to Part 2.

  1. Prepare Your HomeLink: Start with your car’s ignition turned to the “Accessory” position. If this is your first time programming any button, press and hold the two outer HomeLink buttons for about 20 seconds until the indicator light flashes rapidly. This clears any factory settings.
  2. Begin Cloning (Phase 1): Hold your first LiftMaster remote 1-3 inches from your car’s HomeLink buttons. Press and hold both the HomeLink button you want to program (e.g., button I) and the button on your LiftMaster remote simultaneously.
  3. Watch the Light: The HomeLink indicator light will begin to flash slowly. Keep holding both buttons until the light changes to a rapid flash. This means your car has successfully cloned the remote’s signal. You can now release both buttons.
  4. Authorize at the Motor (Phase 2): Go to your garage door opener motor unit. Press and release the “Learn” button (it’s often a square button, colored purple, red/orange, or yellow). The LED next to it will light up. You now have about 30 seconds to complete the next step.
  5. Final Sync: Return to your car and press the HomeLink button you just programmed (button I) three or four times, for two seconds each time. You should see the garage door opener lights flash or hear a click, and the door will begin to move.

Success! Your first door is now paired.

Programming Your Second Door to Button II

Here is the most important part of the entire guide. This is where most people make a critical mistake.

⚠️ Mistake Alert: To add a second door, do not repeat step 1 from Part 1. Holding the two outer buttons will erase garage door opener in car memory, deleting the button you just programmed. You will simply repeat the pairing process on a different button.
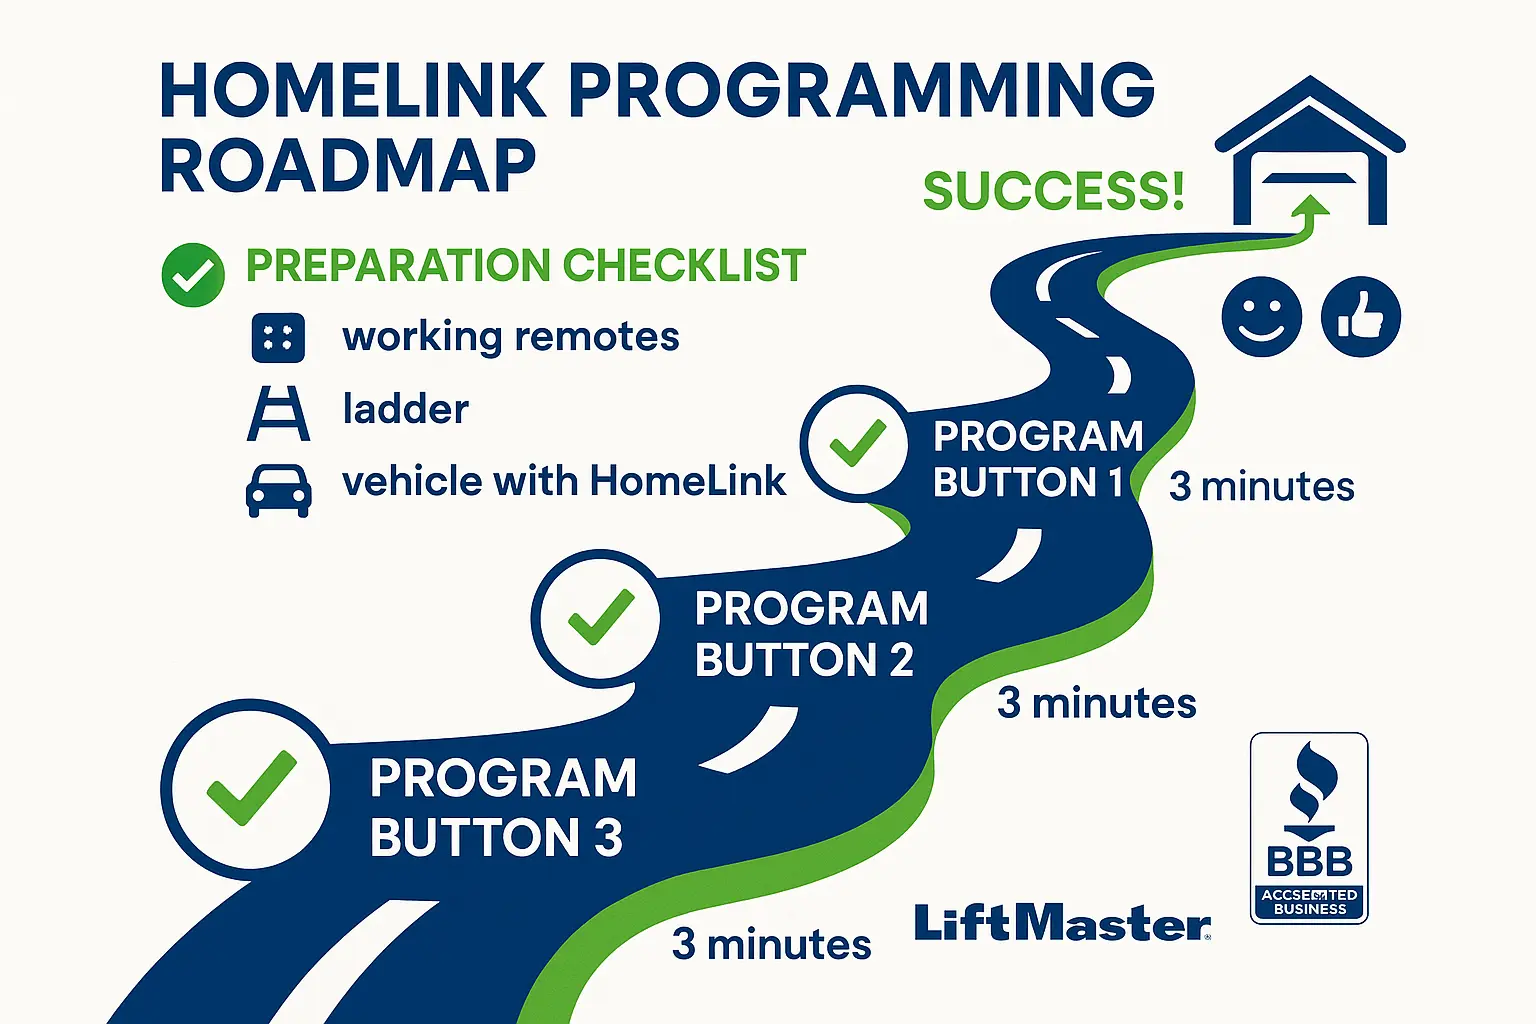
Side-by-side comparison clarifying how to program first and second HomeLink buttons to multiple LiftMaster openers without erasing existing codes, reducing confusion for multi-door programming.

Grab the remote for your second garage door and let’s begin.

  1. Begin Cloning (Phase 1): With your car on, hold your second LiftMaster remote 1-3 inches from your HomeLink system. Press and hold both the HomeLink button you want to program (e.g., button II) and the button on your second remote.
  2. Watch the Light: Just like before, the indicator light will flash slowly, then rapidly. Once it flashes rapidly, release both buttons.
  3. Authorize at the Motor (Phase 2): Go to your second garage door opener motor. Press and release its “Learn” button.
  4. Final Sync: Back in your car, press the HomeLink button you are programming (button II) three or four times until the door activates.

That’s it! You now have two different doors programmed to two different buttons. Repeat this process for a third door using button III. This is the core of how to program multiple garage door openers to your vehicle.

The Ultimate Troubleshooting Guide


Sometimes things don’t go as planned. Garage door remote programming issues are common, but most have simple solutions. Here are the most frequent hurdles and how to clear them.

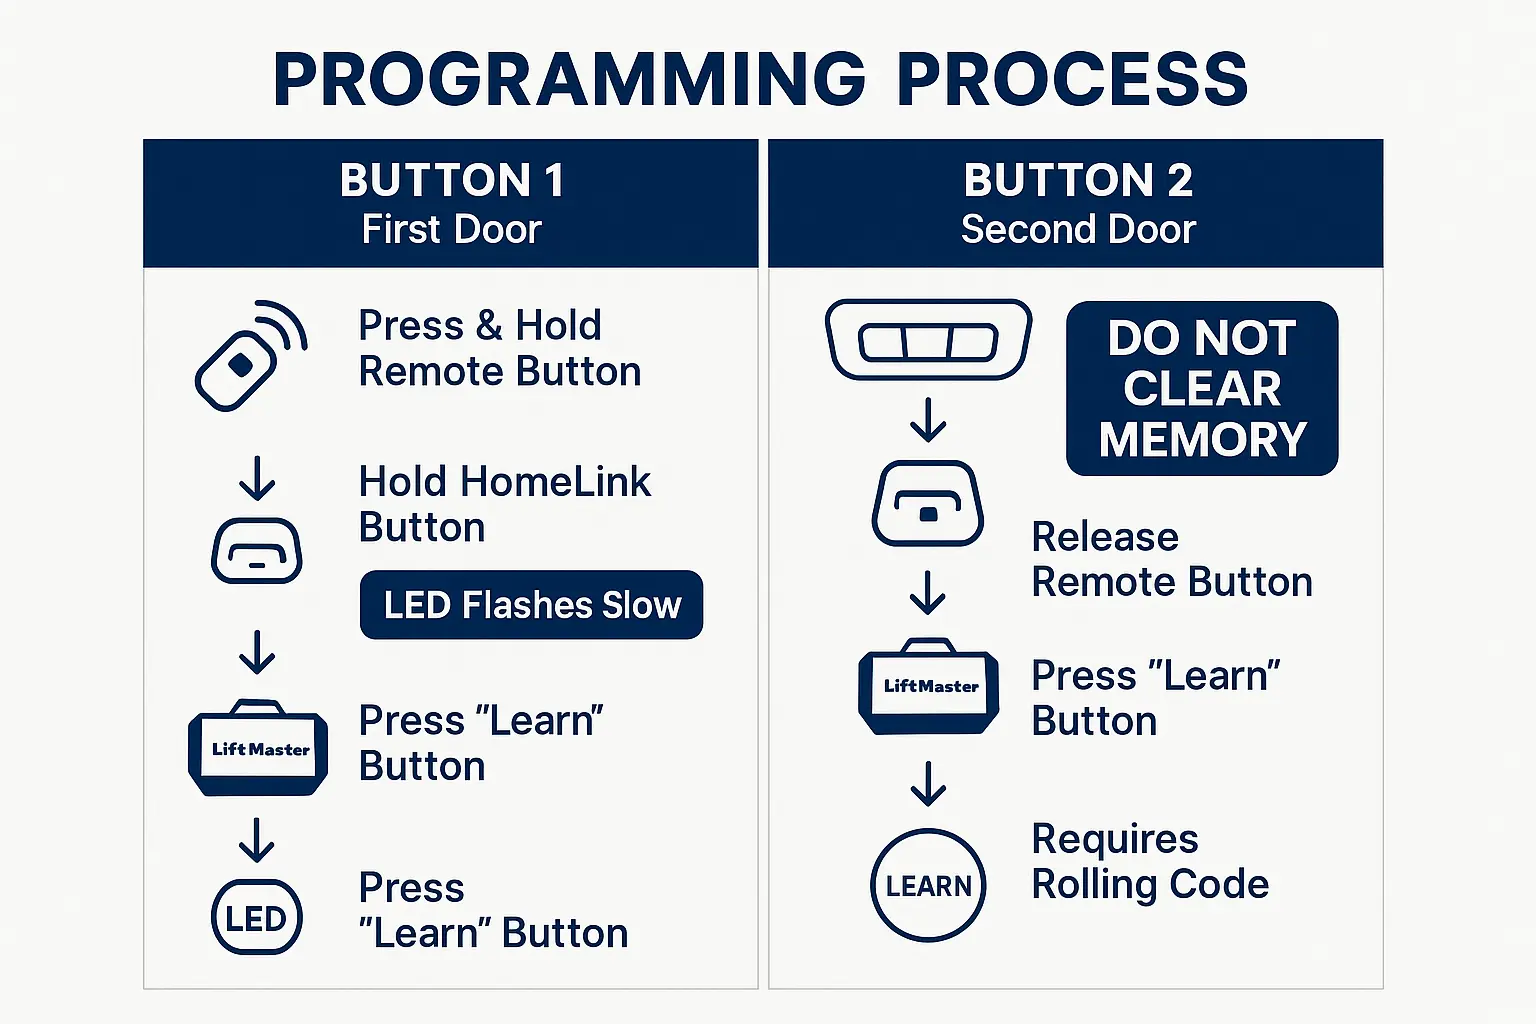
Troubleshooting flowchart that anticipates user concerns and provides clear corrective actions, reinforcing brand credibility during evaluation.

  • Problem: The HomeLink light goes from off straight to flashing rapidly in Phase 1.

    • Meaning: Your car already recognizes this type of “rolling code” signal. This is a good thing!
    • Solution: Skip directly to Phase 2 (pressing the “Learn” button on the motor) and proceed from there.
  • Problem: The HomeLink light never changes from a slow flash to a rapid flash.

    • Meaning: The car is having trouble cloning the remote’s signal.
    • Solution: First, try a fresh battery in your LiftMaster remote. Second, try holding the remote at different angles and distances from the HomeLink buttons.
  • Problem: You completed both phases, but the door won’t open.

    • Meaning: The sync between the car and motor likely timed out.
    • Solution: Repeat Phase 2. Press the “Learn” button on the motor again, and then immediately (within 30 seconds) press the programmed HomeLink button in your car three to four times.
  • Problem: The “Learn” button on the motor unit won’t light up.

    • Meaning: The opener might be in “Lock” or “Vacation” mode, which disables new remotes from being programmed.
    • Solution: Check your wall-mounted control panel for a lock button and make sure it is deactivated.

For a deeper dive into specific models and issues, you can learn more about general car garage door opener compatibility.

Your Path to a Clutter-Free Car


You now have the knowledge and the step-by-step instructions to consolidate all your garage door controls into one convenient system. The key is understanding the two-phase process and remembering not to clear your settings when adding a second door. Understanding how to liftmaster program to car buttons is a rewarding DIY task that simplifies your daily routine.

If you follow the steps and still run into trouble, or if you suspect an issue with your opener’s logic board or antenna, don’t hesitate to reach out to a professional. Sometimes a quick diagnostic is all it takes to get everything working perfectly.

Frequently Asked Questions


Do I need a working remote for each LiftMaster door?

Yes, absolutely. The first phase of programming requires the HomeLink system to “clone” the unique signal from a functional remote control. Without a working remote for each door, your car has nothing to learn from, and the process cannot be started.

What's the biggest difference between programming the first button and the second?

The single most important difference is that you must not clear the HomeLink system’s memory before programming the second or third button. The memory-clearing step (holding the two outer buttons) is only for a complete factory reset. When adding another door, you simply select an un-programmed button and begin the cloning process.

Will this work if one of my LiftMaster openers is old and the other is new?

Yes, in most cases. HomeLink is designed to be backward-compatible. You might notice the “Learn” button on your openers are different colors (e.g., purple vs. yellow), which indicates different security technologies (Security+ vs. Security+ 2.0). The process remains the same: clone the remote, then press the corresponding Learn button. If you have an extremely old opener (pre-1993 with DIP switches), the process may differ, but it is uncommon.

Contact / Request a Call