Are you noticing a subtle sag, a deep bow, or even hairline cracks forming on your garage door when it’s open? Before you brace yourself for an expensive bill, there is a crucial diagnostic step you must take. Many homeowners assume a warped panel requires a complete system overhaul. However, retrofitting a horizontal reinforcement strut is often the exact, cost-effective solution needed to save your door.
Garage Door Strut Installation to Fix a Sagging Panel
Published: Aug 26, 2026
The Bowing Garage Door Dilemma
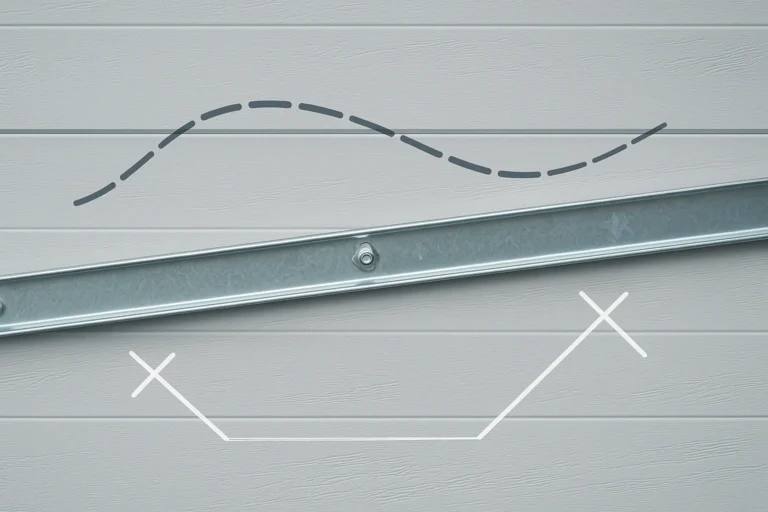
A sagging door usually stems from physical stresses. When an automatic opener pulls a heavy door upward, it exerts intense vertical force on the center of the top panel. Lacking natural horizontal rigidity, the metal begins to fatigue.
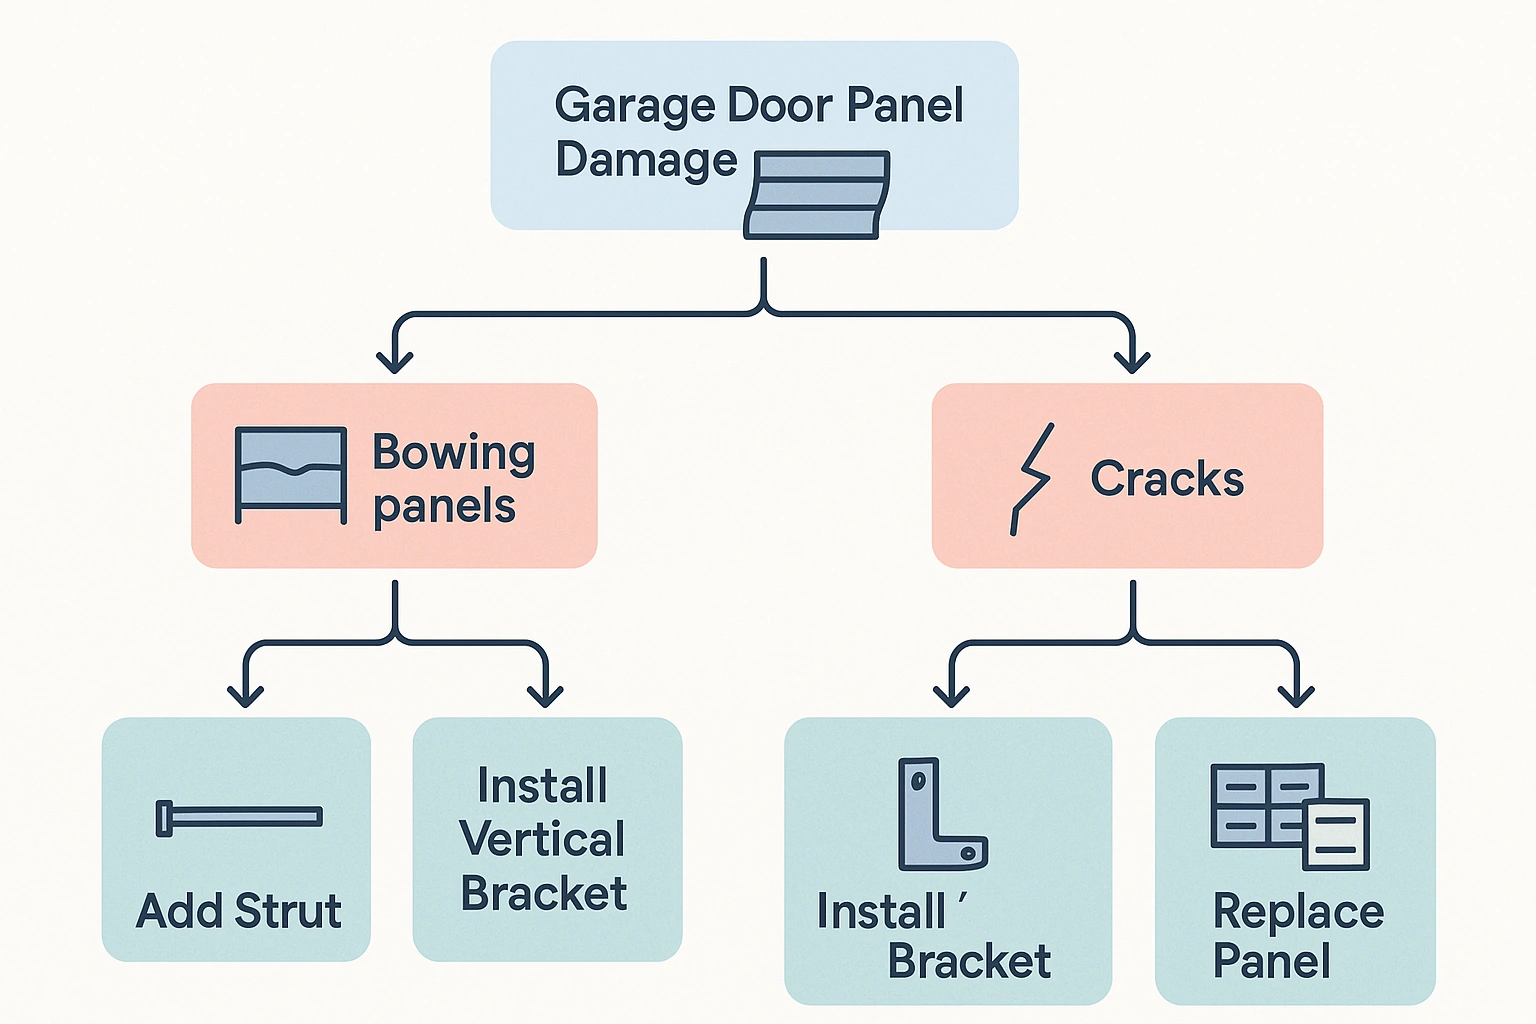
To determine if a strut is your savior or if you need a professional garage door panel replacement, use this practical diagnostic strategy:
- Horizontal Bowing: If the door center sags slightly when open but the steel skin remains intact with no visible tears, a horizontal strut is the ideal fix.
- Localized Center Cracking: If the sheet metal is tearing specifically where the opener arm connects, a vertical operator reinforcement bracket is the correct tool.
- Structural Rupture: If you see creased steel, torn skins, or rollers slipping out, the panel is structurally compromised. In this case, you must consider professional broken garage door panel repair or source replacement garage doors panels to guarantee long-term safety.
Technical Specifications & Sizing Guide
Selecting the correct structural steel reinforcement is critical for structural stability:
- Sizing: Use standard 2-1/4″ struts for residential doors up to 16 feet wide. For heavy wood doors or commercial doors, opt for heavy-duty 3″ struts.
- Steel Gauge: Use standard 22-gauge steel for typical residential panels, and heavy-duty 20-gauge for high-strain applications.
- The Shipping Dilemma & Junction Kits: Shipping a single 16-foot steel bar to a residence is logistically challenging and expensive, often costing $200 to $300 in freight. The smart alternative is a sleeved 3-piece strut junction kit. These kits use shippable 5.3-foot interlocking sections that sleeve together using self-drilling TEK screws to form a rigid 16-foot bar.
- Wind-Load Standards: Proper strut reinforcement is also a key component of meeting strict local building codes. In coastal regions, installing the correct high wind garage door components ensures your home resists high-velocity hurricane pressures, protecting both your property and choosing the best garage door material for coastal homes.
The Danger Zone: Weight & Spring Balancing
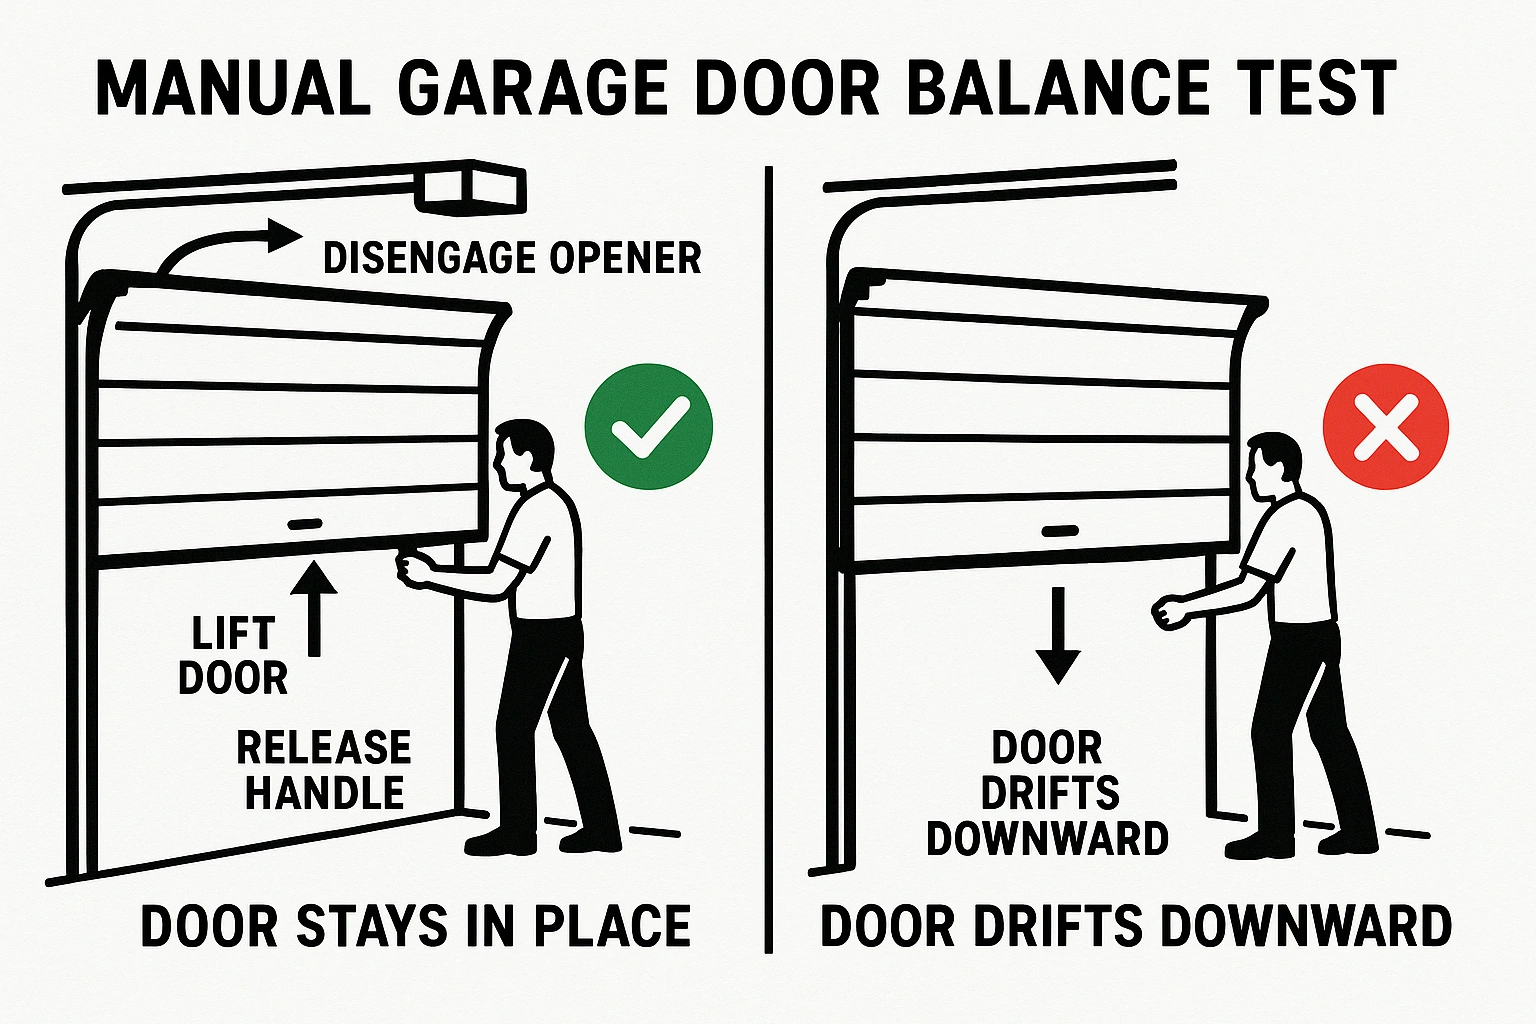
Garage doors operate as finely tuned counterbalance systems. A standard 2″ 22-gauge strut weighs approximately 10 ounces per foot (roughly 10 lbs for a 16-foot door). Heavy-duty 3″ or 20-gauge steel variations can weigh 12 to 15 lbs.
Adding this deadweight directly alters the physics of your system. If you add multiple struts or exceed a 15–20 lb threshold, your torsion springs will struggle, risking motor burn-out or sudden failure.
Always run a manual balance test after installing any reinforcement:
If the door drifts downward, you must increase spring tension. Never attempt garage door torsion spring winding unless you are certified and have designated winding bars. If you are unsure of the mechanics, always call a technician for professional broken garage door springs or learn how to rewind garage door spring safely.
Step-by-Step Retrofit Installation Guide (Intent: Execution)
Follow this professional methodology to secure your horizontal support:
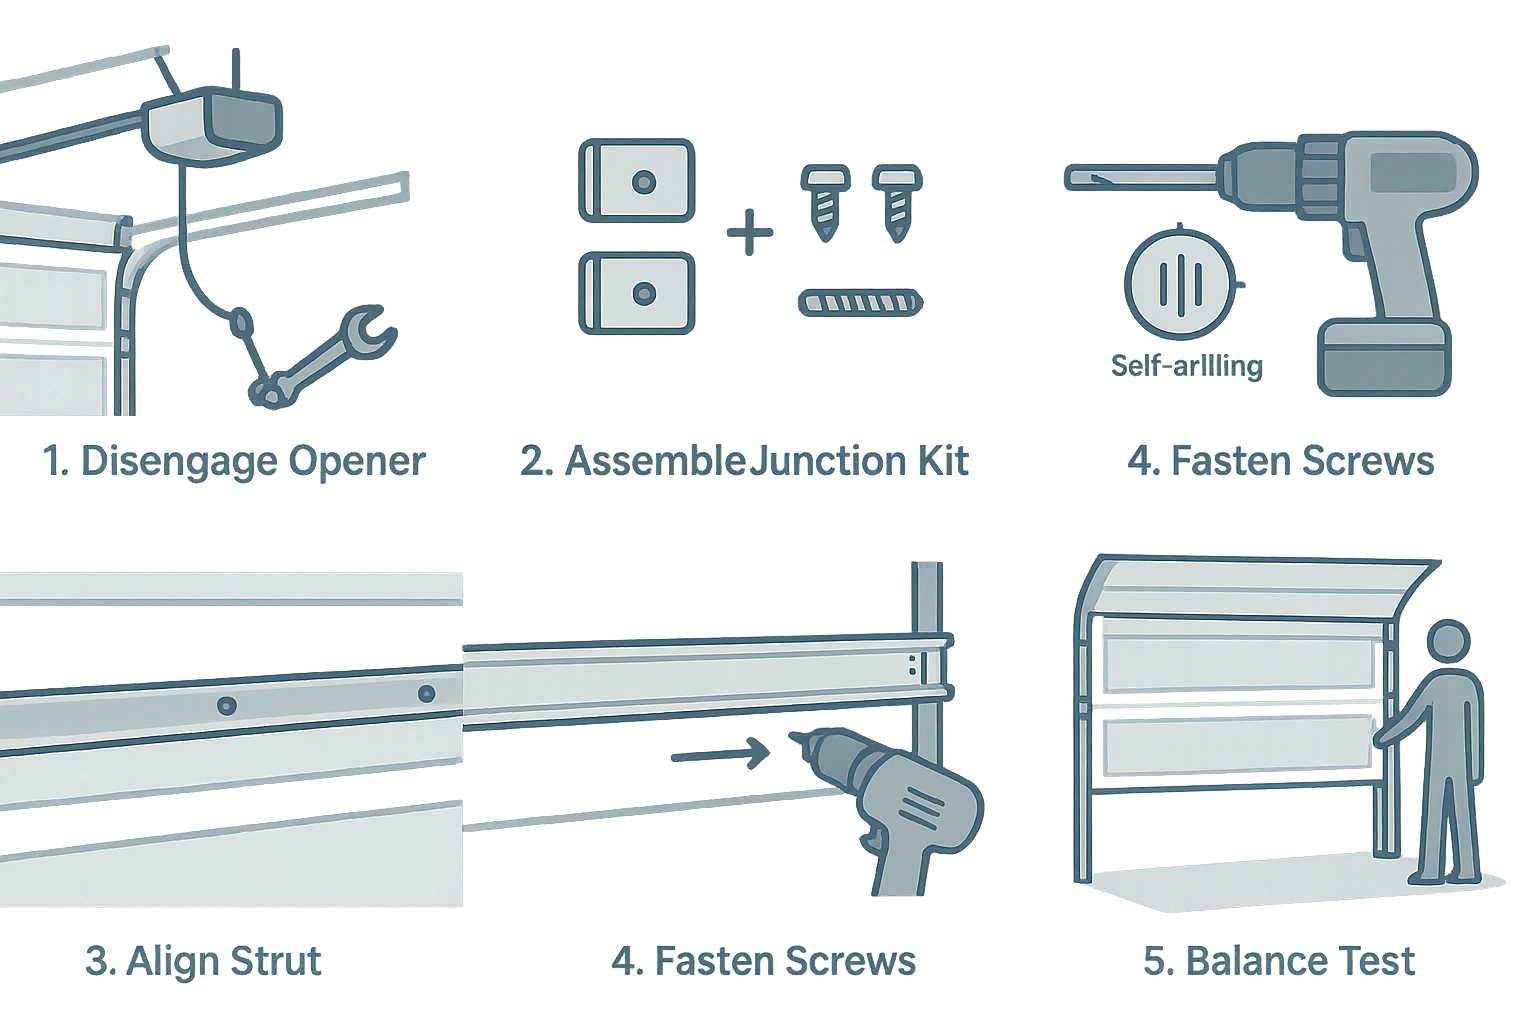
- Secure the System: Pull the emergency release cord and lock the door down by placing locking pliers (Vise-Grips) on the vertical track just above a roller to keep the panels completely flat.
- Assemble the Junction Kit: If using a split-strut kit, sleeve the segments together according to the manufacturer’s exact specifications.
- Position and Align: Align the strut horizontally across the top stile of the damaged panel. Verify its level. Also check your garage door track alignment to ensure the door won’t bind.
- The Clutch Hack: Secure the strut using 1″ self-drilling TEK screws. Crucial Tip: Set your drill clutch to a medium-low setting. Thin 25-gauge or 26-gauge door skins strip instantly under high torque, which ruins screw holding power.
- Test Limits: Manually lift the door to check clearance along the curved track. Re-engage your opener and fine-tune your garage door opener adjustment settings to accommodate the updated weight distribution.
Let the Experts Handle Your Door's Structural Integrity
While retrofitting a strut is a highly effective way to extend your garage door’s lifespan, balancing safety and structural mechanics is critical. Whether you need a simple reinforcement, a professional spring adjustment, or a complete panel replacement, 24H Garage Doors is here to help. Contact our experienced, Connecticut-based team today to ensure your garage door remains safe, robust, and reliable.
Frequently Asked Questions
Can I use a strut to fix a completely creased garage door?
No. Struts are designed to reinforce sagging doors and prevent bending. If a panel is creased, the structural integrity of the steel is lost. You will need a professional garage door panel replacement.
Will adding a strut void my door's warranty?
Adding non-OEM hardware can sometimes impact manufacturer warranties. If you want to maintain compliance, hire a licensed provider like 24H Garage Doors to source certified parts and install them professionally.
What should I do if a self-tapping screw strips out?
If a screw strips, do not leave it loose. Move the screw slightly to fresh metal or upgrade to a slightly oversized 5/16″ sheet metal screw or a rivet nut to ensure a secure grip.