Master the Sync: LiftMaster Car Garage Programming & Compatibility Guide


Published: Sep 11, 2026

Sitting in your car with your owner’s manual open, pressing visor buttons repeatedly while your garage door refuses to move, is a deeply frustrating experience. Establishing a seamless connection between your vehicle’s integrated HomeLink system and your LiftMaster garage door opener should be straightforward. However, behind that simple visor button lies a complex web of radio frequencies, rolling code protocols, and security generations.

Understanding your opener’s specific technology is the key to bypassing setup friction. This guide decodes the technical engineering behind LiftMaster systems, provides a step-by-step master programming protocol, and shares the troubleshooting workarounds that standard user manuals often omit.

Decoding LiftMaster Technologies by Learn Button Color


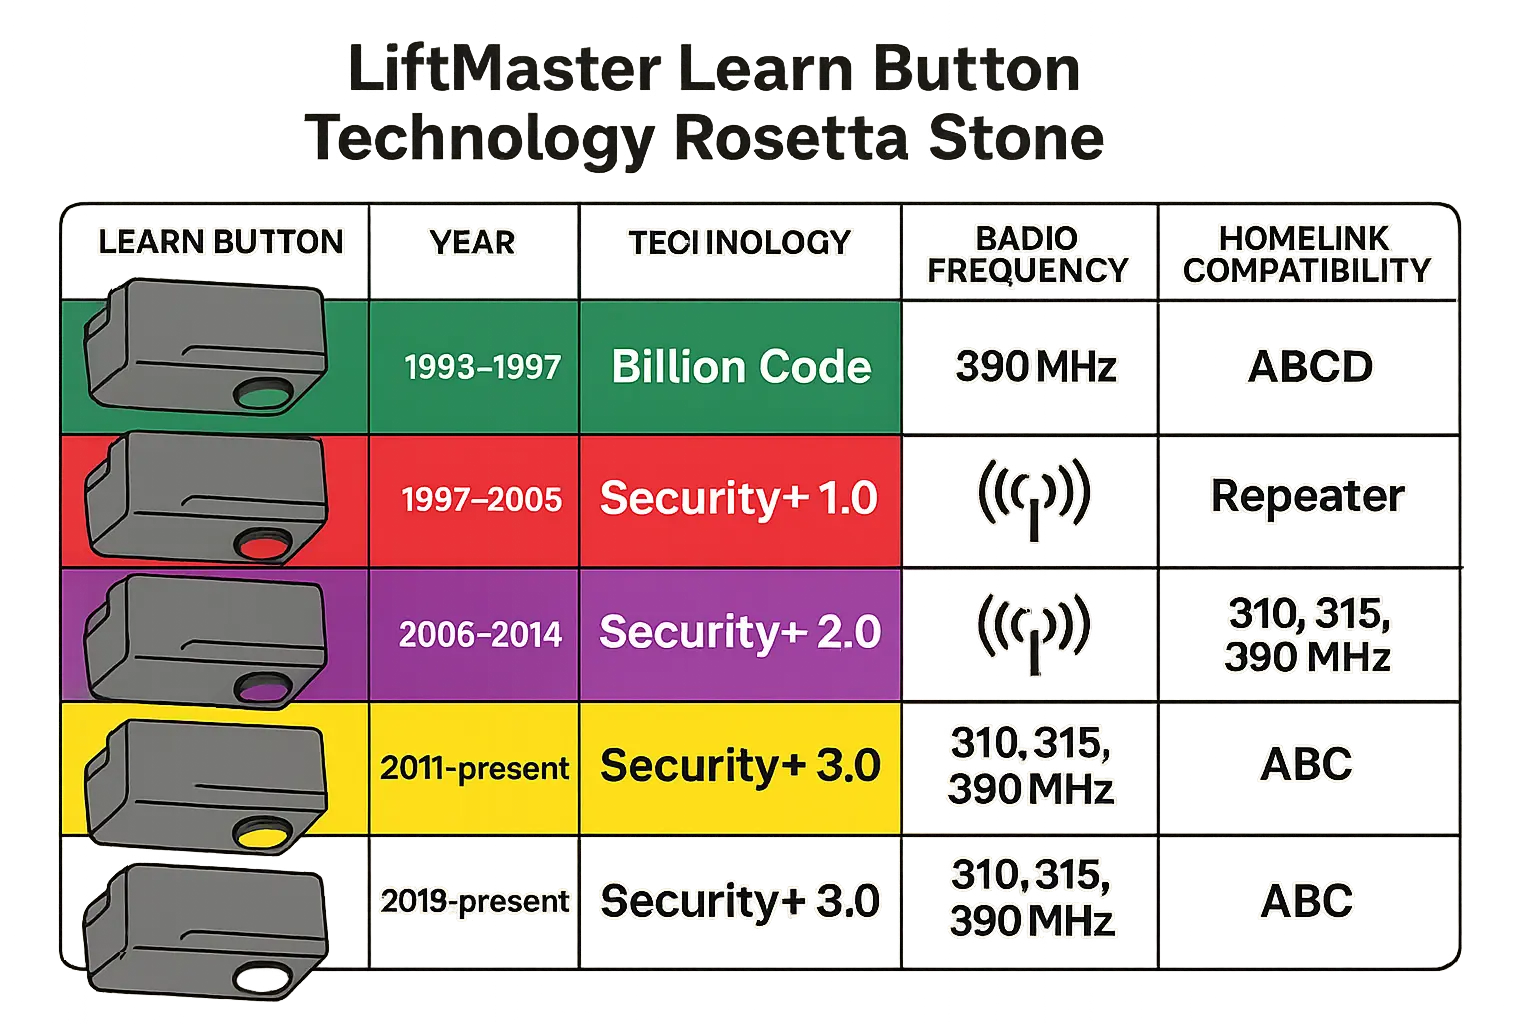
The technology running your garage door opener dictates the exact programming sequence your car requires. LiftMaster systems are categorized by the color of their physical “Learn” button, which reveals the underlying radio frequency, security generation, and encryption protocol of the unit. First, locate where is the learn button on the liftmaster motor head—usually found under the light lens cover on the back or side.

Historically, FCC shifts and radio frequency conflicts have driven technological evolutions. For example, in 2005, the U.S. Land Mobile Radio system’s military base radio interference on the 390 MHz band forced garage door manufacturers to pivot. LiftMaster introduced the Purple Learn Button operating at 315 MHz to sidestep this interference.

By 2011, LiftMaster debuted Security+ 2.0 (Yellow Learn Button), utilizing a narrow-band, tri-band technology that hops across 310, 315, and 390 MHz simultaneously to block signal jamming. This frequency-hopping capability creates a direct physical limitation: cars built before 2011 cannot natively communicate with Yellow Button openers because their in-car transceivers lack the hardware required to sweep multiple frequencies. Determining your specific car garage door opener configuration depends heavily on matching these system generations.

This chart decodes LiftMaster opener technology by Learn Button color, helping you quickly identify your opener type, frequency band, and whether your car needs a compatibility bridge for programming.

The Master Protocol: Training and Syncing Your Car


Most failed programming attempts occur because drivers miss the transition between two distinct phases: training the vehicle’s transceiver to copy a remote’s signal, and syncing the trained vehicle to the garage door’s motor receiver. If you are starting from scratch, here is how to master the setup:

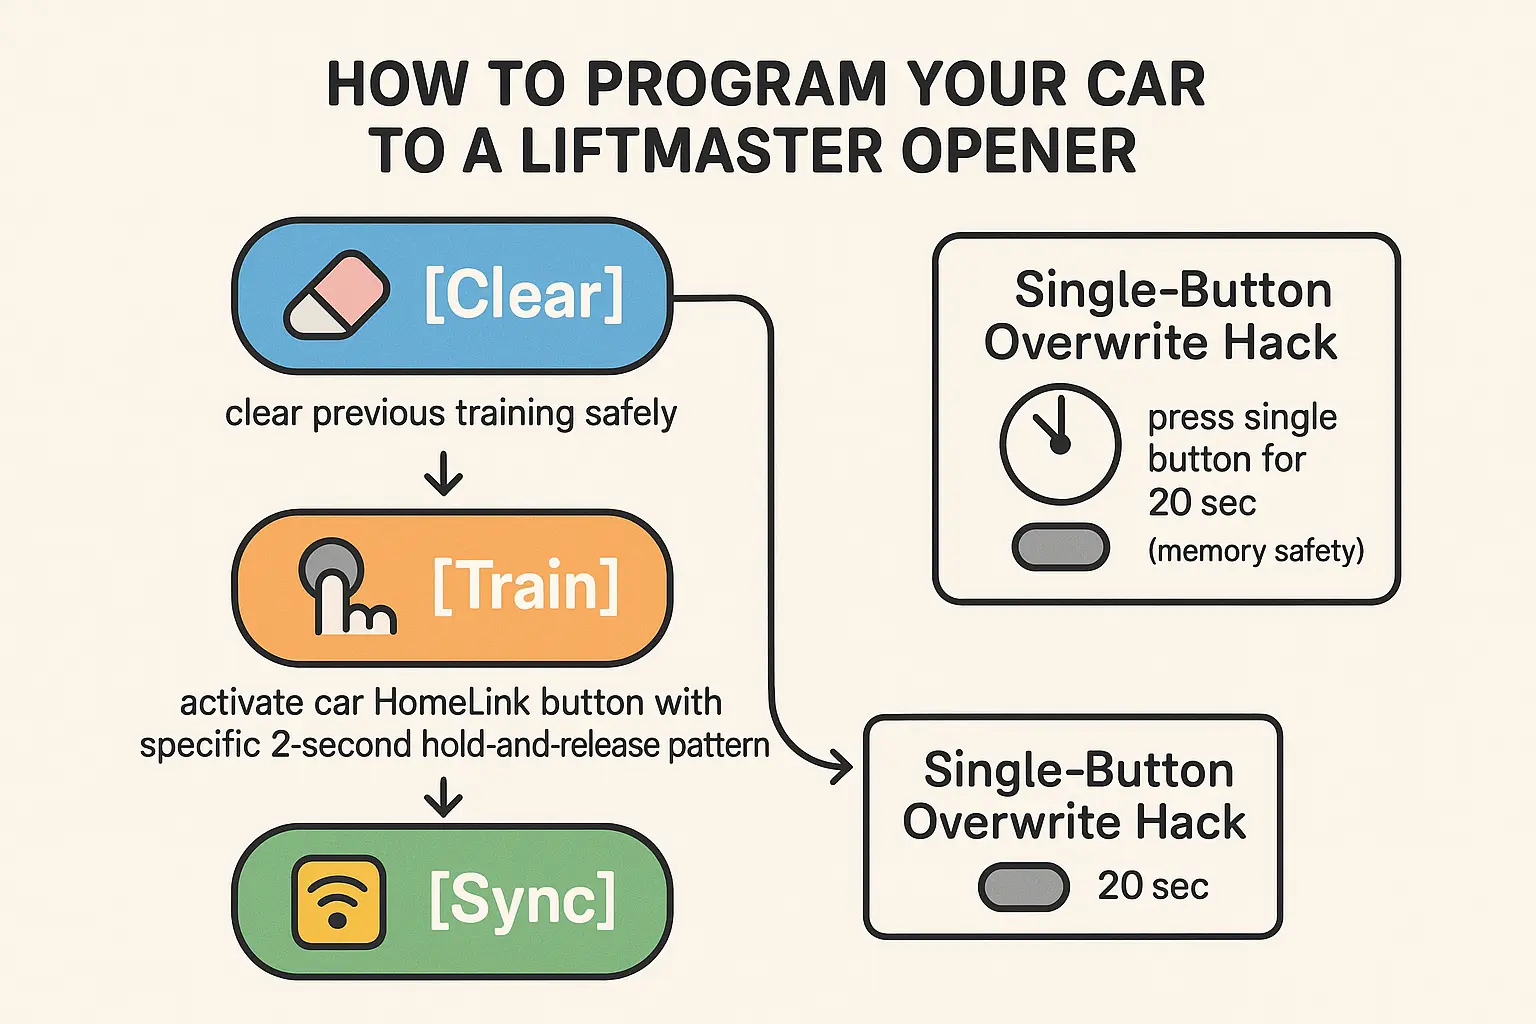
  1. Clear Car Memory (If Needed): Press and hold the two outer buttons on your in-car transceiver until the indicator light transitions from solid to rapid flashing. Warning: This clears all existing paired garage doors. If you only want to program a single button without wiping out other active channels, skip to our “Single-Button Overwrite Hack” below.
  2. Train the Visor Button: Hold your hand-held LiftMaster remote 1 to 3 inches away from your vehicle transmitter. Press and hold both the desired visor button and your remote control button simultaneously. Do not release them until the car’s indicator light flashes slowly and then transitions to either rapid flashing or a solid light.
  3. Sync to the Opener Motor: Walk up to your opener unit and press the Learn button once. A physical capacitor on the motor’s logic board holds a charge to keep program mode active for exactly 30 seconds.
  4. Complete the Sequence: Return to your vehicle within that 30-second window. Firmly press and hold your trained visor button for two full seconds, then release. Repeat this hold-and-release pattern up to three times. The garage opener’s lights will flash or click, indicating the motor has successfully accepted your car’s rolling code.

For general opener pairing steps outside of in-car systems, you can review our companion guide on how to program liftmaster garage door opener.

Follow this clear flowchart to program your car's HomeLink to a LiftMaster garage opener safely and efficiently, including how to avoid erasing other cars by using the single-button overwrite hack.

Pro-Tips and Hardware Troubleshooting


When programming fails to click, standard instructional guides offer little guidance. To resolve persistent syncing issues, look to these hidden hardware factors:

The Single-Button Overwrite Hack

To add a second or third vehicle to your system, standard manuals suggest holding down the outer buttons. However, doing so completely erases all other programmed vehicles. Instead, bypass this by holding down the specific visor button you wish to reprogram for 20 seconds. The indicator light will shift to a slow, deliberate blink. While continuing to hold it, bring your active hand-held transmitter close and press its button. The light will flash rapidly to show the individual channel has been overwritten without disturbing your other programmed vehicles.

Programming Without a Remote

If you do not have an operational hand-held remote, you can still link older vehicle systems. For detailed technical workarounds, read our guide on how to program liftmaster to car without remote. Additionally, check if your car features HomeLink v5 or “QuickTrain” software, which allows newer vehicles to communicate directly with Yellow Learn Button openers without requiring a remote bridge.

Understanding the Compatibility Bridge

If you drive a pre-2011 vehicle and own a Security+ 2.0 (Yellow Button) opener, the car’s transceiver cannot process the tri-band signals. You will need a physical HomeLink Compatibility Bridge (Repeater). This plug-in device accepts the older 390 MHz signal from your car and converts it into a modern Security+ 2.0 signal that the opener can interpret.

Mechanical and Environmental Blockers

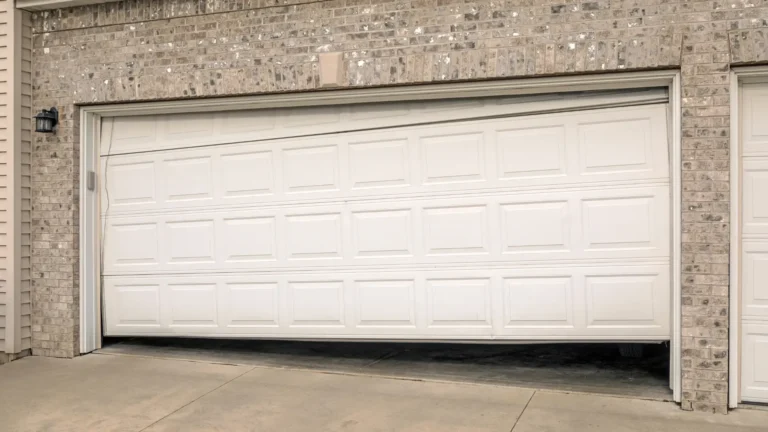
If you hear your garage motor click and flash during programming but the door fails to budge, check your trolley. If you recently pulled the red emergency release cord, make sure you reengage garage door mechanics so the physical carriage locks back into the belt or chain drive. Furthermore, radio frequency blockages can disrupt setup. If you have active LED lightbulbs in the opener casing, they may be emitting electromagnetic noise; if so, refer to our troubleshooting steps for resolving led lights interfering with garage door opener signals.
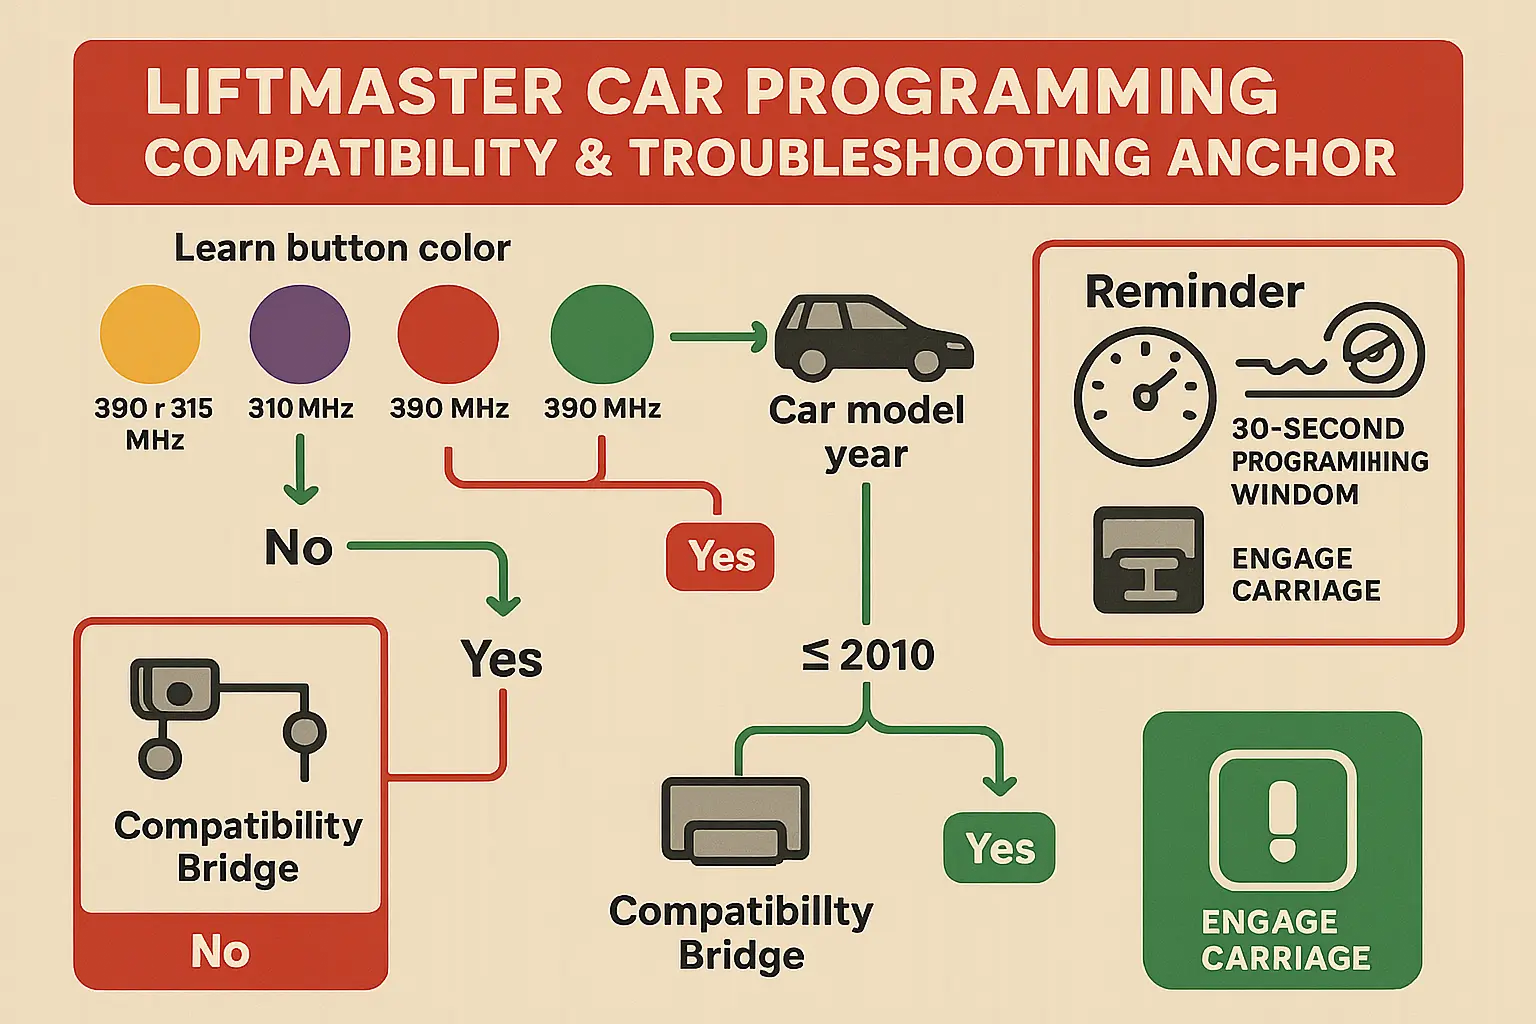

This infographic anchors essential compatibility knowledge and troubleshooting tips for programming your car to LiftMaster openers, helping prevent common pitfalls and clarifying when special hardware or software solutions are needed.

Modern Cloud Alternatives: myQ Connected Garage


If you own an electric vehicle (such as a Tesla or Rivian) or a modern vehicle featuring an advanced infotainment system, you can bypass RF programming altogether. Through software-based integrations like myQ Connected Garage, your vehicle communicates with the opener over cellular or Wi-Fi networks using a secure cloud API. While this requires a smart, myQ-enabled LiftMaster opener and a software subscription, it eliminates the need for physical programming, transceiver syncing, and external hardware repeaters.

If your garage door opener is older or experiencing mechanical or hardware faults that block proper programming, seek professional assistance. For reliable local repairs, contact our technicians for professional liftmaster garage door repair to restore full system functionality.

Frequently Asked Questions


Why won't my car program to my LiftMaster garage opener even though I followed every step?

The most common culprit is a hardware mismatch. If your car was manufactured before 2011 and your opener has a Yellow Learn Button, your vehicle’s transmitter is physically incapable of transmitting across the tri-band frequencies. You will need to install a HomeLink Compatibility Bridge to translate the signals.

Will pressing my opener's Learn button erase my other cars or remotes?

Simply pressing and releasing the Learn button will not erase programmed devices. However, if you hold the Learn button down for more than 6 seconds, the motor’s memory will clear entirely, deleting all active remotes, keypads, and vehicles.

Where is the transceiver located on modern electric or luxury cars?

For certain brands like Tesla and Audi, the HomeLink transmitter is positioned in the front bumper rather than behind the rearview mirror. When training these vehicles, you must stand outside in front of the car’s bumper with your hand-held remote and press the button until the car’s headlights flash to confirm the signal has been received.

Why does my garage door opener click but the door doesn't move when I press my programmed car button?

If the opener clicks or its work lights flash, the programming was successful. The issue is likely mechanical. Make sure your emergency release carriage is reengaged with the drive belt or chain, and check that no physical lock or obstruction is preventing the door from opening.

Contact / Request a Call