Diagnosing Garage Door Safety Sensor Malfunctions: A 10-Minute Homeowner Triage Guide


Published: Sep 7, 2026

Few things disrupt your day like a garage door that refuses to close. You press the button, the door travels down a few inches, then reverses back up while your opener’s overhead lights flash. Under federal safety standard UL 325, mandated since 1993, all residential openers must feature secondary entrapment protection—most commonly photo-eye safety sensors [^3]. When these sensors detect an obstruction or experience a fault, the system halts operation to protect your family and vehicles.

If you are currently stuck, there is an emergency bypass: you can override the sensors by pressing and continuously holding the wall console button until the door is fully closed. However, this is only a temporary fix. To restore automatic operation, you need a quick diagnostic triage. If your override fails, you may require professional garage door opener repair to address deeper board failures. Let’s walk through a safe, simple, 10-minute sequence to identify and resolve the issue.
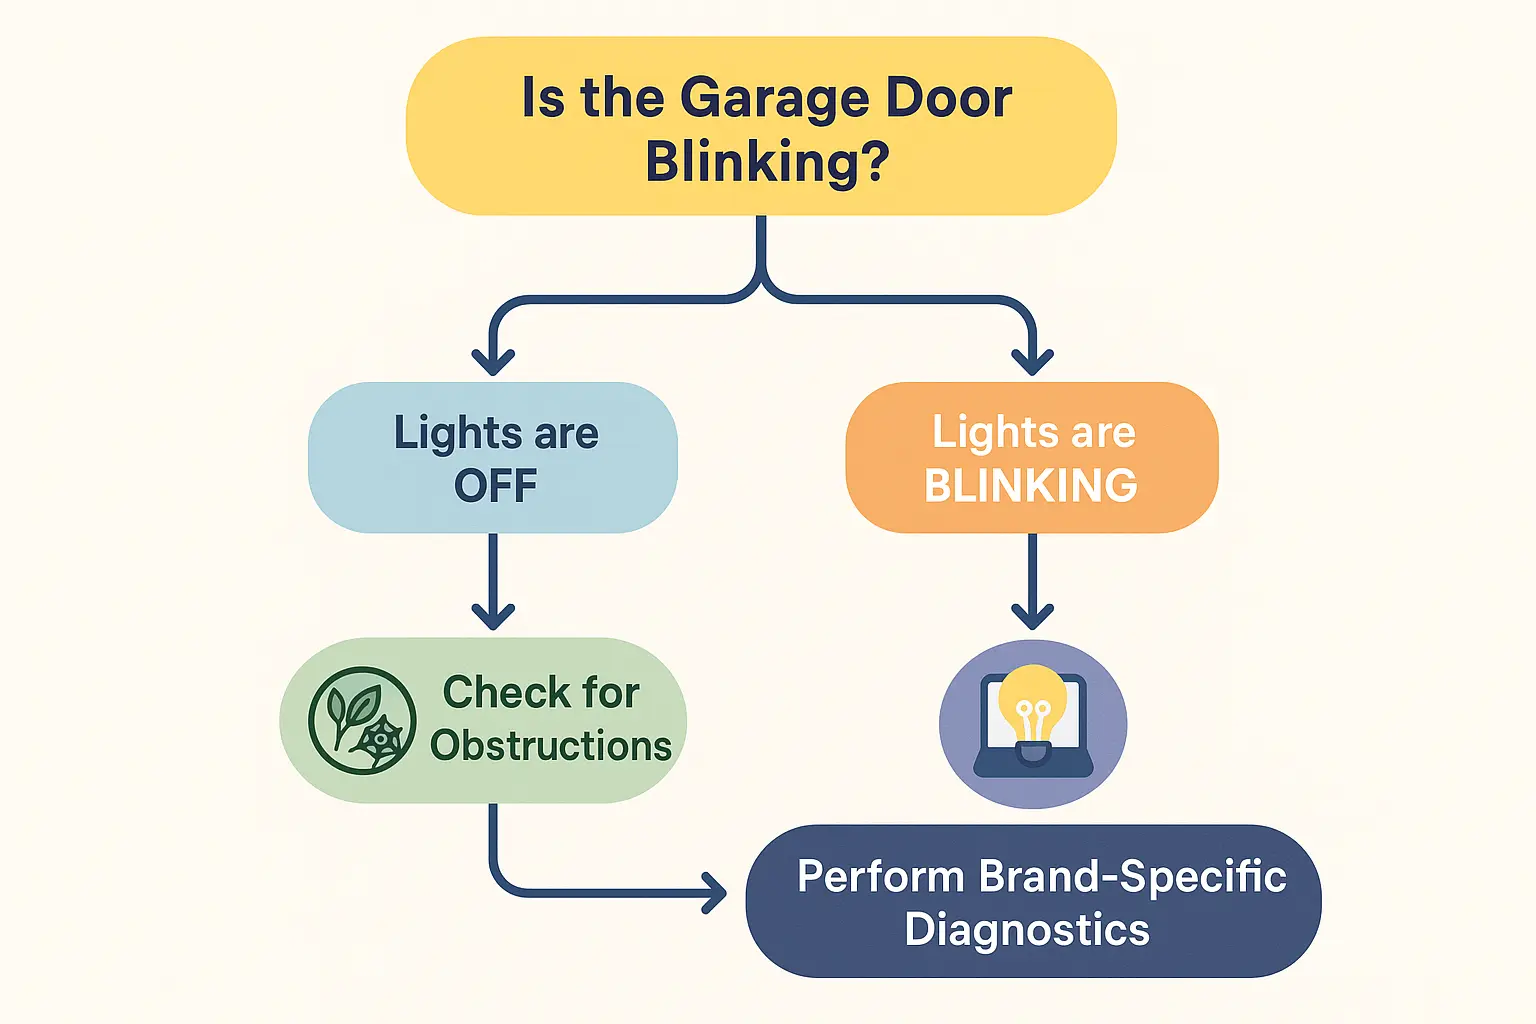
The 10-Minute Diagnostic Triage Flowchart


Many commercial repair networks discourage homeowners from touching safety sensors, claiming that handling them is “highly dangerous” to pressure you into booking a costly service call. The truth is that safety sensors operate on a harmless low-voltage DC line (typically 12V to 24V DC) sourced directly from your opener’s logic board. It carries zero risk of electrical shock. Troubleshooting your photo-eyes is entirely safe to do yourself.

To begin your triage, check for physical blockages like sweeping leaves, cobwebs, or trash cans. If the path is clear, observe the indicator lights on both the sending and receiving sensors.

A step-by-step visual guide to quickly triage common garage door safety sensor issues during a 10-minute check, helping homeowners confidently isolate causes before professional help.

Brand-Specific Diagnostic Decoding


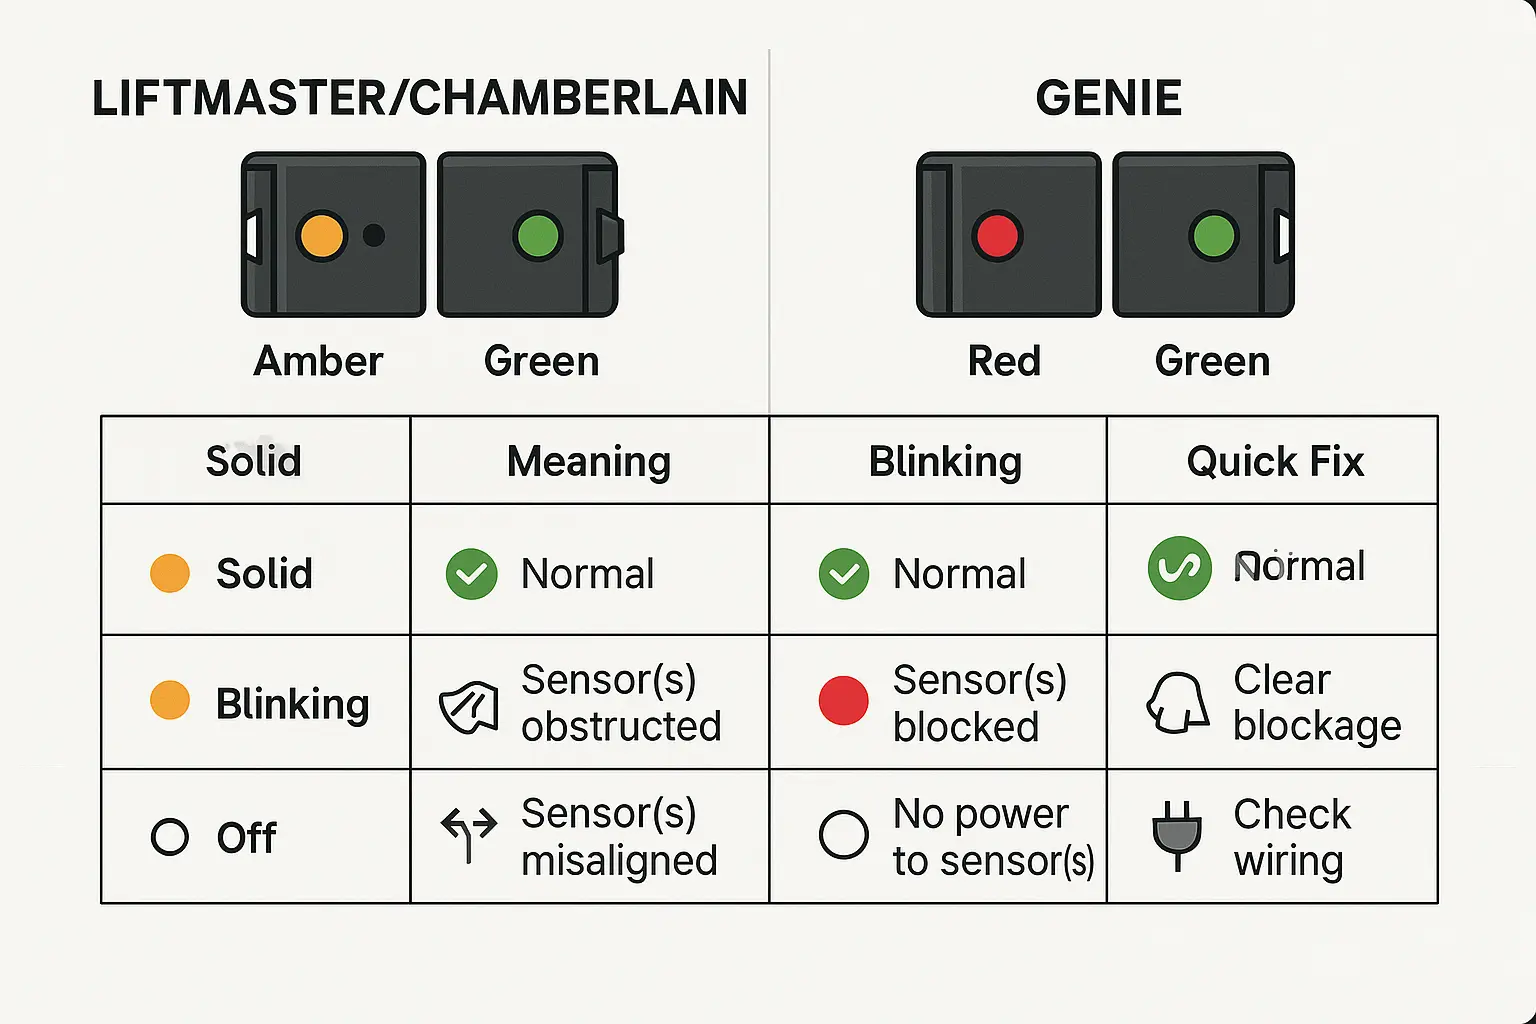
Generic online advice often blends different brands together, leaving homeowners confused when their sensor colors do not match the instructions. Chamberlain-style systems and Genie systems utilize entirely different LED diagnostic patterns. Knowing your brand’s specific language is key to a fast resolution.

Chamberlain, LiftMaster, & Craftsman Systems

These systems feature an Amber LED on the sending sensor and a Green LED on the receiving sensor. If your overhead opener bulb flashes 10 times during a failed close, it is the universal manufacturer code for a sensor fault.

  • Solid Amber & Solid Green: The beam is aligned and functional. If the door still reverses, look for mechanical travel faults.
  • Solid Amber & Blinking/Off Green: The receiver is misaligned, dirty, or blocked. Loosen the green sensor bracket and pivot it until the LED glows solid green.
  • Both Lights Off: There is a power interruption. Check the physical connection at the opener’s motor terminal panel.

Genie Safe-T-Beam® Systems

Genie systems employ a Red LED on the transmitter/source and a Green LED on the receiver.

  • Solid Red & Solid Green: Normal operating state.
  • Both Lights Off: No power is reaching the units. Verify that your breaker is on and wire terminals are tight.
  • 2 Blinks & Pause (Red) with Solid Green: The beam is out of alignment or physically blocked.
  • 3 Blinks & Pause (Red) with Solid Green: Sunlight or cross-talk interference is blinding the receiver lens.

Clear decoding of different LED behaviors for popular garage door sensor brands, empowering homeowners to identify and resolve photo-eye issues with confidence.

Deep Dive Troubleshooting: Dirt, Alignment, and Wiring


If your LEDs indicate a fault, three main areas require close inspection: cleanliness, alignment, and wiring.

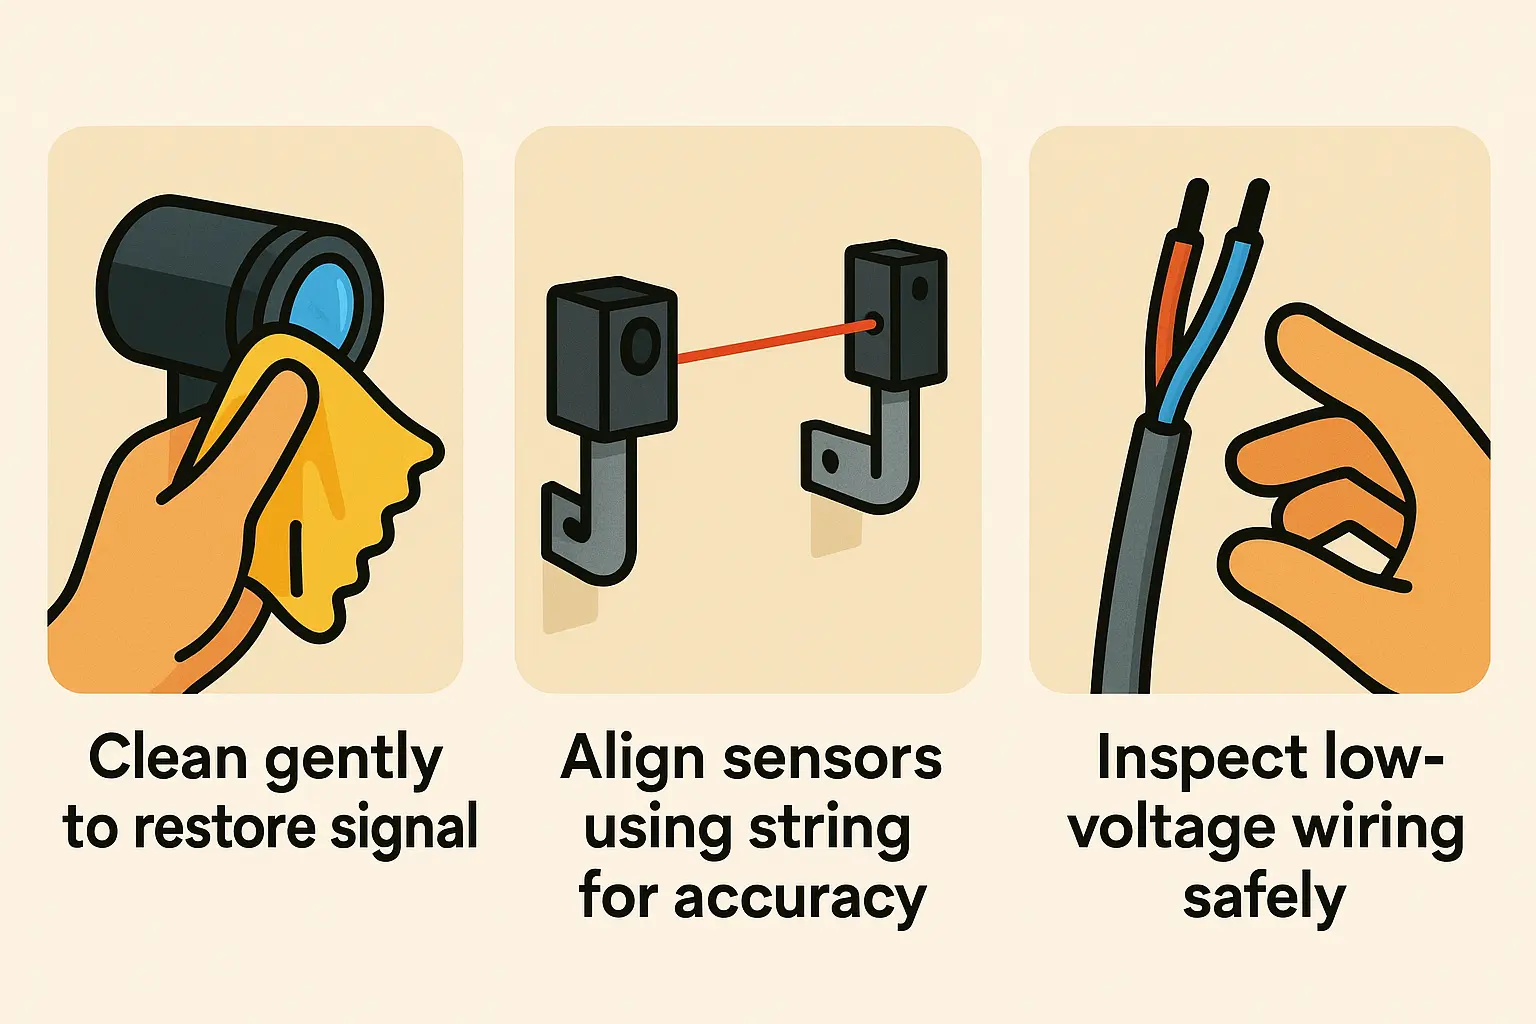
First, wipe the photo-eye lenses. Over time, dust, moisture, and spiderwebs coat the glass. Use a clean microfiber cloth to gently clean the lenses without scratching the sensitive infrared glass.

Second, check your alignment. Sensors can shift if bumped by a trash can or lawnmower. A quick DIY alignment trick is the String Method. Tie a piece of string to one sensor bracket, stretch it tightly across the garage opening to the opposite bracket, and use a level on the string. This immediately reveals if your brackets are at matching heights and angles.

Third, inspect the thin 2-conductor bell wires running from the sensors up the wall to the motor head. Look for staple cuts, pinched insulation, or loose wire-nut connections. Since these are low-voltage lines, you can safely splice damaged sections with simple electrical tape or wire connectors.

A memorable visual anchor helping homeowners recall the 3 essential quick checks for common photo-eye sensor issues: cleaning, aligning, and wiring inspection.

Beyond the Sensors: Ruling Out the "Not Sensor" Trap


What if your photo-eyes show perfect, solid lights, but the garage door still refuses to close? You may be facing a mechanical block or opener settings issue.

  • Travel Limits and Force Settings: Opener logic boards feature travel adjustments. If weather changes make the door stick, the system may interpret the resistance as hitting an object, triggering a safety reversal.
  • Track or Roller Binds: A slightly bent garage door track or worn rollers can increase friction. If your tracks are out of alignment or you require broken rollers repair, the physical drag will trigger the safety reverse mechanism even if the photo-eyes are aligned.

If troubleshooting your sensors reveals a damaged motor board or a deeply degraded mechanical system, it might be time to invest in a modern, reliable garage door opener installation connecticut. When complex issues arise, you can count on the prompt, professional team at 24 7 garage doors to restore safety and security to your home.

Frequently Asked Questions


Why is my garage door opener light flashing 10 times?

The 10-blink sequence on LiftMaster, Chamberlain, or Craftsman openers is the universal diagnostic code indicating that the safety sensors are either misaligned, blocked, or experiencing a wire short [^2]. The door will refuse to close automatically until this signal fault is corrected.

Can sunlight actually prevent my garage door from closing?

Yes. Intense, direct sunlight can blind the receiving photo-eye sensor, tricking the system into sensing an obstruction. If your door refuses to close only at specific times of the day, you can construct a temporary cardboard or plastic sun shield over the receiving lens to block the glare.

Is it safe to rewire or splice garage door sensor wires myself?

Yes. Garage door safety sensors operate on low-voltage DC power (12V-24V) [^1]. This level of voltage carries no risk of dangerous electrical shock, making it safe for homeowners to strip, splice, or wire-nut damaged sensor lines without turning off the home’s main power.

Contact / Request a Call