main logo

Essential Safety Precautions for Working on Garage Door Opener Chains


Published: Jun 8, 2026

That rattling, sagging garage door chain is more than just an annoyance. It’s a sign that your garage door opener needs attention. And while your first instinct might be to grab a wrench and tighten it yourself, it's crucial to pause and understand what you're really dealing with.

A garage door isn't just a simple door on a track; it's a complex, counter-balanced system where hundreds of pounds of force are held in check by a few critical components. Working on the opener chain without understanding the risks is like trying to fix a clock without realizing it's connected to a bomb.

This guide isn’t about scaring you—it's about empowering you. We’re going to walk through the essential safety precautions that must come before any adjustment. Think of this as the required reading before you even open your toolbox.

Foundation: Understanding the System's Dangers


Most DIY guides jump straight to the "how-to." We need to start with the "what-if." Three primary dangers are present any time you work on your garage door: electrical shock, the door's crushing weight, and the explosive power of the springs. Ignoring any one of them can have serious consequences.
Understanding Torsion and Extension Spring Systems

Springs 101: The REAL Threat Hiding in Plain Sight

Let’s be clear: the single greatest danger in your garage door system is not the opener or the chain. It's the springs. These high-tension springs are what do the actual heavy lifting, counterbalancing the door's immense weight so the opener can move it with minimal effort.
They store a tremendous amount of mechanical energy. If a spring breaks or is handled improperly, that energy can be released in an instant, turning metal parts into dangerous projectiles.
There are two main types, and knowing which you have is key:

  • Torsion Springs: These are thick, coiled springs mounted on a metal rod directly above the garage door opening. They are under the most tension when the door is closed.
  • Extension Springs: These are longer, thinner springs that run along the sides of the overhead tracks. They are under the most tension when the door is open, as they are stretched out.
The key "aha moment" here is realizing why you never work on a door with the springs under high tension. It's why safely closing the door is the first step for most repairs. For a deeper dive into this critical topic, understanding proper garage door spring safety is non-negotiable.
Understanding Torsion and Extension Spring Systems

Building: The Pre-Work Checklist


Proper preparation is 90% of safety. Before you even think about making an adjustment, you must assemble the right gear and, most importantly, completely disconnect the power.

Mandatory Safety Gear & Tools

Working on your garage door isn't a t-shirt and flip-flops job. Treat it with the respect it deserves by gathering these items first:
  • Safety Glasses: To protect your eyes from debris or a snapping chain.
  • Sturdy Gloves: To protect your hands from grease and sharp metal edges.
  • A Stable Ladder or Step Stool: Never over-reach or stand on an unstable object.
  • Wrenches/Socket Set: To adjust the nuts on the trolley or rail.
  • Flashlight or Headlamp: To see clearly what you’re working on.
Garage Door Maintenance: Tools and Protective Equipment

The Power-Down Procedure: Your Non-Negotiable First Step

An accidental activation while you're working on the chain can cause serious injury.

  1. Unplug the Opener: Locate the power cord for the garage door opener motor unit and unplug it from the ceiling outlet.
  2. Turn Off the Breaker (Optional but Recommended): For an extra layer of safety, go to your home's circuit breaker box and flip the breaker that controls the garage.
  3. Verify Power is Off: Press the wall-mounted control button. Nothing should happen. If it does, you have a wiring issue that needs professional attention immediately.
Garage Door Maintenance: Tools and Protective Equipment

Mastery: Safely Diagnosing and Addressing Common Chain Problems


With the power off and your safety gear on, you can now safely inspect the chain. Different symptoms point to different issues.

What's Your Chain Trying to Tell You?

Your chain's behavior is a clue to the underlying problem.
  • Sagging or Drooping: This is the most common issue. It means the chain is too loose and needs tightening. A severely loose garage door chain can skip sprockets and cause jerky operation.
  • Slapping Noise During Operation: This is another classic sign of a loose chain hitting the rail as it moves.
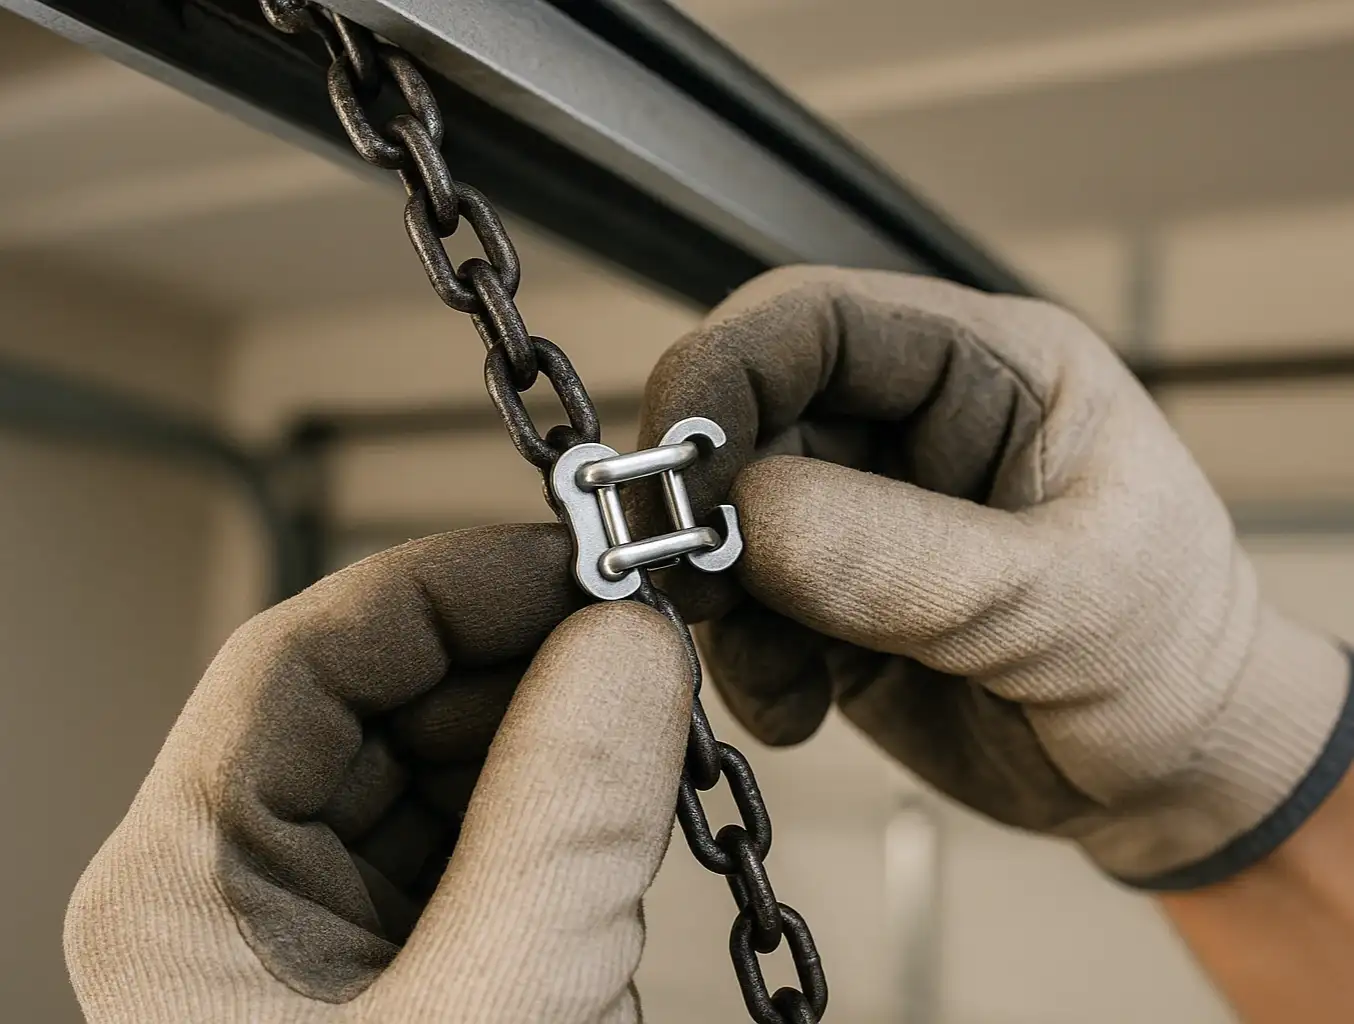
  • Chain Has Fallen Off: If the chain has come off the sprocket or the door is a garage door chain off track, it could be due to extreme looseness, a broken master link, or a sprocket issue.
Visual Guide to Garage Door Chain Tension Issues

A Quick Guide to Safe Adjustments

Once you've identified the issue, the next step may seem simple, but precision is key.

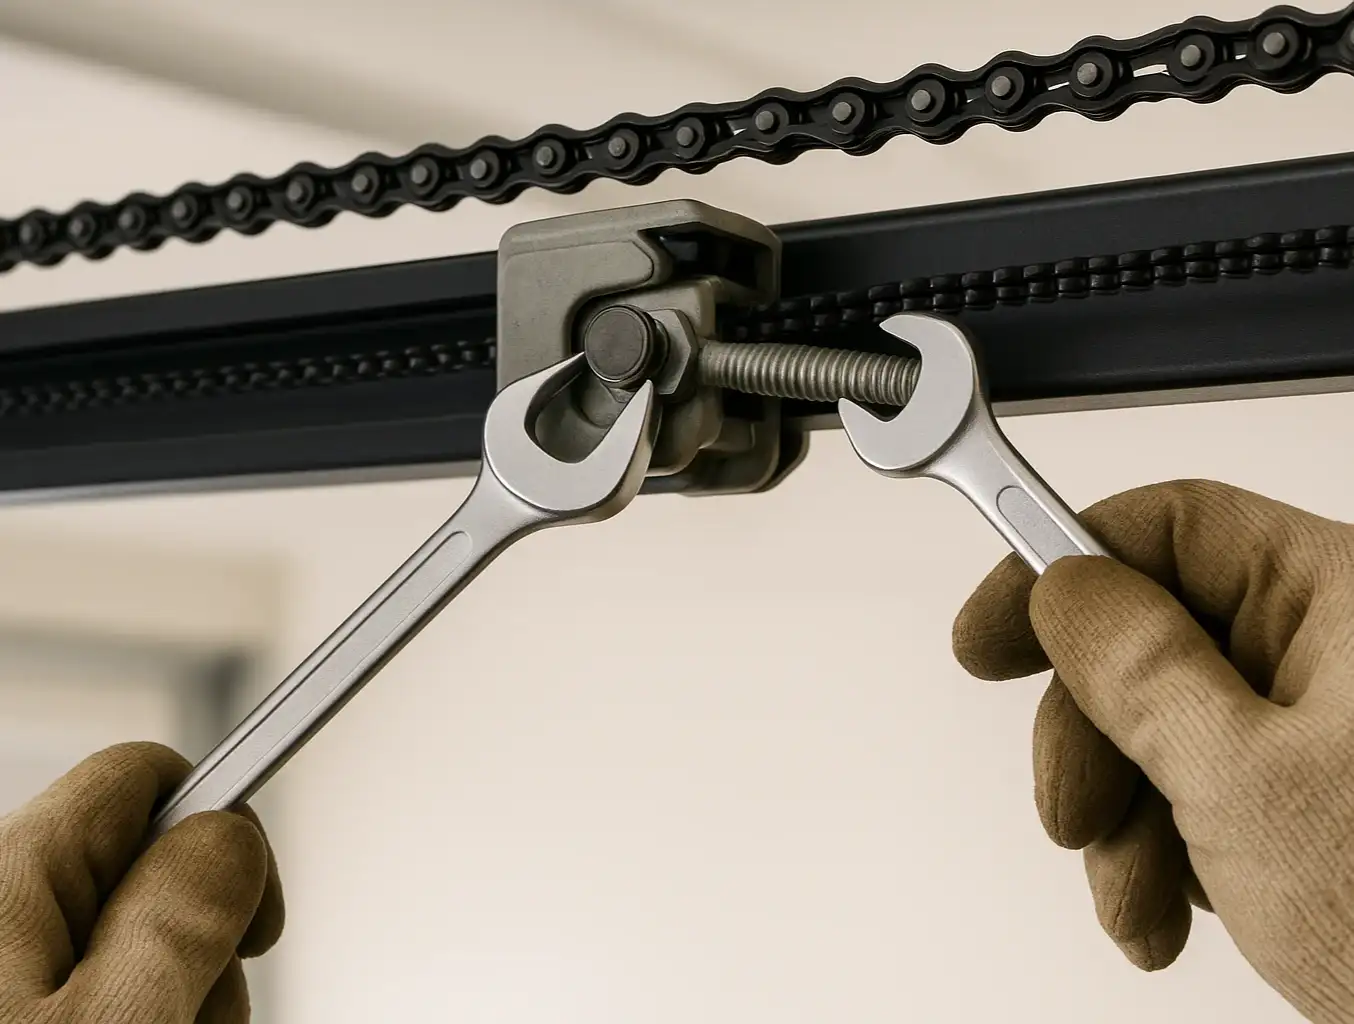
  • For a Loose Chain: The goal is to adjust the garage door chain tension so it sits about 1/4 to 1/2 inch above the bottom of the rail. Over-tightening can cause excessive wear on the sprockets and motor.
  • For a Disconnected Chain: You may need to learn how to reconnect garage door to chain by re-engaging it with the trolley and potentially replacing the master link.
  • For General Maintenance: It's also a good idea to periodically lubricate garage door chain components with a high-quality, silicone-based lubricant—never a degreaser like WD-40.
Visual Guide to Garage Door Chain Tension Issues

Need more information?

Action: Smart Prevention and Knowing Your Limits


The best repair is the one you never have to make. A little routine inspection can save you a lot of trouble. But even more important is knowing when a job is too big or too dangerous for a DIY approach.

When to Put Down the Wrench and Call a Professional

Your safety is not worth the savings of a DIY repair. Immediately stop and call a professional if you see:
Know When to Call a Pro for Garage Door Repairs

  • Any issue with the springs: Broken, stretched, or rusty springs should only be handled by a trained technician. The risk of injury is too high.
  • Frayed or broken cables: These cables are also under extreme tension and are directly connected to the spring system. Some complex jobs, like learning how to replace a garage door spring cable, carry immense risk and are best left to experts.
  • A door that is off its tracks: This indicates a serious problem with alignment or tension that requires professional tools and expertise to fix safely.
  • Damage to the door panels or tracks: Bent tracks or damaged panels can compromise the entire system's stability.
Know When to Call a Pro for Garage Door Repairs

Frequently Asked Questions (FAQ) About Garage Door Chain Safety


How much slack should be in my garage door chain?

A properly tensioned chain should have a little slack but shouldn't be drooping. A good rule of thumb is that it should sit about 1/4 to 1/2 inch above the base of the metal rail it runs along.

Why is it so dangerous to work on the door while it's open?

It depends on your spring type. For extension springs (along the sides), they are under maximum tension when the door is open, making it the most dangerous time for them to break. Even with torsion springs, an open door is only held up by the system's components. If something fails, the full weight of the door could come crashing down. Always work on a closed and disconnected door.

What are those little black boxes near the bottom of the track?

Those are your safety sensors. It's helpful to understand how do garage door safety sensors work: they project an infrared beam across the opening, and if anything breaks that beam while the door is closing, the door automatically reverses. They are a critical safety feature.

Is there anything else I should know about keeping my family safe?

Absolutely. Regular maintenance is key, but so is education. It’s important to implement garage door safety for kids and pets, teaching them never to play with the door or its controls.
Working on your garage door can be a rewarding DIY project, but only when done with a profound respect for the power you're dealing with. By prioritizing safety, understanding the system, and knowing your limits, you can make smart decisions that keep you and your home safe.

You may also like


blog photo

Step-by-Step Guide to Adjusting Garage Door Opener Chain Tension

So, you did it. You wrestled with that greasy chain, consulted a guide on garage door chain repair, and successfully reattached it to the opener. That moment of triumph when the links click back into place is a great feeling for any homeowner. But before you plug the opener back in and hit the button, there’s one critical step that separates a quick fix from a lasting solution: setting the correct chain tension. Getting this adjustment right is the difference between your door gliding smoothly for years and hearing that dreaded slap-slap-slap of a loose chain against the rail, or worse, causing premature wear on your opener’s motor. This guide picks up right where reattachment leaves off, showing you exactly how to dial in the perfect tension for safe, quiet, and reliable operation.